What's new
Photoshop Gurus Forum

Welcome to Photoshop Gurus forum. Register a free account today to become a member! It's completely free. Once signed in, you'll enjoy an ad-free experience and be able to participate on this site by adding your own topics and posts, as well as connect with other members through your own private inbox!

Scanned slide to 11x14?


R.Braverman

Member
Messages
11
Likes
1
That kinda says it all, I only have 35+ year old slides/neg's/prints of someone that I'm trying to "recapture:", as it were is and would like ANY hints or tips on what people here have done to maximize the output.
 
Hi @R.Braverman
It sounds like a fun project and also a very open-ended question. Providing more input on what you want for an end product would be helpful. Here are my quick thoughts
- Pick the pictures that tell the story you want to tell. Maximizing quantity of pictures is secondary
- Always start with the best image you can
- Some services can do scanning of slides, neg, and prints that can take out some of the busy work (unless you want to do it all)
For slides and negatives, scan to TIFF format, 3200 dpi if possible, and 16-bit depth. This gives maximum flexibility in post-processing.
- You did not mention if you have a scanner; if yes, what do you have? If not, you might want to use a service unless you have a lot of time on your hands. So, suggestions depends on whether you are using a scanning service or not
-- For prints, it depends on size of print. As a rough rule of thumb, I scan at a resolution that will give me 300 dpi on my final print.
- After that, there is the post-processing. I use Photoshop and Topaz Photo AI in my work. I lean on a lot of hand work myself and less on AI
- What I do in post-processing depends on what the image needs.

I won't discuss post-processing specifics since I don't know what you need.

I hope this helps a bit in spurring the conversation
John Wheeler
 
I guess I'll add another tidbit from my project management background. It would help to know the scope, schedule, and resources for your project
e.e.
Scope - how many negative slides and prints? How many are going to be processed and converted to 11x14s? Who is the audience for the output of your project? Are the prints, gifts, and wall hanging for yourself? How critical is the quality of the image vs the content and story of the picture?
Schedule - when do you need or want the project to be completed? Is the timing flexible, and you are doing this in your spare time, or is there a deadline or coming event for completion
Resource - what equipment and software do you have available or the flexibility to purchase and buy services
 
I left a lot out eh?
Try to answer all:
These are pic's that I have of a loved one, the only images I have are those I took and developed (myself) all those years ago. I've now decided to enlarge them so that I can enjoy them.
I've no schedule and they're individual images, of her and really don't tell a story. To be honest, as at this point, I can only remember taking one of them (mainly cause I'm in it ...).
The dpi and depth is helpful.
I use Vuescan and have an elder Epson scanner that still reproduces sharp images. It will have to do - for now as I'm in no position to buy a new one (although if the output would be THAT much greater, I'd consider).
There'll only be 10-20 if I do them all anyways.
The audience you speak of is only me.
I have PS V15.5 and a Canon Pro-100 Printer and the aforementioned scanner, not a great graphics monitor; a Samsung, that when I purchased it I wasn't thinking about reproducing ANYTHING.
**** moments later **********
i can only do 1600dpi and 24-bit RGB.
 
thanks for the details that helps a lot. Off hand, you are probably set up great for very good pictures. What epson scanner do you have and can it scan slides and negatives?
 
Here are my thoughts in addition to my first post, assuming your scanner can handle slides and negatives.
Scan at the resolution that would give you 300 dpi for your print size. For negatives and slides with a 1600 dpi scan, I think you will be closer to 150 dpi, but that will still work quite well. 300 dpi is about the limit of what the eye can resolve at 12 inches away, and for the size print you are planning, typically, you would be looking from a larger distance and it will still look sharp

Since you are looking at memories, resolution is secondary. I would focus and crop the image that best conveys your feelings.
I believe PS 15.5 has Smart Objects, so I would change the Layer into a Smart Object. This allows you to easily back out of changes you make.
I also suggest using the Camera Raw filter. Adjust the tone to your liking (after the overall exposure slider, try the Highlights and Shadow sliders)
Then, adjust the color with the color section.
I cannot remember the version of the Camera Raw filter from that time yet. I would try the DeHaze slider if it has it, followed by the clarity slider and texture slider for the effect you desire.
There should be a slider for temperature, so adjust to taste. For memory pictures, I lean toward a warmer color (slider to the right towards yellow a bit)

If the image needs restoration, such as dust or scratches, I use selective tools to clean up the areas to get rid of what I call "distractors" in the image, which allows me to focus on the memory better.

There is a section for noise reduction and sharpening that I do in the later stages.

If you have particular issues, such as particular damage to the image or major color issues, you could address those with more questions about what is needed.

With the above approaches, I bet you get some fantastic pictures.

If you have more questions, just ask away, and other forum members may jump in as well.
John Wheeler
 
Here are my thoughts in addition to my first post, assuming your scanner can handle slides and negatives.
Scan at the resolution that would give you 300 dpi for your print size. For negatives and slides with a 1600 dpi scan, I think you will be closer to 150 dpi, but that will still work quite well. 300 dpi is about the limit of what the eye can resolve at 12 inches away, and for the size print you are planning, typically, you would be looking from a larger distance and it will still look sharp

Before the rest of this (which is GREATLY appreciated), who do you "compute" scanned resolution to get print resolution?

But another question comes to mind; how do you temporarily enlarge a a portion of an image to take a good look at and to start getting rid of unwanted artifacts?


FWIW: 15.5 Camera Raw Panel
Since you are looking at memories, resolution is secondary. I would focus and crop the image that best conveys your feelings.
I believe PS 15.5 has Smart Objects, so I would change the Layer into a Smart Object. This allows you to easily back out of changes you make.
I also suggest using the Camera Raw filter. Adjust the tone to your liking (after the overall exposure slider, try the Highlights and Shadow sliders)
Then, adjust the color with the color section.
I cannot remember the version of the Camera Raw filter from that time yet. I would try the DeHaze slider if it has it, followed by the clarity slider and texture slider for the effect you desire.
There should be a slider for temperature, so adjust to taste. For memory pictures, I lean toward a warmer color (slider to the right towards yellow a bit)

If the image needs restoration, such as dust or scratches, I use selective tools to clean up the areas to get rid of what I call "distractors" in the image, which allows me to focus on the memory better.

There is a section for noise reduction and sharpening that I do in the later stages.

If you have particular issues, such as particular damage to the image or major color issues, you could address those with more questions about what is needed.

With the above approaches, I bet you get some fantastic pictures.

If you have more questions, just ask away, and other forum members may jump in as well.
John Wheeler

CameraRaw.jpg
 
Last edited:
Here are my thoughts in addition to my first post, assuming your scanner can handle slides and negatives.


Before the rest of this (which is GREATLY appreciated), who do you "compute" scanned resolution to get print resolution?

But another question comes to mind; how do you temporarily enlarge a a portion of an image to take a good look at and to start getting rid of unwanted artifacts?


FWIW: 15.5 Camera Raw Panel


View attachment 148146
HI @R.Braverman
Here is the approach I take for the needed pixels (resolution).
I start with the end product. Let's assume that it is an 11x14-inch print in portrait mode. From my prior posts, 300 dpi would be great, yet 150 dpi on the final print would be quite good. When multiplying the dpi times the inches, you need pixel dimensions between 3300 x 4200 pixels and 1150 x 2100 pixels, respectively.
If you are starting by scanning a 35 mm slide or negative, the size of such a slide / negative is 24mm x 36mm or .94 in x 1.42 inch. Note that the slide's aspect ratio differs from the print size of 11x14 inches. If one crops the size of the slide / negative to fit the same ratio, the usable size of the negative / slide is .94 in x 1.2 in
Scanning the usable area of the negative / slide at 1600 dpi again by multiplying dpi by the slide dimensions, you end up with pixels dimensions of 1504 pixels x 1920 pixels.

Your scanning's available pixel dimensions fall within the 150 to 300 dpi range needed for the final product, so you are in pretty good shape.

You follow the same process for other items you might scan, such as larger negatives or prints. For large items that you scan, you may not need 1600 dpi and can back off to a lower scanning resolution.

I hope I understood your question, and also, I hope you understand my response as sometimes (OK, most of the time) I am pretty wordy :)
John Wheeler
 
Whew, (NOT complaining) but I need time to take all this in. I've copied it out to a note so that I can re-read 'till I understand better. I have NO problem with wordy - I get to learn more (not that a lot of it sticks around in my head for very long) but if I make good notes, I'm the one who wins.

I scanned a muddy slide that I've been working on at 1600DPI and made another change in Vuescan, which I've already forgotten (that's what happens when the little grey cells get old), and the ~11.50x16.25 print is UNBELIEVABLE!:)
Even the screen almost matches the print-out. Now get to re-add, the Datacolor Spyder. (just finally upgraded the desktop to Win10, so ...)
BUT there is still a lot to go through from your amazing reply.
AND we've not talked about B&W/Greyscale - me and the mates, when we went out mostly shot B&W.

NOW, for the time being (while I go through what you've given me), ONE last question: One has an image and wants to attempt to rid it of unwanted artifacts, how do you enlarge (unless there is another term) a portion of the image to run through it, then "dropping" it back in as if it never left? Is there a way? If not how does one do it?

You're ACES!
Hi @R.Braverman, and you are welcome.
Believe it or not, when you say "UNBELIEVABLE," you usually mean you are on the home stretch because you are already enjoying the results. The rest is a labor of love.
We can talk about greyscale when you are ready, yet that is mostly what I mean by adjusting "tone" in my prior posts, e.g., the level of dark, light, and in between, as well as contrast and clarity. There is no right or wrong as it accompanies the feeling you want out of the picture.

I understand artifacts, yet I may not understand your question. I assume you are talking about zooming in and out of the image and not changing its resolution. If I am wrong and you know all about this, ignore what I put below

Zooming is done with the Zoom tool and all sorts of shortcuts.
The Zoom tool is in the toolbar and it's the magnifying glass
You can turn it on by clicking on the magnifying glass or the keyboard shortcut "Z"
Once in the Zoom tool, it will typically show a point with a plus. Click on the area you want to zoom, and it will enlarge. Multiple times for larger.
To zoom out, you can hold the Opt key on a Mac (Alt key on Windows machine), and the pointer turns to minus, and just click away.

Another shortcut is to hold the Cmd key down (Ctrl key in windows) and then the "+" key to zoom in or the "-" key to zoom out or the "0" key to bring back to full screen.

There are other techniques for zooming, but I thought this would be a good start, also in case I am answering the wrong question.

Note that you did not mention whether you were on a Mac or PC or what OS version you have.
Isn't the version of PS you have a subscription version? If yes, then have you considered upgrading to a more recent version of Photoshop? It is not needed, most likely, for the work you are doing, yet they do have more advanced tools. Newer versions may require more recent OSes, though, which may not be supported on older Macs and PCs. Upgrading is not a priority and is more of a question as a potential resource for you.

There are many ways to remove artifacts or distractions from the image, and since you did not ask, I assume you are good with that until you do ask.
 
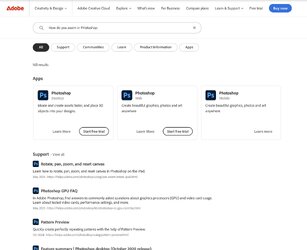
I should add that Adobe provides a pretty easy help resource that may give you a faster turnaround for easier questions.
Just go to the Adobe help website https://helpx.adobe.com/support.html
I typed in how do you zoom in Photoshop and here is an example response:
It is more focused that searching on a search engine such as Google

Screenshot 2024-11-20 at 4.43.58 PM.jpg

and the list, of course, is longer. FYI
 
Well, I got to thinking ...
There are image output options within Vuescan that got me wondering; there is a sharpening option and restore colors, which I scanned with and the initial scan was wonderful - BUT that still means that there is a software algorithm that makes the change, not PS - agreed?
 
Well, I got to thinking ...
There are image output options within Vuescan that got me wondering; there is a sharpening option and restore colors, which I scanned with and the initial scan was wonderful - BUT that still means that there is a software algorithm that makes the change, not PS - agreed?
Yes, that is correct, yet if you like the results, that is OK. Even with PS, many use add-ons or plugins, which are supplemental software working on the image.

It would only be a real downside if you prefer to have more control in having PS do all the work or you knwo that PS would do a better job in a certain area rather than Vuescan.
John Wheeler
 
I should add that Adobe provides a pretty easy help resource that may give you a faster turnaround for easier questions.
Just go to the Adobe help website https://helpx.adobe.com/support.html
I typed in how do you zoom in Photoshop and here is an example response:
It is more focused that searching on a search engine such as Google

View attachment 148148

and the list, of course, is longer. FYI
The problem is that - unlike me - you need to use the search terms that return results. Those that I wasn't using.
 

Back
Top