What's new
Photoshop Gurus Forum

Welcome to Photoshop Gurus forum. Register a free account today to become a member! It's completely free. Once signed in, you'll enjoy an ad-free experience and be able to participate on this site by adding your own topics and posts, as well as connect with other members through your own private inbox!

Does anyone know a way to randomly select these?


@OP - Sorry, I forgot all about this thread until I saw your private message. Anyway, the approach I took (ie, Post #7) is conceptually very similar to Hawkeye's approach in Post #17. The main difference is that instead of using reticulation like he did, I made a layer with noise, blurred it by a few pixels, used it to randomly darken a cleaned up version of your original image, and then thresholded the result to get something that looks like this:
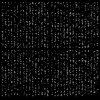
ramen_voorbeeld-tjm01_ps01a-11_after_add_noise_and_threshold.jpg

(Note: This may not be exactly the same as what I showed before as I didn't many of the steps in the old file and had to reproduce some of them.)

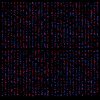
Once you have this, you can fill it with color in various ways. If you only want two colors in each little rectangle, you can use it directly as a mask for one color, invert it, and use the result as a mask for a second color. If you want more than one color in each little square, you can easily generate several variants by refreshing the noise pattern. You can then use each variant as a mask for it's own color. This is the approach that I took, even though I only show two colors, first bright blue, then bright red in this (reconstructed) example:
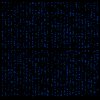
ramen_voorbeeld-tjm01_ps01a-12_added_blue_linear_burn_layer.jpg

ramen_voorbeeld-tjm01_ps01a-13_added_red_linear_burn_layer_different_noise.jpg

In the version I posted earlier, to make the result look closer to what I thought you wanted, I'm pretty sure that I then inverted the above (or something similar), and stripped out the completely white background stripes to produce a png with transparency.

HTH,

Tom
 
PS - The approach of thresholding random noise is one of the standard methods to simulate a starry night (ie, pinpoints of bright ight on a dark background). Just like in that situation, if you want fewer windows to be colored (or you want a lower density of stars), just adjust the threshold.

T
 
Hello Tom,

Thanks a lot for the explanation!

You said: "I made a layer with noise, blurred it by a few pixels, used it to randomly darken a cleaned up version of your original image, and then thresholded the result"

I get the treshold part, but what exactly do you mean by "to randomly darken a cleaned up version of your original image" please? What tools/ filters do you use?

Thanks!
Jonas
 
Hi Jonas -

If you look carefully, there were some little bumps and wiggles along the edges of each "window" of the second attachment to your original post. Although it probably wasn't essential, I didn't want these to cause problems later, so my very first step was to clean up your image. I used Topaz Clean to give me nicer edges. That's what I meant by "... a cleaned up version of your original image".

By "...randomly darken", if I remember correctly, I simply set the blending mode of the layer with noise to darken.

BTW, when I said, "...blurred it by a few pixels", because of the rectangular geometry involved, I actually used the "box blur" tool instead of using one of the blurring tools that has circular symmetry such as the Gaussian blur tool.

HTH,

Tom
 
Here is my go...:)

1. Open your image.

2. Apply Threshold so that all windows are black and the background is white.

3. Invert.

4. Press Ctrl-Alt-2 to make selection of the windows.

5. With selection active apply Clouds or Difference Clouds filter.

6. With selection still active apply Threshold to erase as many windows as you like.

7. Now, with selection still active, apply Maximum filter several times(apply once and then repeatedly press Ctrl-f) to restore partially erased windows to their original shapes.

P.S. In the 5-th step you can use any tools(black brush, Dodge, Burn, Levels, Curves, etc) to wipe away the windows you want to leave out.
 
Last edited:
I didn't notice the upload problem you mentioned here.

The best solution is to zip the file and upload that.......


Yes indeed ibclare, I received a lot of good solutions. :-) Thanks a lot for that everyone! (I'm still curious how Tom Mann ended up with his result :-) )

Thanks to the large amount of patience of Colleague I now also have a real script to do it! :-) With a little bit of tweaking on the script it is applicable to different window sizes. Here you can see the result:

View attachment 45097

I'm trying to upload the script as an attachement, but I get the message "invalid file" or something. I don't know if I am doing something wrong?

Thanks a lot Colleague for your help and patience!!!

Jonas
 

Back
Top