What's new
Photoshop Gurus Forum

Welcome to Photoshop Gurus forum. Register a free account today to become a member! It's completely free. Once signed in, you'll enjoy an ad-free experience and be able to participate on this site by adding your own topics and posts, as well as connect with other members through your own private inbox!

Photoshop Challenge Week #10


So i finally done something. Took a simple hair and tried not to spoil it. No problem with hair masking. I watched this The Perfect Technique for Masking Hair.
Realized that same method i was using all the time, except it didn't comes in mind that alpha chanell can be multipied (of course it can but i missed that opporunity). Still i wasn't using it but used curves on image copy and mask. As result no much need to paint on mask.
But it seemed to easy and didn't felt satisfied. Started to play and that's final (or almost final). Of course it supposed to be diferent. Eye in middle like cyclop (maded it blending own eys in one symetric - waste of time) etc. blablabla.
Too long start, no more talk:
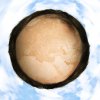
hairyheadplanet.jpg

Used material:
Full sized:
origin1.jpg

Scalled down:
sky-original.jpgglobus.jpg
 
LoL...it's not seems simple to me.
You did a great work to extract hair from not plain background but it's lost many transparent "things" in process.

You're right. I obviously suck at this and need to practice the technique a little more. :banghead:
 
You're right. I obviously suck at this and need to practice the technique a little more. :banghead:

That's a little extreme! I've tried three methods today and nothing is working. I did this with one try a couple weeks ago. Anyway, now that I look back at your post I see the flyaway hairs. Well, OK, so maybe not masterful but we're all coming along. That's why it's called "Challenge." :D
 
You have all done really well! I have been avoiding this because I am afraid of it lol. I think this is going to be extremely hard to do.
 
Don't be afraid of it. It takes time, inspiration and some knownledge. But you got all of it.
Elements and tools that been using in extrcting is mostly elementar. Of course they been used with some trick. But it's learnable.
Actually i'm afraid of hairs too (luckily don't have to select them often) but theoreticly it's just making proper greyscale mask.

So to enhance mine technic searched for some tutorial and finded best one (for now).
It's puse magic. One step is mystical and it works so good.
Selecting & Extracting Hair - Masking Tutorial - Extraction Tips | PhotoshopSupport.com
You have to try it. It's simple. Just find for start easy hair. Hair itself can be complicated but background must be lighter that hair. Then it's very easy.

That was achieved by 5minutes (plus reading and undersranding) without extra painting in mask, just doing first 7 step and adding one mine. I'm amazed myself or i just lucky with original.
Anyway:
hair-cut.jpg

Used material:
hair-original.jpg


Done by first 7 step in linked tutorial.
My coments.
First i dublicated image and set background to 0 by curves and white point.
That i start to use for tutorial.
Step 1. Didn't know where is "Enhance > Adjust Color > Remove Color". I just used dublicated new image again and merging it with Black&White adjustment layer.
Didn't use "Perfomance tip" after Step 4.
Step 5. You have to CTRL+click on RGB in Channel panel. Then make Layers.
Step 7 (and final for me). I don't have thinked out why it works but IT WORKS!

I hope it'll help someone.
 
Last edited:
Good job.
I feel little gilt choosing easy ones, you all took much more challenged ones.

I've got some advice (don't know if it'll work for sure). Give to cutted hair layer Inner Glow (default size is good but free to change :)). Or Inner Shadow but then you'll have to change blending. I liked Screen with middle light color and size=0, Distance=1). That removes somehow some irregularity.

Sample (fast dark part selection by colorrange. Don't feel too strong to do whole hair):

example.jpg

For Inner Shadow used RGB(141,189,231) - very random and Screen 75%, Distance=1 others=0.
Inner Glow default settings.

Personally i liked how both worked together (never tried that one).


P.S. Hope you don't mind mine intervene (transtalor).
 
That's good. Me too...sometimes...and rarely admiting it :)

P.S. I would love to see how it look on your image (if you'll use it).
 
I will but not sure when I will get a chance. The psd is at work, and Im not due back there to Monday.:rocker:
 
Pitty :) but lucky you! I've would like to skip work to monday.

By the way i forgot to mention that i don't hold credit for that tip. I've seen it somewhere one or two years ago.
 
Last night I couldn't follow any of 3 tutorials; I was too tired to be trying it I guess. Finally, today I found patience and a better subject. I kept trying to extract hair from rather busy backgrounds. Not ready for that yet. I found a better resolution image though not a lot better. I'm thinking of photographing all the pine needles on my sidewalk and have them raining down! Maybe not. :mrgreen:

Today I combined what I needed from each of the tutorials. I did go back in when I was done with the mask and clean up of course. I also applied the mask and then took a teeny brush to go over some of the faint hairs that were showing up as grey instead of brown. Cheat! :rocker:
 

Attachments

  • OceanCave.jpg
    OceanCave.jpg
    790.6 KB · Views: 2
I am SOOOO frustrated with this exercise. So far I have tried channels, extracting, background erasing, and quick masking and I still lose details.

... still trying
 

Back
Top