What's new
Photoshop Gurus Forum

Welcome to Photoshop Gurus forum. Register a free account today to become a member! It's completely free. Once signed in, you'll enjoy an ad-free experience and be able to participate on this site by adding your own topics and posts, as well as connect with other members through your own private inbox!

Is it possible for a non-professional to do this? If so, how?


Q: "...Or will it still look tacky in your opinion?..."

For some subjects the white background (with a darker motion blur from the subject) will look great, for others not so good. You have to be led by what the subject artistically demands, and not be led into over-generalizations.

However, if I was pressed, I would say that I've seen many more successful examples of this technique with a dark background than with a white (or light) background.

If I have a moment later, I'll look through my files and on Google Images and find examples of each ... or, you can do the same, LOL.

Cheers,

Tom M
 
Yeah there is something about black backgrounds that is appealing...there's a much greater sense of mystique to images shot in black. But I have seen something kind of similar done on white before. Same musician so I assume the same artist worked on it but yeah you're right it doesn't look as good but I cannot tell if it looks the way it does because of the picture not being shot properly rather than inability to recreate the effect on white because the actual picture overall looks somewhat blurry. I may be wrong though: the image just doesn't look nearly as well shot as the blackroom one so the comparison seems a bit unfair.

3743_artworks_000051858282_7dywic_original.lg.jpg
 
Last edited:
I think that the reason most artists prefer this effect on a black background is that a much smaller amount of the blurred image can be seen against a jet black background, compared to the larger amount that would be needed to be seen against a white background. To me, this means that the viewer's eye sees the effect but is less distracted against the black background compared to the white background.

Tom M

PS - As you correctly pointed out, the image you just posted is definitely not a good example to support the white background version of the technique because its starting image - to be blunt - absolutely stinks. It's grainy, out of focus, lousy color, and, last, but not least, the effect is different. The effect in this example is just a couple of displaced (and desaturated) copies of the original, not blurred versions of the original. It's quite analogous to anaglyphs ( description here: https://en.wikipedia.org/wiki/Anaglyph_3D ), just without any color in the displaced images.

PPS - Good luck in finding a studio with jet black walls. Most studios are used for portraiture, and such harsh contrast is almost never called for in that field. Look for studios that specialize in product photography.
 
Yeah black seems like a better call. Can you think of any interesting effects that in your experience do work on white backgrounds in terms of making a subject pop against a white background, especially if they are wearing black, which is high contrast? Maybe motion blurring isn't the best way to go about things for a white backdrop and I should try to gain inspiration from something else/keep a more open mind that trying to recreate the original effect meant for a black background? Also yes the image does look exactly like an anaglyph: I had no idea that is what they were called before but honestly the effect is distracting without 3D lenses on.

I plan to just call a few studios near me and ask me if they have a blackroom. Is it normally expensive to shoot a photo there? If not, I might just ask to take a photo in the room just so I can have one as a keepsake. I assume it is expensive though because I haven't seen many people taking photos in these locations just for fun haha.
 
Last edited:
@claydees You realize that the effect you posted in post #22 is a very different effect than the blur effect from earlier discussions. This effect is much more complicated.

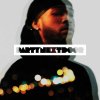
PartyNextdoor_01.jpg

Screen Shot 2016-09-13 at 5.24.01 PM.png
 
Hey Sam,

Yes I do realize the effect is different but admittedly, I did not know it was more complicated because the first picture from earlier discussions looks more professional/better. That said, as we've discussed trying to recreate blackroom from a white room doesn't really make sense so something similar on a white background is what I have to cope with but I'm pretty optimistic that I can do something similar. Here's my plan – what I'm thinking right now is to have the subject in the center...normally with no blur, and then using the magic wand outline the subject, then paste a copy of said subject to both the left and right slightly and then add transparency to give it a semi-see through look for both of the shadows while leaving the center subject untouched. Then apply a semi-cartoonish filter (not sure) to make the subject pop and give it that semi-cartoonish finish of the first image, then finally apply a glossy filter or matte filter...to bring all of that together and then have it look somewhat cool. It's a bit of a work but in my head it sounds like it could yield something tangible given the white background is what I've come to realize is best to go with. Plus, this plan seems much easier than trying to do the anaglyphs (if the plan in fact makes sense). Also I'm not going to bother adding lights and that kind of stuff that was on layer 3 of the separations you created because I'm not sure if the blurred city lights really add much value to the image, plus it just looks like a bit unnecessary. How long did it take you to crop the background so cleanly if I may ask?
 
claydees said:
How long did it take you to crop the background so cleanly if I may ask?
About 2 seconds with the Quick Selection Tool. When you have an image with such clear contrast between subject and the BG, it's really very easy.

claydees said:
Here's my plan – what I'm thinking right now is to have the subject in the center...normally with no blur, and then using the magic wand outline the subject, then paste a copy of said subject to both the left and right slightly and then add transparency to give it a semi-see through look for both of the shadows while leaving the center subject untouched. Then apply a semi-cartoonish filter (not sure) to make the subject pop and give it that semi-cartoonish finish of the first image, then finally apply a glossy filter or matte filter...to bring all of that together and then have it look somewhat cool.
I'm looking forward to seeing your results! Get to work! LOL!!
 

Back
Top