What's new
Photoshop Gurus Forum

Welcome to Photoshop Gurus forum. Register a free account today to become a member! It's completely free. Once signed in, you'll enjoy an ad-free experience and be able to participate on this site by adding your own topics and posts, as well as connect with other members through your own private inbox!

How I draw cars in PS: WIPtorial?


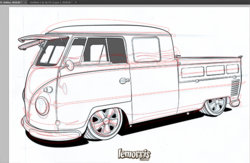
so...now that the base lines are done...I make a bunch of paths that are all closed and they represent the hilite and shadow lines.
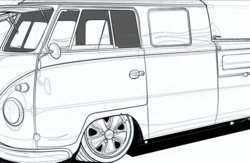
cjsmitty_35.jpg

Here's the paths

cjsmitty_36.jpg
Then I just stroke those paths at 2 pixels on a layer above my lineart. I do this so I can see them, when we get into the render I will show you how to make selections using paths. I actually render to those selections.
cjsmitty_37.jpg
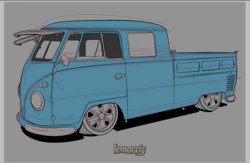
and now here's the flat body base added and a little background tone. I find it easier to render with a colored background. For some reason the solid white background is very stark to me.
 
Now we can add some tone.

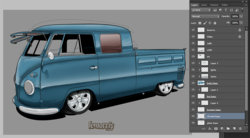
First thing I do is pretty basic. Make a clipping mask in this case above my body base. It'll be for dark tones. I set my airbrush to soft edge and flow about 40% and opacity about 15% then I just brush in some tone in the shadow areas. I build it up a little so I can see it, but I don't try to get too specific or even really worry about going outside a shape. I add another clipping mask and brush in some lighter tones.

Then we start havin fun.

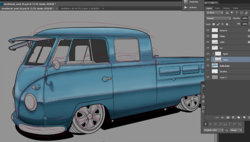
Here's a look at how I use the paths we created for hilites and shadows.

cjsmitty_38.jpg
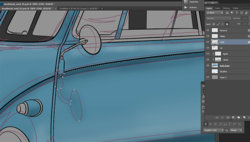
I used the magic wand to select the entire door area on my lineart layer. I turn on my paths and select the mirror shadow. (yeah yeah, I know...doesn't make sense for the lighting which is all over the damn place anyway, but it looks cool. :) )

cjsmitty_39.jpg
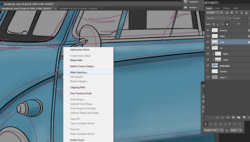
Right button click on the path and click Make Selection then click New Selection

cjsmitty_40.jpg
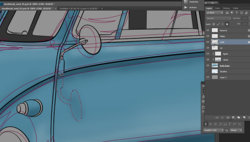
PS selects just the mirror. Now...I have the make new selection, subtract from a selection, and intersect a selection set up as actions as well, so I just hit F3, Shift-F3, and Shift-F2 to do those functions.

cjsmitty_41.jpg
Once the area is selected I can gradient in the tone, or brush it in, or fill to taste.

cake

If anybody cares, I will make my actions available once this thing is done.
 
So basically I just use low brush settings and try to follow a pattern of light and shadow. Using the paths I can select a very tight area and do things like brush in a hot edge.

One important thing to never forget is your wheel well shadows. Nothing sells your wheels more.

cjsmitty_42.jpg

I still have tones, chrome, rubber, and interior. Then I gotta add my "bling". It's gettin there though.
 
So for this one it's gonna stay a bit more graphic so wrapping it up was cake.

Little things like adding some back light to the door seams, and darkening the bumper back, really help.

It's still not done as there is adjustments in the layout, but so far so go.

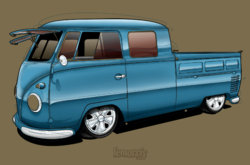
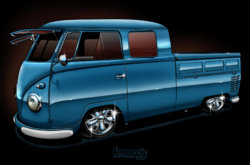
I did add a hue saturation and a levels adjustment layer. that's kinda like the reward.

Here it is:

cjsmitty_43.jpg

cjsmitty_44.jpg

cjsmitty_46.jpg

I will render out the other 2 then drop them in here and then go ahead and show you the layout with the text and how we do that.

questions?
 
so...

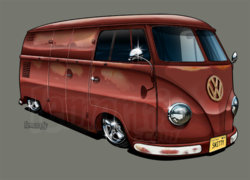
The panel bus landed here:

cjsmitty_57.jpg

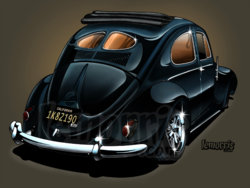
and the split window bug landed here:

cjsmitty_52.jpg

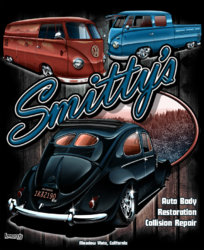
then the rest was cake. I just put the vehicles in the design. On the elements like the text and the scene I tried to incorporate the colors in the vehicles. This helps reduce the pallet. I also did the little make the glass tint the color of another vehicle in the design thing. That way I can print this in 5 spot colors on dark t-shirts.

:)

Here's where the design landed:

cjsmitty_58.jpg

Clients dug the snot out of it. :)

Once I get the tshirt separations ready, I will come back and talk about that a little.
 

Back
Top