What's new
Photoshop Gurus Forum

Welcome to Photoshop Gurus forum. Register a free account today to become a member! It's completely free. Once signed in, you'll enjoy an ad-free experience and be able to participate on this site by adding your own topics and posts, as well as connect with other members through your own private inbox!

Help with Aligning and Cropping Scanned Cards


Johnny15

Member
Messages
19
Likes
2
Hello,

I need your help. This might be simple for you, but it would be a great help for me to learn how to do it. I don't want you to do it for me!
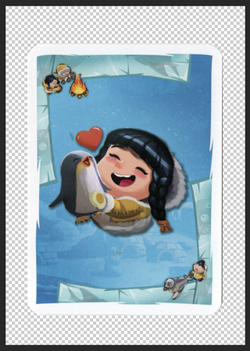
I have scanned some cards and would like to align them because some of them are tilted.
After that, I would like to crop and save each card individually as an item so that I can use it in another document. However, I want each card to maintain the same dimensions.
One last thing—do the card dimensions change if I save and then load them into Illustrator?
I’d really appreciate any help! 😃

Thanks a lot,
Giannis
 

Attachments

Hey!!!
Open your PDF in Ps.
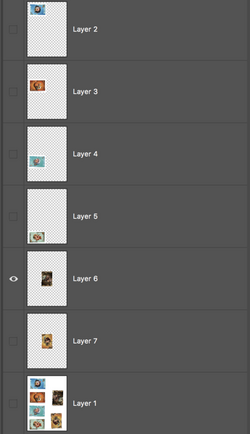
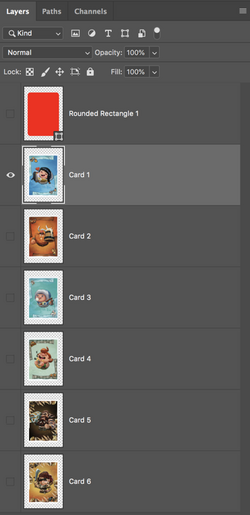
Use your Rectangular Marquis Tool to select and copy each card from the original grouped layer (Layer 1 in my layers panel image) to it's own layer.
Select > Cmd/Cntrl + J
Screen Shot 2025-04-01 at 2.42.24 PM.png
If you need instruction on how to do this, let me know!

I have scanned some cards and would like to align them because some of them are tilted.
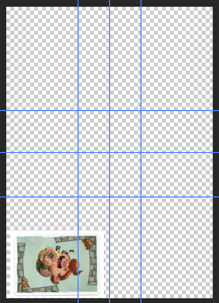
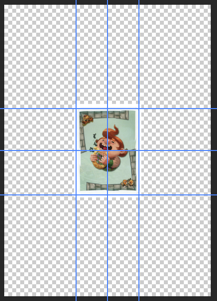
Once you have the cards on their own layers, Use Free Transform to rotate and move them to the center.
Screen Shot 2025-04-01 at 2.47.29 PM.png Screen Shot 2025-04-01 at 2.48.05 PM.png

Use the Ruler Tool to align them.
On one (either vertical or horizontal) of the cards edges, click and hold, drag the line to be even with the cards edge.
Seen here on the right hand edge of the card.....
Screen Shot 2025-04-01 at 2.51.42 PM.png

Once you have the line drawn, click on "Straighten Layer"
Screen Shot 2025-04-01 at 2.52.55 PM.png

I will explain how I cropped them in the next post.
 
Once I have the card placed in the centerish of the document window and straight, I have to center it. This is how I did that.

On a new layer.
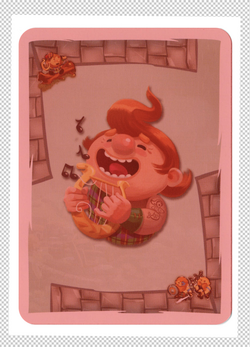
I used the Rounded Rectangle Tool.
I set the radius to 60px.
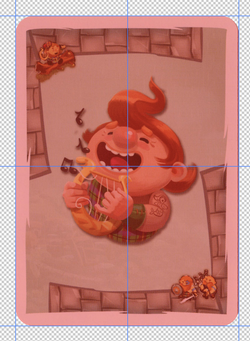
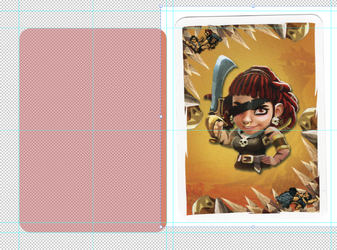
I then dragged out a Rounded Rectangle (RR) to match the GENERAL size of the card (note: the card is not yet centered in the document).
Once the RR was close, I lowered the RR's opacity so I can see through it.
I then used Free Transform (Cmd/Cntrl + T) to match the RR to the exact card dimensions!
Screen Shot 2025-04-01 at 3.12.15 PM.png

The RR is now a template for cropping all other cards but it still needs to be centered.
Select the Move Tool.
Make sure the RR layer in selected/highlighted.
Hit Cmd/Cntrl + A to select all.
In the Move Tools preference bar, center the RR template by hitting the "Align horizontal centers" and the "Align vertical centers" icons....
Screen Shot 2025-04-01 at 3.18.27 PM.png

Your RR template layer should be centered in the document.

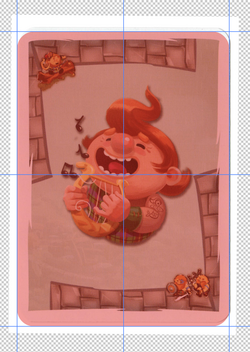
Next, select/highlight the RR template layer and drag guidelines to the edges (Note:I also have them in the center, but it's not necessary.
Note that the RR template is now centered but the card is not!
Screen Shot 2025-04-01 at 3.21.14 PM.png

Select/highlight the card layer.
Select the Move Tool.
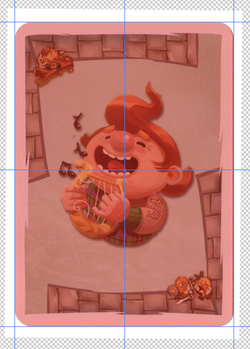
Move/nudge (directional arrows on keyboard) the card into alignment with the RR Template.
Screen Shot 2025-04-01 at 3.24.26 PM.png

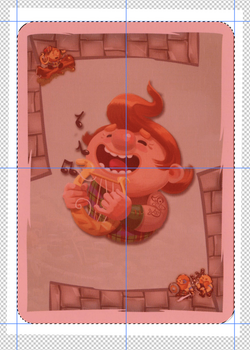
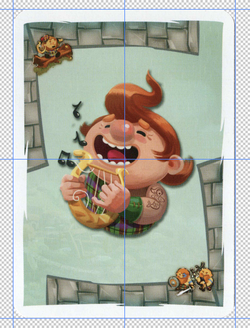
With the card layer still selected/highlighted, Cmd/Cntrl + mousclick the RR templates thumbnail to make a selection.
Screen Shot 2025-04-01 at 3.26.09 PM.png

Then hit Shift + Cmd/Cntrl + I to invert the selection.
Then hit DELETE.
This removes/crops everything outside the selected area!
Hit Cmd/Cntrl + D to deselect.

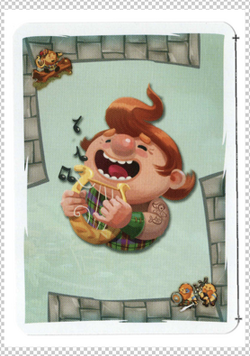
Your card has now been straightened and cropped.
All cards are the same dimensions.
Repeat the same process for each card.
Screen Shot 2025-04-01 at 3.28.18 PM.png

With RR Template layer turned off
Screen Shot 2025-04-01 at 3.33.02 PM.png
 
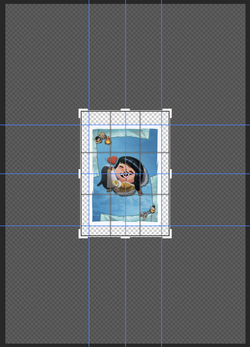
Once I have all the cards repositioned, aligned and centered, I can now crop the document.
Screen Shot 2025-04-01 at 3.39.57 PM.png
Screen Shot 2025-04-01 at 3.41.29 PM.png

I can now rename all of the layers.
I can save each card to it's document, or a specific file.
Screen Shot 2025-04-01 at 3.41.21 PM.png
 
Great tutorial!
Thanks a lot!
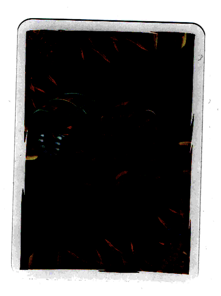
Is there any way to make the edges of the card a little darker so that I can align them more easily? (mostly at the bottom and at the sides)
They have the same color as the paper.
Also is it easy to add crop marks?

darken the edges.png
 
Is there any way to make the edges of the card a little darker so that I can align them more easily? (mostly at the bottom and at the sides)
They have the same color as the paper.
Well...........in the PDF you provided, you can see most of the edges, at least two edges and a corner. This is all you need to straighten or align the card for the crop.
Fore example......this card has visible lines on the top, left, and right edges. The two top corners are also visible. This is all you need.
Screen Shot 2025-04-02 at 3.06.35 PM.png

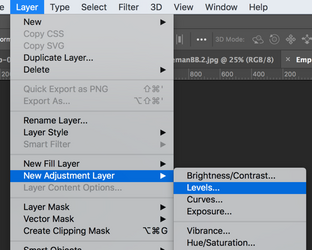
But if I were to try and darken the edges, I might add a temporary Levels ADJUSTMENT layer (LAYER>NEW ADJUSTMENT LAYER>LEVELS)

Screen Shot 2025-04-02 at 3.01.22 PM.png

Drag the dark point slider to the right and darken the image.
Then delete the Levels adjustment layer when done.
Screen Shot 2025-04-02 at 2.59.44 PM.png

Also is it easy to add crop marks?
Not sure what you mean by this. Perhaps to could describe it better?
 
They are marks that help you cut cards straight
OK............maybe like this........

5.5in x 11in
Make a grid.
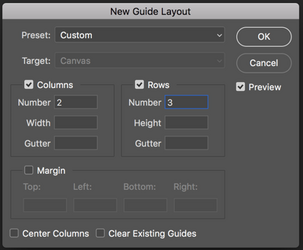
Go to VIEW>NEW GUIDE LAYOUT> Make 2 Columns and 3 Rows.
Screen Shot 2025-04-02 at 7.15.16 PM.png

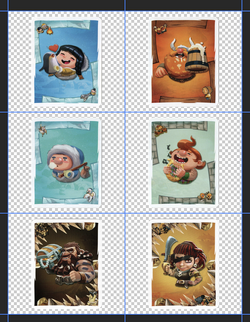
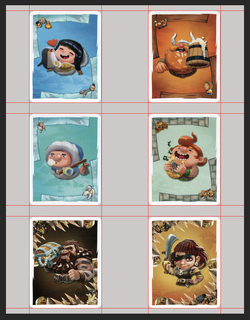
Center your cards in the grid.
Screen Shot 2025-04-02 at 5.38.45 PM.png

Under VIEW, make sure you have "snap" and "snap to" >Guide, Layers, and document bounds.

Select and highlight the card layer on the top left. Drag guides to all four sides.
Select and highlight the card layer on the middle left. Drag guides to it's top and bottom.
Select and highlight the card layer on the bottom left. Drag guides to it's top and bottom.
Select and highlight the card layer on the top right. Drag guides to it's left and right.
Select and highlight the card layer on the middle right. Drag guides to it's left and right.
Select and highlight the card layer on the bottom right. Drag guides to it's left and right.
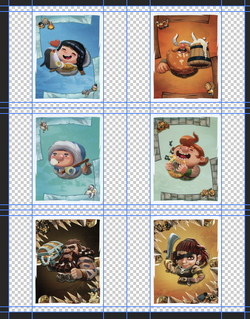
Should look like this.....
Screen Shot 2025-04-02 at 5.40.39 PM.png

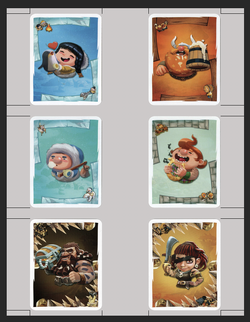
Using the guides, now use your Line Tool to create "cutting" lines!
Note: I added an off white background so you can see the cards and lines.
All the way across....
Screen Shot 2025-04-02 at 7.12.56 PM.png

Or just short ones on the edge.........
Screen Shot 2025-04-02 at 7.12.32 PM.png
 

Back
Top