What's new
Photoshop Gurus Forum

Welcome to Photoshop Gurus forum. Register a free account today to become a member! It's completely free. Once signed in, you'll enjoy an ad-free experience and be able to participate on this site by adding your own topics and posts, as well as connect with other members through your own private inbox!

Help Printing out Work


maverick24

Member
Messages
13
Likes
0
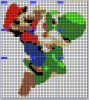
I am a school teacher and have a created a mosaic for my young students to recreate using stickie notes. Is there a way to print out the order of colors so that each group may work on their individual section?
 
We would love to help you but we need a lot more information. For example, do you know Photoshop already? You have a copy of it? If so, what version?


I'm not sure I understand exactly what you are trying to do. Can you simply show us a photograph of the final product? It would help a lot because based on your description, I can envision many different type of games for the kids, but most would probably have nothing to do with what you really want to do.

Cheers,

Tom M
 
I have a few other questions, as well. First, I know you said you were working from a template that you created, but do you want to know how to create future templates automatically? How many distinct colors are you working with? Are your sticky notes square or rectangular? Are they partially overlapping? Do you want each distinct color numbered or is it sufficient to simply have the color for each area printed out? How many total squares are we talking about - a dozen, or many hundreds? Have you looked at commercial mosaic and jigsaw puzzle software packages? Also, what does the word "order" mean in your sentence "order of the colors"?
T
 
I am using Photoshop CS6 and am familiar with it. The mosaic I created is a 8 bit image of a Super Mario screenshot. It is 800 total squares and only uses 5 colors. The sticky notes are square

What I plan to do is put the students in small groups where they can as a team work on a section. Issue is since there are many squares I would prefer if I can print out the order of the colors or print out a sheet where the order of the colors are at least distinguishable. On the monitor it looks like a mosaic but, when I print it out the colors blends together and you can not tell where one square begins and ends. By having a printable color order they can say, " Next is 1 red, 2 blues, 4 black, etc."
 
I would also like to add that I did not create the image using the mosaic filter. I created it by resizing the image and then rendering it down to 5 colors using the index color mode.
 
Thank you. That was very helpful. I now understand what tools you are working with, what you have done, and what you are trying to do.

If I understand you correctly, I think that you started with something like the 1st attachment, made it look like the 2nd attachment, and want the individual sheets to look like the 3rd attachment, right?

T
 

Attachments

  • 01-illuminated-manuscript-as-e-book.jpg
    01-illuminated-manuscript-as-e-book.jpg
    99.5 KB · Views: 11
  • 02-cartoon-illuminated-manuscript-as-e-book-tjm02-ps02a_pixellated_index_8_colors-full_size_RGB-.jpg
    02-cartoon-illuminated-manuscript-as-e-book-tjm02-ps02a_pixellated_index_8_colors-full_size_RGB-.jpg
    134 KB · Views: 11
  • 03-cartoon-illuminated-manuscript-as-e-book-tjm02-ps02a_pixellated_index_8_colors-full_size_RGB-.jpg
    03-cartoon-illuminated-manuscript-as-e-book-tjm02-ps02a_pixellated_index_8_colors-full_size_RGB-.jpg
    114.9 KB · Views: 11
Last edited:
If this is what you want to do, it couldn't be easier. Just use the Magic Wand tool (with low tolerance and "contiguous" NOT checked) to select the 1st color. Copy it (cntrl-C) to it's own new layer (cntrl-V). Do the same for the remaining other colors.

Add a plain white background just above the background layer. Turn it on. Turn all other layers off.

Add a text layer at the top of the stack, so that your layer stack eventually looks like this.

Sequentially, turn on each layer, modify the text appropriately, and print out the result.

You are done -- I think ;-)

T
 

Attachments

  • 04-2013-05-21_175910-layer_stack.jpg
    04-2013-05-21_175910-layer_stack.jpg
    42.9 KB · Views: 11
Very similar to that but, I believe even easier. The mosaic would look like the second image. Instead of each team working on a "layer" they would be working on a "section". Using the image you provided it would be cut into 4 sections: group 1 would work on the top left, group 2 top right, group 3 bottom left, group 4 bottom right.
 
The problem is when I print it out there is no telling how many squares there are of each color, you have to guess. For instance using the second picture I can tell that the first row starts with 1 light gray, 2 blue, 7 gray but, this will surely cause confusion with young kids which is why I chose to make it an 8 bit picture.

I remember seeing an image online of a guy doing something similar where he had a sheet of paper with spaced apart colored dots printed on it telling him what color was next in the order but, i can no longer find it nor the method.
 
Thanks. I have been looking for it on google but, can not seem to find a good explanation.

Here is an image of one of the pictures. It uses 7 colors and the farther you get the more in focus it seems. I think it will be cool for the kids to see when finished.


mario 8 bit.png
 
So, assuming that we can organize the groups the way u described, would having a grid of thin lines separating adjacent squares solve the counting problem?

T
 
Btw, obviously the grid of thin lines would only be a guide that could be turned off to view the image, and turned on when squares need to be counted.
 
So, assuming that we can organize the groups the way u described, would having a grid of thin lines separating adjacent squares solve the counting problem?

T

Yes, that would be great. All I need is for each square to be distinguishable for the kids to be able to work as groups independently without confusion of what color is next or how many of each color. The greater the separation of squares the better.

So, far when I try to print it out the colors either blend together or when using CMYK try to create a wider color pallet.
 
Got it! Let me see what I can come up with.

T

PS - FWIW, cmyk spaces for printers almost always have a narrower gamut than RGB spaces - certainly narrower than Adobe RGB and ProPhoto RGB, but I seriously doubt gamut is the cause of the effect u are seeing.
 
OK. Here's my suggested workflow:

1. Start with the original...
 

Attachments

  • super_mario_and_yoshi-tjm01_cropped-acr0-ps01a-00_orig.jpg
    super_mario_and_yoshi-tjm01_cropped-acr0-ps01a-00_orig.jpg
    144.5 KB · Views: 7
2. Apply filter / pixelate / mosaic to it (...I used a setting of 8 pixels for my example...)
 

Attachments

  • super_mario_and_yoshi-tjm01_cropped-acr0-ps01a-01_filter_pixellate_mosaic_8.jpg
    super_mario_and_yoshi-tjm01_cropped-acr0-ps01a-01_filter_pixellate_mosaic_8.jpg
    34.6 KB · Views: 7
3. Convert the RGB 8 bpc image to indexed color. I custom selected a full set of 8 colors to keep the bright colors, black, white and the skin tone. Convert back to RGB (8 bpc)...
 

Attachments

  • super_mario_and_yoshi-tjm01_cropped-acr0-ps02a-01_indexed_color.jpg
    super_mario_and_yoshi-tjm01_cropped-acr0-ps02a-01_indexed_color.jpg
    32.1 KB · Views: 7
Last edited:
4. Next we have to figure out a good way to overlay a square grid of thin black lines that are in perfect registry with the underlying pixelated image.

There are numerous ways to do this ranging from tedious procedures ("step and repeat") using native PS tools, all the way to fully automatic grid generating plugins, but which unfortunately can't be set to the exact pixel pitch we need and/or can't be easily put in registry with the underlying grid.

I decided to use a free plugin called "scanlines" from Richard Rosenman:
http://www.richardrosenman.com/software/downloads/

Apply it once to get a set of thin black horizontal scan lines of the correct periodicity on a new white layer. I used settings (for his 1st two adjustments) of 7 and 1. Set the blending mode to darken, select the move tool (V), and used the up-down arrow keys to nudge the 1 pixel wide black lines up and down till they are in registry with the underlying pixelated image.

To get the vertical thin black lines, make a copy of the previous layer, rotate it 90 degrees, and stretch it vertically as needed to get the lines to fill the full extent of the image. Again, use the move tool and arrow keys to bump these vertical lines left and right into exact registry with the underlying pixelated image.
 

Attachments

  • super_mario_and_yoshi-tjm01_cropped-acr0-ps02a-01_indexed_color-02_with_scanlines_7_1.jpg
    super_mario_and_yoshi-tjm01_cropped-acr0-ps02a-01_indexed_color-02_with_scanlines_7_1.jpg
    237.7 KB · Views: 7
5. Finally, we need to chop up the image into sections for the various groups of kids to work on. I would suggest using the "slice" tool (BTW, I think I called it the "tile" tool when I was typing on my iPhone at a stop light earlier...sorry about that.). This tool is co-located with crop tool, and is designed to do exactly what you want - cut an image apart into well-defined, arbitrary rectangular areas. There are many tutorials about using this tool on the web.

I sliced the image into 9 areas.
 

Attachments

  • 2013-05-22_022047-after_using_slice_tool.jpg
    2013-05-22_022047-after_using_slice_tool.jpg
    411 KB · Views: 7

Back
Top