
Photoshop Gurus Forum
Welcome to Photoshop Gurus forum. Register a free account today to become a member! It's completely free. Once signed in, you'll enjoy an ad-free experience and be able to participate on this site by adding your own topics and posts, as well as connect with other members through your own private inbox!
You are using an out of date browser. It may not display this or other websites correctly.
You should upgrade or use an alternative browser.
You should upgrade or use an alternative browser.
Coloring a Black and White image
- Thread starter KrystalDream
- Start date
I do it completely different, I create a new layer, set the property to Color, and name it skin.
I use #f6ccbb as my color and paint the skin, this is obviously for a white person.
About the only adjustment I need to make is to lower the opacity a little.
Then I'll make 1 or more other layers set to Color for the rest of the colorization. but skin is always by itself.
I do it exaclty same way as you Steve.
Raymond Worrilow
Member
- Messages
- 11
- Likes
- 2
I will have to try this... I have alsway used the pen tool a small intuos pad and colored them to look like a old colorized photo from the 30'S-LATE 50'S
northlandhusky
Active Member
- Messages
- 30
- Likes
- 1
Hi
Thanks for sharing this. I really like the technique.
Steve,
You've probably figured it out by now but if not, I think Krystaldream was on the right track.....image / mode / rgb or cmyk
Thanks for sharing this. I really like the technique.
Steve,
You've probably figured it out by now but if not, I think Krystaldream was on the right track.....image / mode / rgb or cmyk
Hoogle
Guru
- Messages
- 8,333
- Likes
- 2,587
I do it the same as steve but sometimes you get artificial looking parts here is a sample I did using new layer blending mode colour then hue saturation
View attachment 4760
Ok to somewhat I was going for the super imposed look but the skin sort of has a powdery look to it
View attachment 4760
Ok to somewhat I was going for the super imposed look but the skin sort of has a powdery look to it
Hoogle
Guru
- Messages
- 8,333
- Likes
- 2,587
the curves version seems complicated so will look into it more with the version I just posted it really is easy and so flexible with a lot of forgiveness you could do an image like mine in 5 mins.
step 1 spot heal blemishes etc
adjust levels exposure brightness etc so image is even
then for each colour skin for example create a new layer paint over all the skin in a close skin colour match set layer blending mode to overlay or colour whichever looks best depending on image
then with that layer selected image > adjustments > hue saturation check the colourise box and play with sliders until your happy
repeat all these steps for hair lips eyes clothes and background here is 1 i just did from a friend on facebook since you posted your responsemogsy yes there are some rough parts but it is just demonstratiung that in 5 mins you can get somewhat close to a fully coloured image
View attachment 4761
this was slightly harder though as some of it is over exposed but still a better play on levels you will be sorted
 I will have a go at that later
")
siodre
Well-Known Member
- Messages
- 147
- Likes
- 38
skin is easy, it's really just paint by numbers. after opening the curves dialogue use the gray eye dropper from curves. hold down shift and click on some skin with the dropper, that should leave a little crosshair on the skin. open up window>info, the crosshair number with correspond with a number in the info dialogue. next to the number you'll see RGB and values and a smaller eyedropper. click on the eyedropper and change it to CMYK. to change the CMYK values use the hand with the up and down arrows (found in the curves dialogue) on the crosshairs on the skin. click on the crosshair and drag the tool up and down, you'll see the CMYK numbers change. red=opposite of C(yan), green=opposite of M(agenta) and blue=opposite of Y(ellow).
you have to know the numbers for different skin colors, but here's an example for caucasian skin:
C*2 or 3 should fall between the values of M and Y.
it's easier than it sounds -
to start set Y slightly higher than M.
divide M by 2 and Y by 3, C should fall between those numbers. the numbers all change slightly as you adjust each channel so adjust C and Y as necessary until the math works out. leave K alone.
this works for color images as well if your skin colors are off.
PhotoRepair
Member
- Messages
- 8
- Likes
- 6
It do it with separate layers and up to five shades of skin colour on five separate layers
The process is to build up the colour base tones in yellow tints and work up to reds and perhaps some blues or greens if its a real close up and veins need realism.

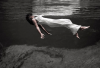
here is an image completed using this technique
Ive written a tutorial on it, search google uk for "Colourising or tinting an old photo - Part 1" and this will lead you to part 2 as well.
I hope this helps
Neil Rhodes from image-restore
The process is to build up the colour base tones in yellow tints and work up to reds and perhaps some blues or greens if its a real close up and veins need realism.
here is an image completed using this technique
Ive written a tutorial on it, search google uk for "Colourising or tinting an old photo - Part 1" and this will lead you to part 2 as well.
I hope this helps
Neil Rhodes from image-restore