What's new
Photoshop Gurus Forum

Welcome to Photoshop Gurus forum. Register a free account today to become a member! It's completely free. Once signed in, you'll enjoy an ad-free experience and be able to participate on this site by adding your own topics and posts, as well as connect with other members through your own private inbox!
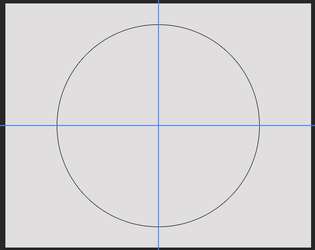
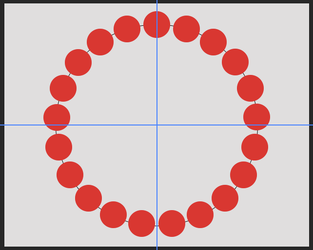
Array shape on a circle


Alexandria

Well-Known Member
Messages
114
Likes
8
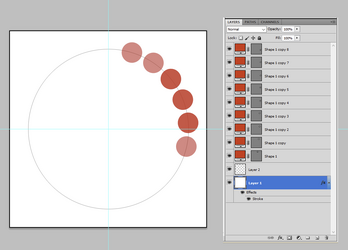
I made this with the "Elliptical Marquee Tool":
1728055500483.png
Is there a possible way to make this circle with the "Ellipse Tool", creating a new layer for every ellipse?
 
Here's one way for anyone who can better break it down for OP.

Determine the division of the circle (360º ÷ number of circles), Create center guides. With Ellipse Tool, create and position first circle. Copy/duplicate first circle, Select Move Tool!!. Cmd + T, move rotation point to the center (guides), enter angle/degree of rotation then OK. Simple step and repeat > Shift + Option + Command + T 19 clicks (original+copy+19clicks = 21) .

Circle. Division 17.14
Screen Shot 2024-10-04 at 2.42.05 PM.png

21 circles equally spaced.........close enough! All in separate layers.
Screen Shot 2024-10-04 at 2.42.16 PM.png

Showing first 10.5...........but there are 21.
Screen Shot 2024-10-04 at 2.42.33 PM.png
 
Yes, exactly what @IamSam says above. Here's a breakdown of the steps:
  • Use guidelines or a grid to identify the center of your circular path.
  • On a new layer, draw a circular path as an additional guide to the placement of your small ellipses.
  • On a new layer, use the Eliptical Shape tool to create a circle (or ellipse) of the desired size.
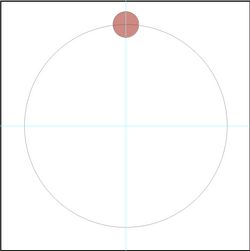
  • Position that shape exactly at "twelve o'clock". Like this:
1728072404608.png


  • Determine how many circle shapes you want. In your example there are 21 of them.
  • To equally space 21 shapes around a circular path, calculate 360° divided by 21, which equals 17.143°.
  • Activate your shape layer and go to Edit>Transform Path>Rotate.
  • You now need to do two things before "accepting" the rotation.
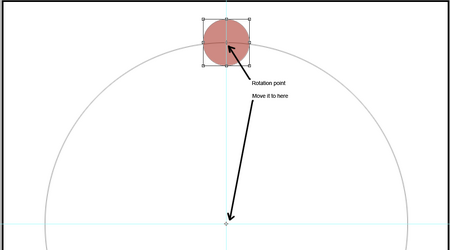
  • First: a bounding box will appear around your circular shape. In the center of that is the "rotation point". Grab that rotation point with your mouse and move it down to the exact center of your guidelines. Like this:

1728073085868.png


  • Next, you need to enter how much rotation you want.
  • While the rotate command is still active, go into the toolbar settings and enter 17.143 where the red arrow is pointing. This is the amount you calculated earlier which gives the exact amount of rotation needed for 21 shapes.

1728073610478.png


  • Once you've entered the rotation amount, click the "okay" checkmark to accept the rotation.
  • The remaining steps will now go much faster.
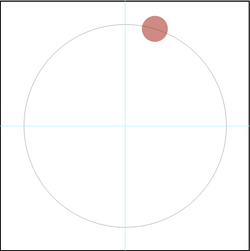
  • For now, you should have this:

1728074014334.png


  • Duplicate your shape layer for Shape #2.
  • Important: after you duplicate the layer, unclick the vector mask so that the mask is not active.
  • Now you can rotate this new layer using the command Edit>Transform>Again.
  • Keep repeating the process: copy the shape to a new layer; unclick the vector mask; go to Edit>Transform>Again.
  • Do this 21 times to complete the circle. Here's what the first six iterations looks like.
1728075005792.png
 
Important: after you duplicate the layer, unclick the vector mask so that the mask is not active.
Not sure where the vector mask(s) entered the equation??? There should be no need for them.............unless it's what your Ps version adds to a shape layer??

Keep repeating the process: copy the shape to a new layer; unclick the vector mask; go to Edit>Transform>Again.
These steps should not be needed. After you copy and move the second shape layer, select the Move Tool and then depress the shift + Alt/Option + Control/Command keys and hit the T key 19 times in a row!!!
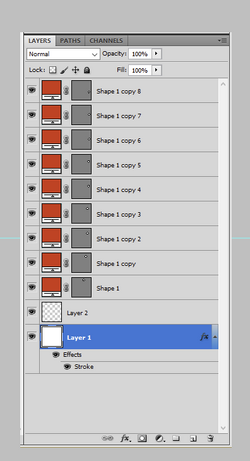
 
Not sure where the vector mask(s) entered the equation??? There should be no need for them.............unless it's what your Ps version adds to a shape layer??


These steps should not be needed. After you copy and move the second shape layer, select the Move Tool and then depress the shift + Alt/Option + Control/Command keys and hit the T key 19 times in a row!!!

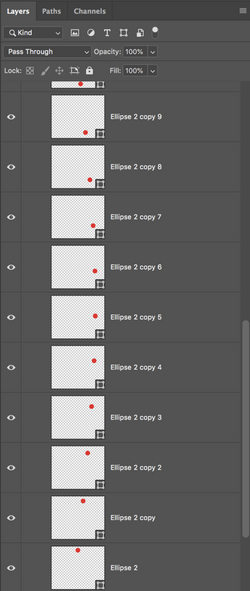
In my old version of PS (CS5), any time you use the Shape Tool, it creates a layer as shown below, consisting of a color picker and a vector mask. I'm not sure if "vector mask" is the right word, but it's the area where the vector path resides. Here is what my layers palette looks like. Perhaps newer versions of PS treat shape layers differently.

When I was experimenting with this, if I did not deactivate the vector mask, then curiously, each time I pressed Shft+Alt+Ctrl+T, the vector path would rotate and repeat itself 21 times all within the same one layer, rather than in 21 separate layers.

1728077093305.png
 
You're very welcome. I hoped the video was easier than trying a written step by step. Glad it was helpful.
Absolutely and yes, was much easier than "understanding the written version" for me. One more question, is the rotation point meant to be "pixel-perfectly" in the center of the circle? Because it didn't "snap" to guides (?)
 
One more question, is the rotation point meant to be "pixel-perfectly" in the center of the circle? Because it didn't "snap" to guides (?)

In one of the YouTube videos I watched, they specifically mentioned that the rotation point will not snap to anything when you move it. You need to place it by hand as best you can. Unless you're making some sort of scientifically-accurate engineering drawing, being off by one or two pixels probably wouldn't be noticeable.
 
One more question, is the rotation point meant to be "pixel-perfectly" in the center of the circle? Because it didn't "snap" to guides (?)
Ok....I agree with Rich. The only thing you can do to improve accuracy of placement is to zoom in as far as you can go. Move the rotation point to the center, then zoom in as close as you can. Re-position as needed.
 
scientifically-accurate engineering
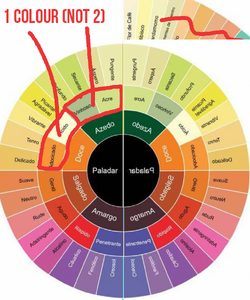
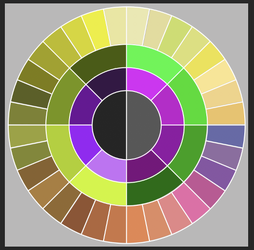
Nope, not on that circle .... but I do have one that probably calls for "scientifically-accurate engineering" or at least "some serious calculations", just not sure as to how far this is for a "Math Forum" or a "PS Forum" (as usual, with replaceable smart objects). Definitely going to tackle it, but anyway,
they specifically mentioned that the rotation point will not snap to anything when you move it
Good to know, ty :thumbsup:

1728202354471.png
 
but I do have one that probably calls for "scientifically-accurate engineering" or at least "some serious calculations", just not sure as to how far this is for a "Math Forum" or a "PS Forum" (as usual, with replaceable smart objects). Definitely going to tackle it, but anyway,
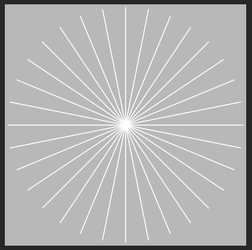
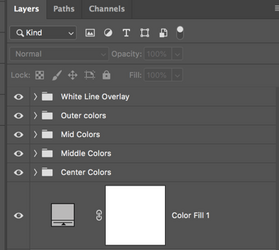
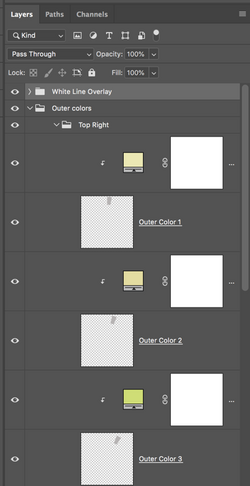
This type of graph will have to be approached differently than you would with the simple rotation of shapes using step and repeat. You will have to use the Pen Tool to make the initial sections so they will not be shape layers. Save the path and fill with a base color. The outer color ring is the most difficult (11.25º rotation), but the two inner color rings are simple 45º rotations. Smart objects can be used, but it's just as easy to use a clipping mask for each color. It's just as easily editable.

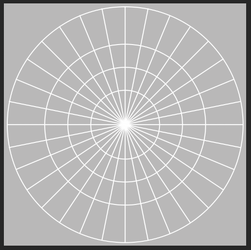
Start with the white lines.
The white lines were done using the Step and Repeat process and the Line Tool.
Screen Shot 2024-10-06 at 1.38.24 PM.png

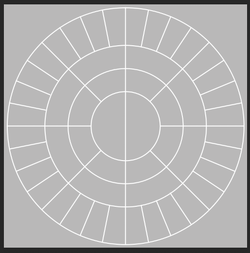
The circular lines were done using an Ellipse shape with a stroke, reduce the fill to 0.
(As seen in video)
Screen Shot 2024-10-06 at 1.38.41 PM.png

Layer mask to hide certain lines.
Screen Shot 2024-10-06 at 1.39.48 PM.png

Each color panel was created using Pen Tool and manual rotation.
Screen Shot 2024-10-06 at 1.24.26 PM.png
Screen Shot 2024-10-06 at 1.32.33 PM.png
Screen Shot 2024-10-06 at 1.53.48 PM.png
 
That is awesome ... but my question is: I can re-colour the parts but I can't put a "texture" in like as in a shape?
 
Yes, I mean maybe the mesh clothing, these "Huds" are used for, is a "thick knit" or a "lace" material, so I have to fill the "spaces" with that texture.
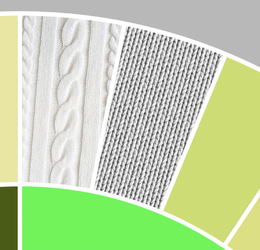
Example: I make a 3D mesh of a dress, instead of colouring the dress 40 times and packaging 40 dresses, it comes with said "Hud".
 
Yes, I mean maybe the mesh clothing, these "Huds" are used for,........it comes with said "Hud".
Please explain what a "HUD" is..........Heads up display? I've heard of gaming huds!


is a "thick knit" or a "lace" material, so I have to fill the "spaces" with that texture.
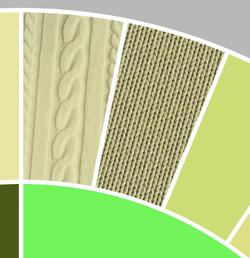
You mean something like this??

Screen Shot 2024-10-07 at 11.16.36 AM.png

With a color change?
Screen Shot 2024-10-07 at 11.16.46 AM.png

I make a 3D mesh of a dress, instead of colouring the dress 40 times and packaging 40 dresses, it comes with said "Hud".
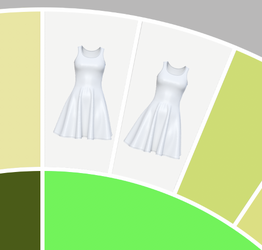
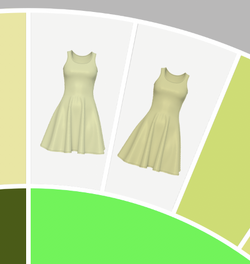
Still not sure what a hud is, but if you are making a circular graphic depicting all the color options of one fabric or a dress, this will still work fairly easy. No shape layers.

3D dress mesh...
Screen Shot 2024-10-07 at 11.43.03 AM.png

3D dress mesh with colors...
Screen Shot 2024-10-07 at 11.43.22 AM.png

It's all about knowing what you want or need. Specifics and details! There's always a solution! There may be an easier way to do what you want.
 

Back
Top