What's new
Photoshop Gurus Forum

Welcome to Photoshop Gurus forum. Register a free account today to become a member! It's completely free. Once signed in, you'll enjoy an ad-free experience and be able to participate on this site by adding your own topics and posts, as well as connect with other members through your own private inbox!

Animated Rain


Alexandria

Well-Known Member
Messages
114
Likes
8
I got this "Animated Raining Gif" for PS but I cannot seem to understand it. When i add all layers to a normal image, everything is fine but when I try to use it inbetween layers, it does not work.

On top of image = fine
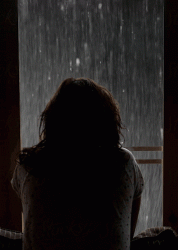
2 layers with person looking out window: I put the layers below window layer and person on above layer ... but it still rains on the entire image

Also when I resize the image, it "breaks" the animation :(

A little help please?
 
Hi @Alexandria
I am not sure it is possible to share the PSD file or not through a file sharing site yet it would be easy to debug if you could.

Without that, here are some thoughts.
- First, it sounds that you are the right path. If you have the raindrop layers below you person and window layer, I am assuming that the window area is transparent to be able to see down to the lower Layers. If not that would be one problem.

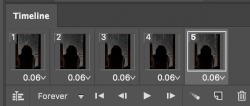
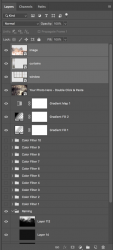
- I also assume that you are familiar with the Timeline panel and how to examine the animation frames in that panel. You should have the Layer panel open and the timeline panel open. You click on the first frame and the Layers Panel will show which Layers have the visibility icon turned on and which ones are off. You follow through each frame one by one and verify that the correct Layers are visible (turned on) for each animation frame.

I suspect if is the later frame by frame issue which may be at fault. It is easy to fix as with each frame, you just turn on/off the visibility of each Layer on a frame by frame basis.

Hope this helps
John Wheeler
 
Hey!

Still waiting to see if you could post something that might help us understand your problem. A PSD file or a GIF. At the very least a better explanation and a screenshot.

Guessing????????? (Quickly made example)
RainyDayBlues_01.gif
Screen Shot 2021-04-02 at 8.19.18 AM.png
Screen Shot 2021-04-02 at 8.22.33 AM.png
 
The rain should be on top of background but behind window (just static rain now)
portr1.jpg
This is the file for the rain:
rain1.PNG
I added the psd rain file to wetransfer for download:

PSD Rain File

Forgot to save other image as .psd but its basically 3 things: person in foreground, window behind, RAIN, backround
 
The file you posted on wetransfer is a RAR file.
Screen Shot 2021-04-02 at 7.47.36 PM.png

I can't open this.
Screen Shot 2021-04-02 at 7.49.13 PM.png

Please upload the PSD file. If you are using wetransfer, there's no need for compression.
 
Hi @Alexandria
I found your rain template on Behance and downloaded the zip file.
Included in that zip file is a PDF file given detailed step by step instructions on how to insert a background image behind the rain. I tried it out and it worked great.

In your case, you are trying to do something different that how the PSD was designed yet we can get around that.
You have 3 major pieces for your project.

1) The background which is everything that is behind the rain (building outside and landscape in distance)
2) The rain GIF goes on top of that
3) The interior with the woman and window does on top of that.

Note that #1 and #2 are taken care of totally by the template if you follow the instructions exactly. If you have trouble with those instuctions, please ask questions on the steps that don't make sense or are not working for you. If you do this part first and get it working, then we can add that last part of you project the interior #3.

Assuming that you have #1 and #2 up and running and working, then all you have to do is create Layer on top of all the other Layers of the interior with the panes of the windows made transparent either by deleting the pixels in that area yet preferably by using a Layer mask and painting black in the window pane areas to see through to you pieces #1 and #2 in the lower Layers.

Note that this template is pretty complex in its implementation so I must providing the simplest path forward to achieve your objective.

Let us know if you have continued issues in implementing your project.
John Wheeler
 
Last edited:
Per @IamSam 's request I will attach the file.
There are actually 3 files. Two of them are PSB files which are templates for rain falling slightly to the left and the other for rain falling slightly to the right.
The third file is the PDF instruction set.
The PDF file is attached directly and the PSD files are attached in each their own zip file (since this site does not support PSB files directly for attaching.
John Wheeler
 

Attachments

Hi @Alexandria
I should have also mentioned that even thought you have trouble with resizing the PSB/PSD file, I would bet that if you follow the PDF instructions which include how to save as a GIF file, you could bring the GIF file back into Photoshop and likely resize the GIF file and then resave through Save for Web as GIF again.
Some of the approaches used in the PSB/PSD file apparently do break when you try and resize directly.
Give this a try and see if it works for you.
John Wheeler
 
Your welcome @IamSam
I must admit thought some of the techniques used in the template were for now, a bit beyond my knowledge of how to extract the exact technique.
I believe it was using keyframe changes in the Layer Style of one Layer as opposed to the very obvious technique of having animation done frame by frame associated with different Layers.
So I did not pursue reverse engineering the GIF technique and just stuck with how to use it to achieve the OPs objective.
John Wheeler
 
Yeah.........As you stated, it works well but this may take me some time to unravel. It's very convoluted.

I believe it was using keyframe changes in the Layer Style of one Layer as opposed to the very obvious technique of having animation done frame by frame associated with different Layers.
I've used this technique in rotating GIF's so I'm familiar with the concept.
 
Back to square 1 .. if I take the plain rain.psd and place an image and save, everything is fine. As soon as I place it, in my case, between WINDOW and CURTAINS layer and only add the background in "place image" part, doesn't work. I do exactly what the how_to says :S
PSD of Image
 
OK...........the PSD image you posted in the above in post #13 is just your image that you need to add to the Rain Right/Left PSB files. Just follow the instructions and this works great.

Rain-RightGirl.gif
Rain-LeftGirl.gif

Back to square 1 .. if I take the plain rain.psd and place an image and save, everything is fine.
OK

As soon as I place it, in my case, between WINDOW and CURTAINS layer and only add the background in "place image" part, doesn't work.
This is the part were I see you getting confused. You have to only add the BG to the PSB smart object. Then you add in the window, curtains, and the girl to the layers panel. Then you have to click on each frame and add the window, curtains, and the girl in the layers panel. Each frame must correspond with the layers otherwise they won't show up.

Now the rain only appears outside the window and infront of the BG!
Rain-Left.gif

Screen Shot 2021-04-03 at 8.41.53 AM.png
 
And to show the enlargement problem can be worked, I just opened @IamSam's GIF file in PS, enlarged by 200% with Image > Image Size and then Saved for Web as GIF and posted it below.
John Wheeler

Rain-Left-2x-enlarged.gif
 
This is the part were I see you getting confused. You have to only add the BG to the PSB smart object. Then you add in the window, curtains, and the girl to the layers panel.

I understood this and got that far but after that o_O ... do you add above every layer like this:
ra.PNG
Rain-Left.gif
 
Last edited:
And to show the enlargement problem can be worked, I just opened @IamSam's GIF file in PS, enlarged by 200% with Image > Image Size and then Saved for Web as GIF and posted it below.

For these specific images, I always use 3000px x 1556px ... can I just resize the rain.psd to be that size too?
 
do you add above every layer like this:
No. DO NOT duplicate the window layer, curtains layer, and the girl image layer!

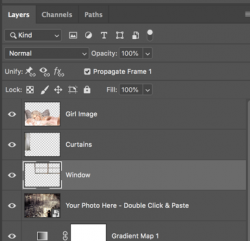
You have to click on each frame in the timeline. Note that the window, curtains, and the girl only appear in the first frame.
Screen Shot 2021-04-03 at 5.42.47 PM.png

You will see that when you have the first frame selected, the window layer, curtains layer, and the girl image layer are active (turned on) (the little eye)!
Screen Shot 2021-04-03 at 5.44.49 PM.png

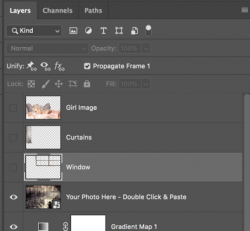
Click on the second frame.....
Screen Shot 2021-04-03 at 5.45.37 PM.png

And the the window layer, curtains layer, and the girl image layer are not active/turned on.
Screen Shot 2021-04-03 at 5.46.55 PM.png

So..............activate/turn on the window layer, curtains layer, and the girl image layer in the layers panel and those layers will be added to that frame (#2) in the timeline....
Screen Shot 2021-04-03 at 5.48.21 PM.png

Repeat this process until all the frames have the window layer, curtains layer, and the girl image layers activated/turned on. As I have previously stated, each frame must correspond with the layers otherwise they won't show up.
 
OK...........here's how I'm resizing.

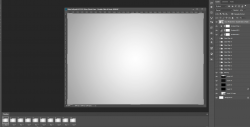
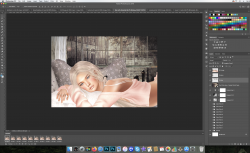
The PSB file (Rain Left.psb) is open. Here I have made my modifications by adding the background/lights to the smart object layer, and then the window layer, curtains layer, and the girl image layers. Full size 3000px x 2000px.

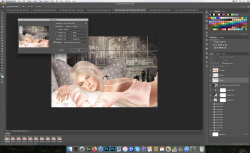
Screen Shot 2021-04-03 at 6.08.36 PM copy.png

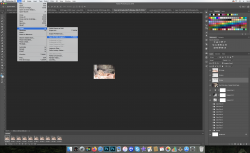
Now I use image size to reduce the size of the canvas to 600px x 400px.
Screen Shot 2021-04-03 at 6.13.58 PM copy.png

Then I save for the web as a GIF. This creates a GIF file that is 600px x 400px.
Screen Shot 2021-04-03 at 6.15.59 PM copy.png

I would not "SAVE" changes to the original PSB file!!!!! I would "SAVE AS" and rename this altered PSB file!! This will create a new PSB and you always have the original PSB file to return to if needed.
 

Back
Top