What's new
Photoshop Gurus Forum

Welcome to Photoshop Gurus forum. Register a free account today to become a member! It's completely free. Once signed in, you'll enjoy an ad-free experience and be able to participate on this site by adding your own topics and posts, as well as connect with other members through your own private inbox!

Advice for a beginner


montyonthebonty

New Member
Messages
4
Likes
0
Hi everybody

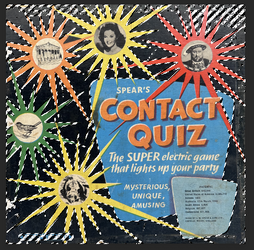
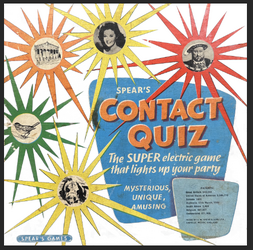
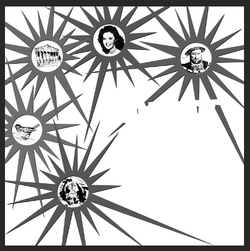
I'm making a gift for my mum for Christmas and I'm laser cutting/engraving a wooden box as part of it. What I want to do is make a picture more engraver-friendly. Get rid of the black background, tidy up some of the scratches, sharpen some of the text, that kind of thing. Ultimately it's going to be monochrome, so I'm not too bothered about the colours, I just need enough contrast for them to stand out in grayscale.

First, is illustrator or photoshop better for this? I'm not really sure why there are two packages, other than I'm guessing one is more for making and one more for editing.

Second, any idea what kind of tools I need to be using? I'm happy to spend a bit of time going on YouTube and looking at tutorials, but a starting point would be helpful. For example, I've tried the dust and scratches remover, but for it to be strong enough to get rid of the scratches, it starts to remove the text!

Any advice would be greatly appreciated - photo attached
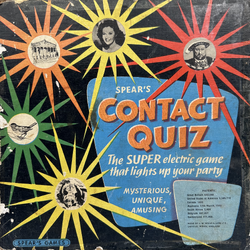
IMG_2220.png
 
Hello and welcome to to the forum!!!

First, is illustrator or photoshop better for this? I'm not really sure why there are two packages, other than I'm guessing one is more for making and one more for editing.
Correct. Photoshop is better suited for this chore.

Second, any idea what kind of tools I need to be using?
This depends on what you're doing.............where do you want to start? I would start with the removal of the black background.
 
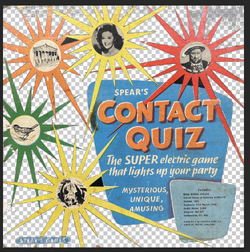
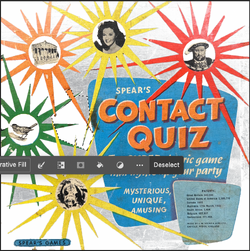
You can start with "Color Range" and the Quick Selection Tool (+ or -) to make your initial selection.

Screen Shot 2024-09-05 at 12.46.44 PM.png

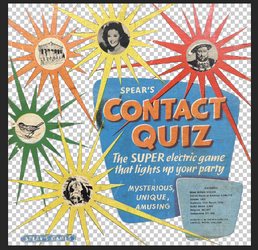
Then use a layer mask to remove the black BG. We use a layer mask because we can adjust it.
Screen Shot 2024-09-05 at 12.46.59 PM.png

On the layer mask, use the Brush Tool, The Pen Tool, or the Polygonal Lasso Tool to clean up the rest of the BG.
Screen Shot 2024-09-05 at 1.14.38 PM.png
Screen Shot 2024-09-05 at 1.15.56 PM.png

NOTE: I'm just making suggestions without going into deep step by step explanations........you stated you would "look them up" on YT. Let me know if I need to explain in more detail.
 
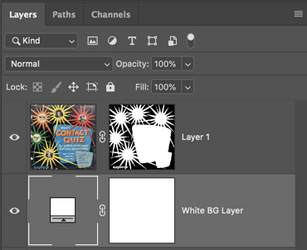
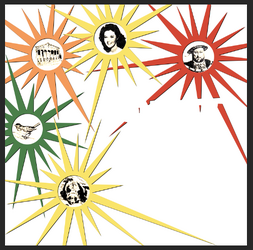
You can add a white BG layer to see if you missed anything!!
Screen Shot 2024-09-05 at 1.17.57 PM.png
Screen Shot 2024-09-05 at 1.18.12 PM.png
 
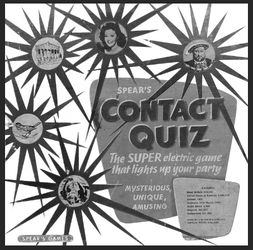
Just letting you know that it's a process getting to the monochrome image you say you need. You still need to clean up the image!

This is not there yet!
Screen Shot 2024-09-05 at 2.00.38 PM.png
 
I have a question. For the engraving aspect, are the different colors interpreted as varying shades of black/grey? Would this affect the overlapping effect of the starburst arms? Or does it just need to be a solid contrast?

Screen Shot 2024-09-05 at 3.00.16 PM.png
 
Good morning

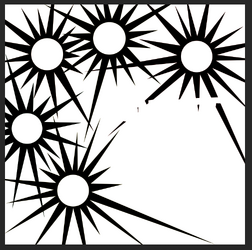
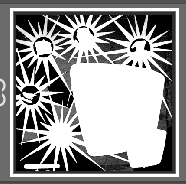
As suggested by one user (although for some reason their replies seem to have been deleted from this thread), I've used a combination of 'Select colour range', 'Quick Select' and 'Layer Mask' to get rid of most of the black background, but it's produced some odd results.

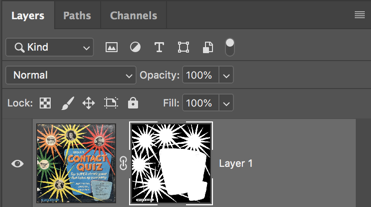
As shown in the ecreenshots, some of the layer mask has only partly obscured the background (shown on the layer mask thumbnail as grey). Any ideas what I might have done to cause this?

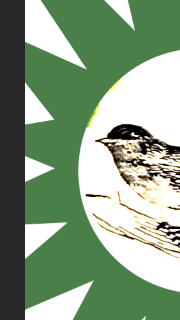
One other thing is that the green starburst on the left is missing, is there an easy way to draw the missing chunk of using straight lines and roughly matching the adjacent texture?

Thanks
Chris

Screenshot 2024-09-06 at 09.06.27.png

Screenshot 2024-09-06 at 09.06.42.png
 
As shown in the ecreenshots, some of the layer mask has only partly obscured the background (shown on the layer mask thumbnail as grey). Any ideas what I might have done to cause this?
Yes.........this means that the layer masks are not solid. You can use shades of grey on a layer mask which affects it's transparency. They need to be a solid black or a solid white for this background.
 
One other thing is that the green starburst on the left is missing, is there an easy way to draw the missing chunk of using straight lines and roughly matching the adjacent texture?
This can be done with the Pen Tool. It's just a matter of creating a selection and filling in the color. But that's for your next step. Right now, you need to concentrate on the BG removal.

Screen Shot 2024-09-06 at 3.20.05 AM.png
 
Sorry.............not sure how I managed that! I will fix it!

No need to apologise - I'm grateful for the help - and enjoying the process of learning.

The engraving does work with shades and although it will end up greyscale (I believe if you are working with metal you can actually use heat to give different colours!), the picture I engrave doesn't need to be greyscale - just different enough, as though printing a colour image on a B/W laser printer.

I'd like to see the stars overlap, but the contrast doesn't have to be that big - it's just to give the lid a bit of character. In my head, there are starbursts which visibly if not clearly overlap and the black and white drawings in the centre will engrave quite nicely. I've just done a quick search on using multiple layer masks and groups so I can do a separate selection to make the blue boxes white and the text black, but not sure how best to retain the outline of the blue boxes.

Hope this makes sense.

Thanks
Chris
 
Yes.........this means that the layer masks are not solid. You can use shades of grey on a layer mask which affects it's transparency. They need to be a solid black or a solid white for this background.

This is interesting because I did it all as one selection - is there a setting somewhere I may have changed half way through? Or is it likely that I did a shade of grey all the way through and some colours were just a stronger match than others?

Also, when I'd done the quick select, then created the layer mask, is there a way to add or subtract to it without deleting the layer mask, editing the selection and recreating it? I couldn't see one, but I am very new to this!
 
The engraving does work with shades and although it will end up greyscale (I believe if you are working with metal you can actually use heat to give different colours!), the picture I engrave doesn't need to be greyscale - just different enough, as though printing a colour image on a B/W laser printer.
OK.....well I have a solution for this when the time comes. But we can also leave it in color.
Screen Shot 2024-09-06 at 3.38.36 AM.png

Using a Black & White adjustment layer, we can change the shades of grey so that they might appear overlapped when engraved.
Screen Shot 2024-09-06 at 3.34.44 AM.png

This is interesting because I did it all as one selection - is there a setting somewhere I may have changed half way through? Or is it likely that I did a shade of grey all the way through and some colours were just a stronger match than others?
The tool selects similar pixels. If they were weak or light in the original then they may appear as shades of grey in and after the selection is converted to a layer mask.

Also, when I'd done the quick select, then created the layer mask, is there a way to add or subtract to it without deleting the layer mask, editing the selection and recreating it? I couldn't see one, but I am very new to this!
Yes. You select the layer mask and use any of the tools to add or subtract............black and white. Try the Brush Tool to start off with.


Back
Top