What's new
Photoshop Gurus Forum

Welcome to Photoshop Gurus forum. Register a free account today to become a member! It's completely free. Once signed in, you'll enjoy an ad-free experience and be able to participate on this site by adding your own topics and posts, as well as connect with other members through your own private inbox!

Workflow to get this look


JuJitsoup

New Member
Messages
3
Likes
0
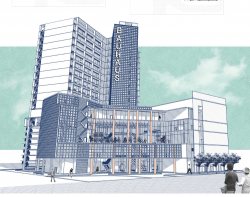
I'm trying to get this look for a presentation board I'm producing. I'm a long time SketchUp, AutoCAD, Revit and Enscape/Twin Motion user so creating the raw geometry and shadows is no problem, but my experience of PS is limited, but growing. I'm hoping someone could give me an idea of what the workflow sequence would be to get this final look across the board.

Thanks.

2021-05-14 09_38_15-Photos.png
 
I'm hoping someone could give me an idea of what the workflow sequence would be to get this final look across the board.
This would depend on what your referring to..............please explain, in detail, which look you are asking about. There are multiple elements in both of your examples each requiring different techniques. It could help if you show a starting and a finished image for comparison.

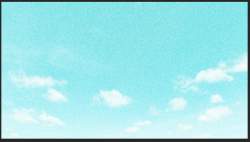
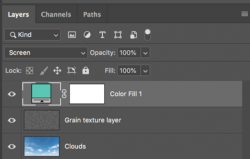
For example: In the first image, the green background is just a simple image with a filter and a layer mask. This is accomplished by adding an image layer below the structure layer. Adding either a filter effect or a grain texture. A Solid color adjustment layer with a "screen" blending mode that's clipped to the image and a rectangular selection converted to a layer mask.

Screen Shot 2021-05-14 at 8.17.43 AM.png
Screen Shot 2021-05-14 at 8.17.58 AM.png
 
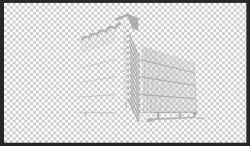
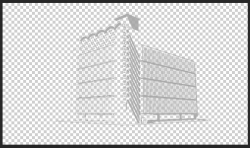
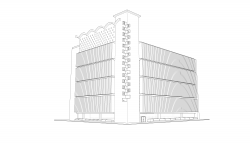
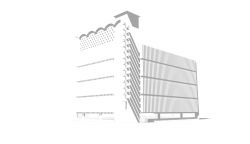
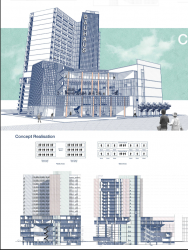
Hi Sam, thanks for the info. I was referring to the Bauhaus building at the top and attached as the style I'm trying to duplicate. I can generate the raw building geometry (linework) and shadows separately in SketchUp as shown below. It’s how I take these and then create the style and finish of the Bauhaus building drawing is what I’m trying to get a handle on.

B1B30C08-72DA-4635-98AE-160052B33E40.png

981F1EC4-F5F9-430E-8FB9-752C3B1AA898.png

DB65649A-F4FC-4AE5-8A40-9A695273197A.png
 
Last edited:
This would depend on what your referring to..............please explain, in detail, which look you are asking about. There are multiple elements in both of your examples each requiring different techniques
Please take the time to answer this question.

There are far too many elements involved so you need to be much more specific.

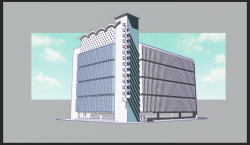
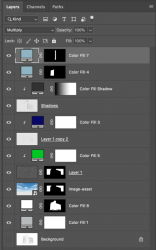
Here's a few I added to your second example.
Screen Shot 2021-05-15 at 5.50.54 PM.png

You can see that it's fairly involved.
Screen Shot 2021-05-15 at 5.51.03 PM.png

You really need to help us out by being very specific. We may have to describe each element in full before moving to the next.
 
Sam, thanks again, very much appreciated. This Is precisely the look I was trying to achieve using the linework and shadows drawings as a starting point. What I’m trying to find out is exactly all the workflow processes you went through to get to that final image using the images I posted. You say that the process is quite involved. What would you suggest is the best way for me to learn the steps in the process?
 
Sam, thanks again, very much appreciated.
You're very welcome.
This Is precisely the look I was trying to achieve using the linework and shadows drawings as a starting point.
I realize that this is the look you're going for!
What I’m trying to find out is exactly all the workflow processes you went through to get to that final image using the images I posted.
Yes I do understand this and I would like to help you out!
You say that the process is quite involved.
The process is quite easy if you know what to do, but it is very involved and can be frustrating for someone with limited knowledge of Ps techniques and procedures.
What would you suggest is the best way for me to learn the steps in the process?
By starting with one element of the process at a time. By learning the Ps procedures for accomplishing the one (singular and not overall) effect at a time.

The first step is to place the two line work images into Ps as layers.
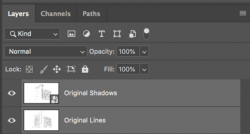
Screen Shot 2021-05-16 at 9.36.29 AM.png

It would really help if you could save the line work without the white background. But since this was not done here in your examples, we have to remove the white backgrounds from the two layers.
Linework
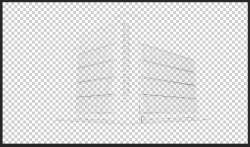
Screen Shot 2021-05-16 at 9.41.39 AM.png
Shadows
Screen Shot 2021-05-16 at 9.41.26 AM.png
Combined
Screen Shot 2021-05-16 at 9.42.09 AM.png

While there are many techniques for removing white backgrounds, here is the simple technique and steps I followed:
1. Duplicate originals (Cmd/Cntrl + J). Group originals and turn off.
2. Select linework layer. Double click the layer body to open a layer style. Under "Blending Options", use the "this layer" of the "Blend if" sliders in the layer style to remove the white background.
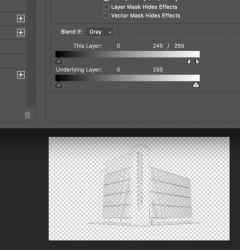
3. Select shadows layer. Double click the layer body to open a layer style. Under the "Blending Options", use the "this layer" of the "Blend if" sliders in the layer style to remove the white background.

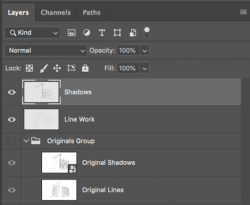
Screen Shot 2021-05-16 at 9.47.00 AM.png
Screen Shot 2021-05-16 at 10.15.31 AM.png

This is a TUTORIAL showing the process.

This is a great TUTORIAL explaining how "Blend If" works!!

Hopefully you can now see why I state that this is an easy process but is very involved. It takes some work. Post screenshots of your progress on this first step when your done!!
 

Back
Top