What's new
Photoshop Gurus Forum

Welcome to Photoshop Gurus forum. Register a free account today to become a member! It's completely free. Once signed in, you'll enjoy an ad-free experience and be able to participate on this site by adding your own topics and posts, as well as connect with other members through your own private inbox!

Very difficult cut out


Pipapou

Member
Messages
7
Likes
1
Hello there,

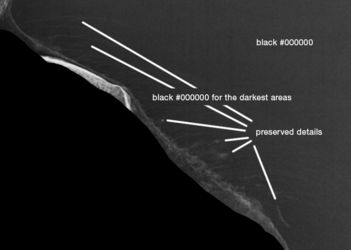
I'd like to do the least destructive cut out possible for the following picture (black and white, low quality and low contrast).
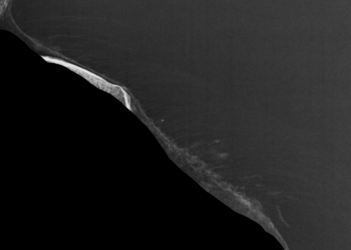
TEST 02.png

And here is the result in words.

TEST 01.png

How would you do it to get a smooth, clean and sharp result? I'm more interested in the process (step by step) than the result.

I have a pen tablet and good knowledge of Photoshop (I know how to use all the main tools and layer masks, etc.).

Thank you very much :)
 
Last edited:
détourage = clipping

Are you referring to a clipping mask? Or a masking process of some type? Maybe a selection process?

Can you provide a sample image and describe what you want to do? (something other than the image above?)
 
I'm having a hard time getting this user to post back in this thread................here is their PM response.

Hey, sure!

Yes, I guess it is a masking process or a selection process.
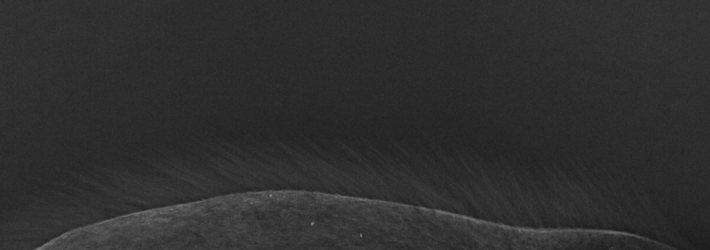
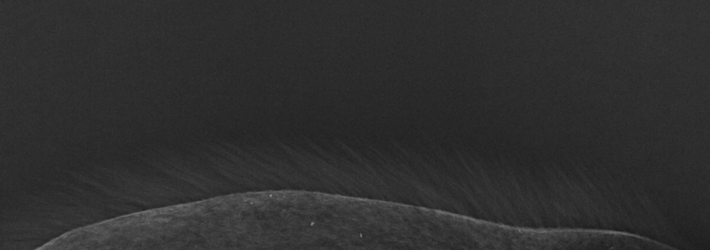
Here is another sample image:

WUB03ji.png

Let say there are 3 parts in this picture: 1. is the grainy dark grey on the top, 2. is the spikes and 3. is the textured low part. I would like to get the 1. as a #000000 background with a good transition to the spikes. 3 stays as it is. It's quite the same with the previous image.
 
Yes, I guess it is a masking process or a selection process.

Here is a sample image:

TEST 04.png
Let say there are 3 parts in this picture: 1. is the grainy dark grey on the top, 2. is the spikes and 3. is the textured low part. I would like to get the 1. as a #000000 background
 
This is what I understood about the requirement:
From the given top image in the Opening Post, the white serrations/cracks/cut marks need to be selected and the rest of the image has to be masked out to black - Non destructively.
 
This is what I understood about the requirement:
From the given top image in the Opening Post, the white serrations/cracks/cut marks need to be selected and the rest of the image has to be masked out to black - Non destructively.

I agree. There is a lot of cloudy background noise that is nearly the same luminosity as the wispy serrations that the OP wants to keep. The goal is to eliminate the background noise—change it to pure black—while keeping the serrations. Off the top of my head, this may require several Levels adjustments, each masked to its own little section of the image.
 
This is exactly it! Thank you for clarifying my thought. So, how would you do that? :)

Sorry, I can't do it. The areas you want to keep are too similar to the background noise you want to eliminate. I can't do anything better than what you've already posted above. Maybe somebody else will jump in.
 
Hi @Pipapou

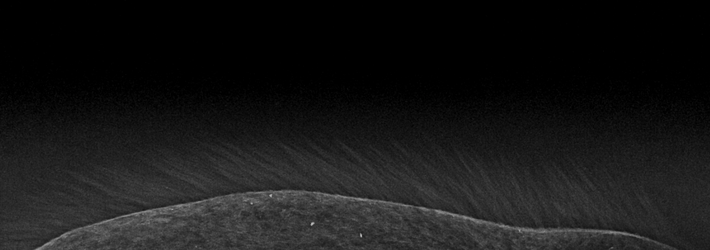
Here is my try.
I did convert the image to 16 bit depth though I am not sure that made any difference. We are working with a very narrow range of gray which leads to posterization and difficult to make adjustments to achieve the result.
I turned the image into Smart Object and then applied just the Camera Raw Filter.
For the whole image I increase clarity and texture
Then I drew a linear gradient from the tip edge to the boundary just at the bottom of the "hairs". I did it in three pieces to better match the curvature of the image. Then I mostly turned down the Black point to get to 0,0,0, as I approached the top edge and adjusted the contrast slightly.
There is still noise left yet you can adjust that with the detail section in the Camera Raw Filter as well.
From here, it is also pretty easy to increase the luminosity of the lower two sections at this point as well if desired
Hope this gives you some additional ideas.
John Wheeler


WUB03ji-adj.png
 

Back
Top