Photoshop Gurus Forum
Welcome to Photoshop Gurus forum. Register a free account today to become a member! It's completely free. Once signed in, you'll enjoy an ad-free experience and be able to participate on this site by adding your own topics and posts, as well as connect with other members through your own private inbox!
You are using an out of date browser. It may not display this or other websites correctly.
You should upgrade or use an alternative browser.
You should upgrade or use an alternative browser.
Using brush to fill empty shapes
- Thread starter Ludo29200
- Start date
thebestcpu
Guru
- Messages
- 3,211
- Likes
- 2,960
Hi Ludo20200
You did not mention if your shape had a fill (e.g. white) or not. If it does, here is how you could proceed.
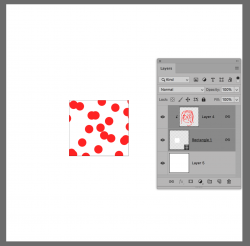
- Add a Layer above the shape Layer and right click on the Layer in the Layer Panel (not on the thumbnail image) and chose "Create Clipping Mask"
- You can now paint on that new Layer and it will only paint within the bounds of the shape.
- If you want to be able to move the shape and the dots or brush marks in the clipped Layer to move with it, select both Layers in the Layer Panel and choose Link Layers
Hope this gives you a direction to consider
John Wheeler

- Messages
- 23,889
- Likes
- 13,633
Yes. Depends on what you are wanting. You may need to offer more of an explanation.I would like to fill shapes with brushes is it possible and how?
Example i would like to make squares filled by dots brushes
Squares... OK
Squares filled with dots....OK
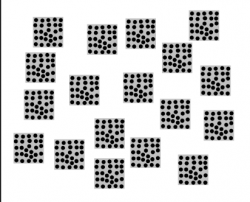
Brushes?????? Like this?
A brush preset consisting of a square filled with dots???
Great thanks a lot i will try thatHi Ludo20200
You did not mention if your shape had a fill (e.g. white) or not. If it does, here is how you could proceed.
- Add a Layer above the shape Layer and right click on the Layer in the Layer Panel (not on the thumbnail image) and chose "Create Clipping Mask"
- You can now paint on that new Layer and it will only paint within the bounds of the shape.
- If you want to be able to move the shape and the dots or brush marks in the clipped Layer to move with it, select both Layers in the Layer Panel and choose Link Layers
Hope this gives you a direction to consider
John Wheeler
View attachment 115472
- Messages
- 23,889
- Likes
- 13,633
There are many different ways to accomplish things in Ps. You mention shapes. What kind of shapes are you referring to??? Can you show a screenshot? Are you actually using square shapes filled with "dots" made with the Brush Tool or was this just your "example"?
Because if you are using an actual shape created with a shape tool, there would be other options such as pattern fill.
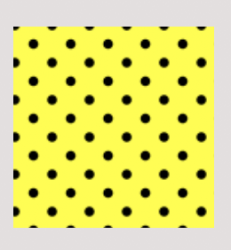
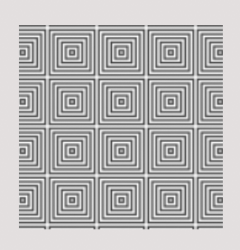
Because if you are using an actual shape created with a shape tool, there would be other options such as pattern fill.


Hi,
In fact i m making shapes (squares) with the shapes tool and tried to find pattern like i which to fill them but none satisfied me. So i found nice brushes to do it.
I tried to make a square with shape tools and made a Clipping Mask and then it works.
Thanks a lot
In fact i m making shapes (squares) with the shapes tool and tried to find pattern like i which to fill them but none satisfied me. So i found nice brushes to do it.
I tried to make a square with shape tools and made a Clipping Mask and then it works.
Thanks a lot
Hi Ludo20200
You did not mention if your shape had a fill (e.g. white) or not. If it does, here is how you could proceed.
- Add a Layer above the shape Layer and right click on the Layer in the Layer Panel (not on the thumbnail image) and chose "Create Clipping Mask"
- You can now paint on that new Layer and it will only paint within the bounds of the shape.
- If you want to be able to move the shape and the dots or brush marks in the clipped Layer to move with it, select both Layers in the Layer Panel and choose Link Layers
Hope this gives you a direction to consider
John Wheeler
View attachment 115472
Many thanks, i tried your method and it works fine for filled shapes (when creating them for example filled white). But when shapes are empty (transparent filled) it s not working.
My goal would be to have shapes filled with brushes but keeping transparent.
Best regards
Hi found a solution, probably not the best one but it works:
1 – Create a shape filled white
2- Create a layer under the form layer and using a brush (black color)
3- Create Clipping Mask Shape layer
4- Specify the Brush layer under the form layer to subtraction mode
1 – Create a shape filled white
2- Create a layer under the form layer and using a brush (black color)
3- Create Clipping Mask Shape layer
4- Specify the Brush layer under the form layer to subtraction mode
Attachments
thebestcpu
Guru
- Messages
- 3,211
- Likes
- 2,960
Thanks for sharing your solution
John Wheeler
John Wheeler
- Messages
- 23,889
- Likes
- 13,633
Now that I have had a chance to see what it is that you're trying to do, I see there is an easier way. I love clipping masks but sometimes they are not the best choice. Layer masks are not as editable, but in some cases (like this) it's not an issue.
I make this post so that anyone who may search this subject in the future will see options.
When removing the red background, we can see that this is a complete mess.
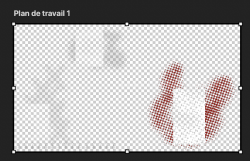
Even on a neutral background, we can see that the "effect" is not contained.
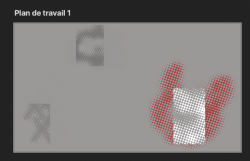

Here's how it looks just using simple layer masking.
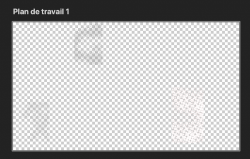
With a neutral background.
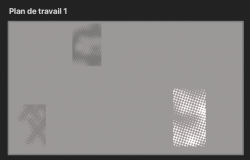
Sometimes it's easier to keep things simple. Just my 2 cents.
You can use clipping masks with the "blend if" option. Works on all colors of rectangle shapes except white. More on that later.
I make this post so that anyone who may search this subject in the future will see options.
When removing the red background, we can see that this is a complete mess.

Even on a neutral background, we can see that the "effect" is not contained.


Here's how it looks just using simple layer masking.

With a neutral background.

Sometimes it's easier to keep things simple. Just my 2 cents.
You can use clipping masks with the "blend if" option. Works on all colors of rectangle shapes except white. More on that later.
Now that I have had a chance to see what it is that you're trying to do, I see there is an easier way. I love clipping masks but sometimes they are not the best choice. Layer masks are not as editable, but in some cases (like this) it's not an issue.
I make this post so that anyone who may search this subject in the future will see options.
When removing the red background, we can see that this is a complete mess.
View attachment 115483
Even on a neutral background, we can see that the "effect" is not contained.
View attachment 115487
View attachment 115484
Here's how it looks just using simple layer masking.
View attachment 115485
With a neutral background.
View attachment 115486
Sometimes it's easier to keep things simple. Just my 2 cents.
You can use clipping masks with the "blend if" option. Works on all colors of rectangle shapes except white. More on that later.
VERY NICE
THANKS A LOT
thebestcpu
Guru
- Messages
- 3,211
- Likes
- 2,960
Hi Ludo29200
I agree with IamSam after I looked at the PSD file as well.
I also noticed that your approach using the shapes in the upper clipping position did not actually isolate the effects to the shapes edges if you look carefully
An parallel alternative to what IamSam showed is to just turn the shapes in to Vector masks which preserves the sharp shape edges. I used your PSD and turned all the extra Layers into the three Layers. Similar to IamSam's approach, the brush patterns are isolated to just the area of the vector shape and then you can choose which colors and blends and opacity to use with the pixels of that Layer. I consolidated your image for those shapes down to three Layers showing the resulting image below and also include the PSD file for your perusal.
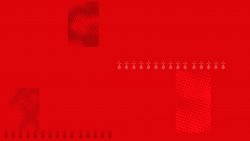

Attachments
syrupfizzy
Member
- Messages
- 17
- Likes
- 4
Thanks for the tips from this post, need this for a project. 
