Photoshop Gurus Forum
Welcome to Photoshop Gurus forum. Register a free account today to become a member! It's completely free. Once signed in, you'll enjoy an ad-free experience and be able to participate on this site by adding your own topics and posts, as well as connect with other members through your own private inbox!
You are using an out of date browser. It may not display this or other websites correctly.
You should upgrade or use an alternative browser.
You should upgrade or use an alternative browser.
MrToM
Guru
- Messages
- 3,595
- Likes
- 3,322
The logo is an embedded AI file so why not just use that?
There seems little point in the 3D effect if viewed 'face on' anyway.....so you could even just type the copyright symbol and the word 'cutout' if that's what you want.....and add an inner shadow if needs be.
Not sure what your ultimate goal is here but it does appear to be using a sledgehammer to crack a nut.
Regards.
MrToM.
MrToM
Guru
- Messages
- 3,595
- Likes
- 3,322
...Any suggestions to make these images 2D?...
All images are 2D.
You'll have to be more specific with relevant details on what you mean.
Regards.
MrToM.
MrToM
Guru
- Messages
- 3,595
- Likes
- 3,322
Like I said, the '2D' image as you call it will be embedded in the smart objects that make up the image you see.
Open the smart objects and all will be revealed. (Double click it....you'll get a PSB file open)
You can then do with it what you want....re-create a smart object 'face on' if you wish.
If you're asking if the transforms can be removed from those smart objects then no, they cannot.
Scale can be re-adjusted but that's all.
You can apply further transforms to the final image to straighten it but that's probably a 'last resort' tactic.
Regards.
MrToM.
MrToM
Guru
- Messages
- 3,595
- Likes
- 3,322
OK...I've looked at that other 'example' and although its reverse engineering a complex image for a simple effect and could be done far more simply....try this:
1. Double click the 'Your Logo Here' layer.
2. Save that PSB file as a PSD file......lets say as 'Logo.PSD' for sake of argument.
3. Open the 'Effects' group.
4. Open the 'Logo 3' group.
5. Notice that the same image appears once more in each of these groups.....select any of them....notice that the 'FILL' for each of these images is ZERO.
6. Open the file you saved earlier.....'Logo.PSD'.
7. DRAG that image into the working document.
8. POSITION this new layer ABOVE the first 'logo' image in the stack.
9. Duplicate it (CTRL + J) twice.
10. Position a copy above both the other two 'logo' images.
11. Clear any existing 'fx' or blending options from each of the original layers then HOLD ALT and drag both the 'fx' and 'blending options' from each of the original layers to their respective copy above them. (ALT + CLICK & DRAG the two small icons on the right of the layer.)
12. Set the FILL to ZERO for each of these copies.
13. Turn off the original three 'logo' images.
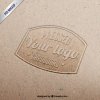
14. You should now have this:


Regards.
MrToM.
1. Double click the 'Your Logo Here' layer.
2. Save that PSB file as a PSD file......lets say as 'Logo.PSD' for sake of argument.
3. Open the 'Effects' group.
4. Open the 'Logo 3' group.
5. Notice that the same image appears once more in each of these groups.....select any of them....notice that the 'FILL' for each of these images is ZERO.
6. Open the file you saved earlier.....'Logo.PSD'.
7. DRAG that image into the working document.
8. POSITION this new layer ABOVE the first 'logo' image in the stack.
9. Duplicate it (CTRL + J) twice.
10. Position a copy above both the other two 'logo' images.
11. Clear any existing 'fx' or blending options from each of the original layers then HOLD ALT and drag both the 'fx' and 'blending options' from each of the original layers to their respective copy above them. (ALT + CLICK & DRAG the two small icons on the right of the layer.)
12. Set the FILL to ZERO for each of these copies.
13. Turn off the original three 'logo' images.
14. You should now have this:

Regards.
MrToM.
Last edited:


