What's new
Photoshop Gurus Forum

Welcome to Photoshop Gurus forum. Register a free account today to become a member! It's completely free. Once signed in, you'll enjoy an ad-free experience and be able to participate on this site by adding your own topics and posts, as well as connect with other members through your own private inbox!

Trying to recreate this type of collage effect


ocp

New Member
Messages
4
Likes
0
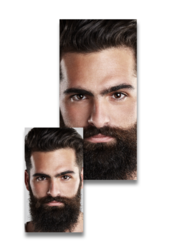
Im looking to recreate this type of photo collage effect.


I managed to create a basis for the design to attempt it, but it shows up as 1 single image.


But Im at a complete loss as to what to do next, this is the result Im trying to get, from the image you can see placing the image in the top part, auto places the image into the lower framed section.


Im looking to get each layer to have it's own section of the image. Im a PS newbie and Im just not sure how to get each layer to represent it's own portion of the image. I should point out that Im looking to create a template. So Im not looking to add each image separately but add one image so it applies to all layers. Iv tried playing around with layer 9, the image layer, as a smart object and clipping mask, just not sure if that's even the right thing to do. Looking for advice. I can upload the PSD of what I have for now but a detailed process of what I need to do would be awesome. Thanks
 
Hello and welcome to PSG.

Sorry, I made my previous post before reading to the end.

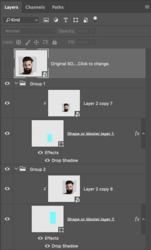
OK, just so I unserstand, you want to use the SO layer (at the top) that you named "right click edit contents" to change all the other images in the layers below? Right?

Did you make one smart object layer of the model and then duplicate them as you used them in all the other layers?
 
OK, just so I unserstand, you want to use the SO layer (at the top) that you named "right click edit contents" to change all the other images in the layers below? Right?

Did you make one smart object layer of the model and then duplicate them as you used them in all the other layers?
 
If you just copied each layer and then converted them to a SO as you used them, they won't be connected. They will be individual SO's. You have to convert one image to a SO layer and duplicate it, then the duplicates will all be connected.
 
Hello and welcome to PSG.

Sorry, I made my previous post before reading to the end.

OK, just so I unserstand, you want to use the SO layer (at the top) that you named "right click edit contents" to change all the other images in the layers below? Right?

Did you make one smart object layer of the model and then duplicate them as you used them in all the other layers?


The example with the "right click edit contents" is not mine, so Im not exactly sure how they were able to link that layer to the lower ones. But yes I am looking to recreate that process where the single image affects the lower layers.

As for the layers in my recreation, I made each sep layer then made them into smart objects. Would I be better suited to make one and dup it? Thanks
 
If you just copied each layer and then converted them to a SO as you used them, they won't be connected. They will be individual SO's. You have to convert one image to a SO layer and duplicate it, then the duplicates will all be connected.


Excuse my ignorance, very new to PS but what does SO mean? Im an idiot, smart object,duh

I actually created the overall design in corel draw and exported as a PSD file, then went in and made them. Ill try to redo it with duping it that way.
 
OK, I think I'm just now beginning to see what your needing. So my first post was relevant.

In the original and second example, notice that each of the model layers are a different size and position.

When making yours, open one image of the "model" you want to use and convert it to a smart object. Then make duplicates to use for the rest of the clipped layers. When your done, you will double click the original "model" you converted to a SO (or any of the duplicates for that matter) to make a subject change, when you save, all the duplicated (linked) SO's will change as well.

Once you have all of your "model" SO layers clipped to their shape layers (you call them master layers) then you need to use Free Transform on each one to resize and re-position them.
 
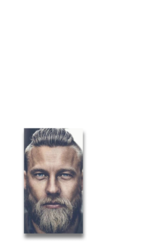
Here I have my original image that I have converted to a SO and duplicated twice for this example.

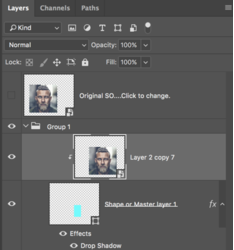
I created two shapes and placed them in their own separate groups with one of the duplicate SO images.

Here's one.
I Used the Move Tool to position the image and Free Transform (Cmd/Cntrl + T) to make it the size I want.
Screen Shot 2017-12-18 at 7.49.23 PM.png

Screen Shot 2017-12-18 at 7.47.04 PM.png

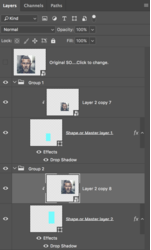
Then I repeated the process for the next group of layers.
Screen Shot 2017-12-18 at 7.49.53 PM.png

Screen Shot 2017-12-18 at 7.49.41 PM.png

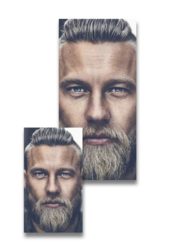
Now.........when I update the Original SO, it changes the other two proportionately.
Screen Shot 2017-12-18 at 7.56.41 PM.png

Screen Shot 2017-12-18 at 7.56.50 PM.png
 
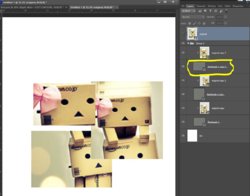
That worked,

6.JPG


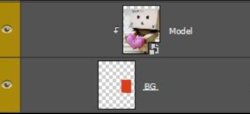
1 last thing, when I create the shapes, it gives me as shown above circled in yellow, how do I get shape layer like the following

7.JPG


Thanks again for your help on this
 
No problem..........

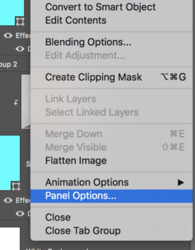
Click on the fly out menu located on the top right hand side of the layers panel.
Screen Shot 2017-12-18 at 10.41.06 PM copy.png

From the menu......choose "Panel Options".
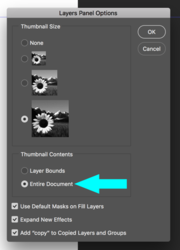
Screen Shot 2017-12-18 at 10.42.27 PM.png

Under "Thumbnail Contents"......choose "Entire Document"
Hit OK.
Screen Shot 2017-12-18 at 10.42.51 PM copy.png

That should do the trick.
 

Back
Top