What's new
Photoshop Gurus Forum

Welcome to Photoshop Gurus forum. Register a free account today to become a member! It's completely free. Once signed in, you'll enjoy an ad-free experience and be able to participate on this site by adding your own topics and posts, as well as connect with other members through your own private inbox!

Trying to recreate an effect


weemac29

Member
Messages
9
Likes
0
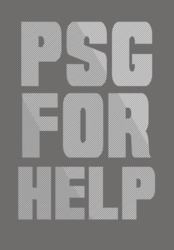
Could anyone help with showing me how to do this?
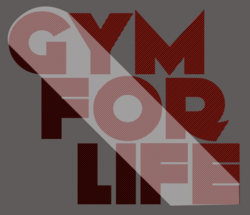
i have been trying to create the line effect on the text that i have attached.

i have tried to make a background similar and also halftone effect to use
as a clipping mask but not having much luck not sure if that was the correct
way to do it, any advice or help would be much appreciated.

2-copy-.jpg

Untitled-1.jpg

Untitled-2.jpg
 
Are you just trying to make it look like the text is on the products? In which case you could probably just adjust the layer blend type on the text layer to 'overlay' or 'soft light'?
 
Thank you for your reply, yes I am trying to make the graduated lines inside the text and I don't know how to do that or how to make that effect to use as a clipping mask behind the text,
I tried what you said and it makes no difference
Thank you
 
Ah I see, I thought you just wanted to make the text look like it was written on the bottle/t-shirt etc. Are you trying to take text and put the lines on it by using a clipping mask like I've added the lines (very roughly) to the first T in the image attached? test.jpg
 
I do want the text to look like the images bottle/t-shirt etc. as you can see the text has a graduated pattern from dark to lighter from letter to letter and to add lines to each individual letter would be very time consuming I just thought there would be an easier way to do this, l probable haven't explained myself very well
Thank you though
 
Something like this? This is fairly easy!
Screen Shot 2019-08-15 at 11.35.53 PM.png

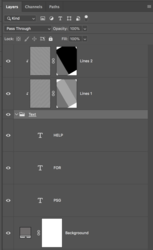
A background layer. Two layers of opposing diagonal lines clipped to a text layer/group with layer masks filled with varying degrees of grey sections to control the opacity of the lines.
Screen Shot 2019-08-16 at 12.00.19 AM.png

If you have any questions, let me know and I will explain further.
 
Thank you IamSam, that is exactly what I was looking for it looks great, could you please explain further for me in a bit more detail step by step, could you also tell me if the background you have made was saved would that work on any text as a clipping mask
Thank you I appreciate your help
 
May I add to my above reply, I was finding it a task just making the lines I thought my skills were average but now thinking they are basic so any help with that as well would be great
Thank you
 
could you please explain further for me in a bit more detail step by step,
Absolutely! Not knowing your skill level, please describe which part you would like me to explain.

could you also tell me if the background you have made was saved would that work on any text as a clipping mask
The background layer is only a Solid Color Fill adjustment layer. I use this because it's quickly and easily adjusted. The background layer is saved with the entire document.

However, if you're referring to the lines within the text then...............

Screen Shot 2019-08-16 at 8.11.52 AM.png
.............they can be used for any text within that document. You may have to adjust the layer masks slightly.

I was finding it a task just making the lines
No problem.

The lines have to be on their own layer and with a transparent background to work. At least one line must be made with the line tool.
(note: I am using a white background for visibility but the lines must be on a transparent layer)

Start with one line. Use the Line Tool. Make it longer/wider than your document.
Hold down the shift key for a perfect 45º angle.
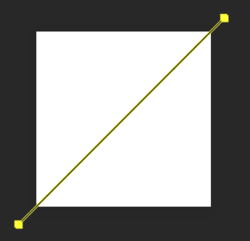
Screen Shot 2019-08-16 at 8.22.37 AM.png

Use your Move Tool to move the line to the lower right hand corner.
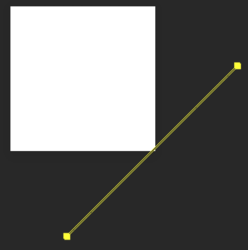
Screen Shot 2019-08-16 at 8.25.09 AM.png

Duplicate the line layer.
Zoom in to the corner.
Very important! With the duplicated line layer selected/highlighted, enter Free Transform (Cmd/Cntrl + T)
Move the duplicated line using the directional arrow keys (on the keyboard) in the following manner---one up, one left until the duplicated line is in the position and spacing you desire.
When you have the duplicated line where you want it, hit enter or the checkmark to accept the state change.

Screen Shot 2019-08-16 at 8.30.27 AM.png

Now comes the fun part. We will step and repeat until we fill the entire canvas with lines!
(Here is a video on step and repeat! It has a long intro and he may do some things differently than I describe)
Hit and hold the SHIFT + OPT/ALT + CMD/CNTRL keys and the tap the T key. This will copy the line and move it!
Keep doing this until the entire canvas is filled.
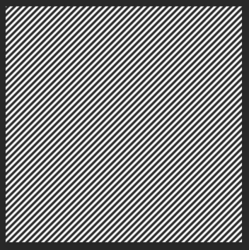
Screen Shot 2019-08-16 at 8.42.20 AM.png

You will create many line layers! I had 73 in this example, you may have more depending on the canvas size.
Click on the very first line layer...........then hold SHIFT and click on the last line layer.
This will select them all.
Then hit Cmd/Cntrl + E to merge the layers.

You should now only have one layer of lines.
(I have a background layer in white to make it easier to see. Don't include the background layer in the merge)
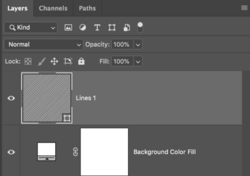
Screen Shot 2019-08-16 at 8.48.32 AM.png

Now right click on the line layer (in the layers panel) and hit "rastorize layer".
Duplicate the line layer (Cmd/Cntrl + J)
Turn off the first line layer.
Then use Free Transform...........right click and select "flip horizontal".

Now you have your two opposing line layers....
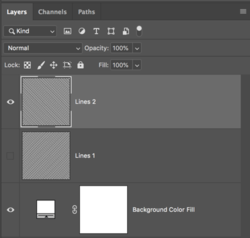
Screen Shot 2019-08-16 at 8.53.24 AM.png
 
That is fantastic, the explanation you have given me is perfect and much appreciated, thank you very much for your time and effort I will be trying this a soon as I get home.
This was my first post and your response has been fantastic
Thank you once again
 
A background layer. Two layers of opposing diagonal lines clipped to a text layer/group with layer masks filled with varying degrees of grey sections to control the opacity of the lines.
screen-shot-2019-08-16-at-12-00-19-am-png.101090

Sorry for being a pest! Could you please explain how to achieve the above as I think it is that bit that I am not sure of, so far I am getting there but not quite getting the same effect as you
I have attached a picture of what I have managed to do which is ok but I had to cross the diagonals and I was getting a bit lost with trying to make layer masks filled with varying degrees of grey
Thank you

Untitled-1.png
 
I was getting a bit lost with trying to make layer masks filled with varying degrees of grey
OK.........let's talk about that for a moment.

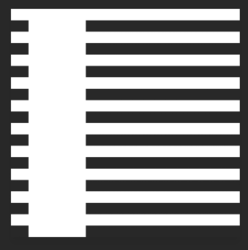
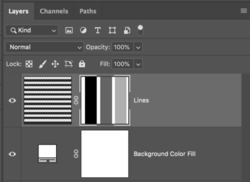
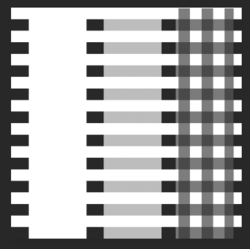
If I have a layer of black lines and I apply a layer mask to it, I can control the black lines opacity by using varying shade of grey ranging from black to white. (note: I am once again using a white BG for visibility)

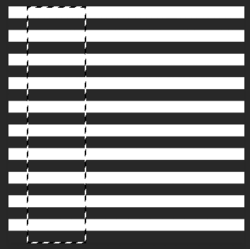
Here is my first selection on the layer mask.....
Screen Shot 2019-08-16 at 8.35.53 PM.png

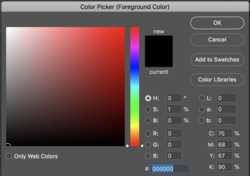
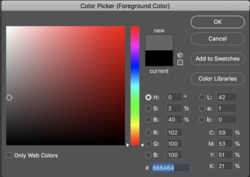
Let's use the Color Picker to chose black....
Screen Shot 2019-08-16 at 8.37.37 PM.png

Now fill that selection (on the layer mask) with black.
Here is the result. The black lines are no longer visible.
Screen Shot 2019-08-16 at 8.36.29 PM.png

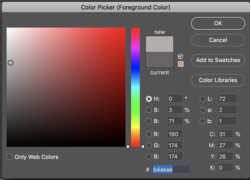
Let's chose a lighter shade of grey for the next selection on the layer mask.
Screen Shot 2019-08-16 at 8.37.49 PM.png

Here is the result. Now the black lines are becoming more visible or darker.
Screen Shot 2019-08-16 at 8.38.10 PM.png

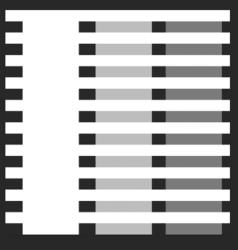
Let's go to a lighter shade of grey for the last selection on the layer mask.....
Screen Shot 2019-08-16 at 8.39.14 PM.png

Here is the result. Now the black lines are even more visible or darker.
Screen Shot 2019-08-16 at 8.39.33 PM.png

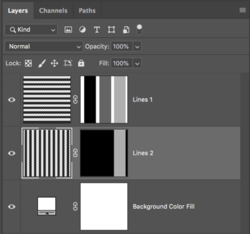
Layers panel.
Screen Shot 2019-08-16 at 8.39.46 PM.png
 
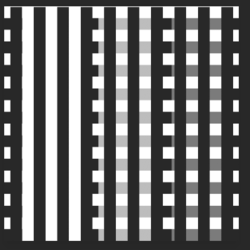
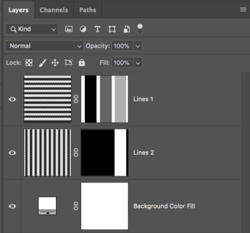
It becomes a little tricky when you add the second opposing layer of lines.
Screen Shot 2019-08-16 at 9.00.52 PM.png

So......if I only want to have the opposing lines appear in the section on the right hand side.....
Screen Shot 2019-08-16 at 9.05.52 PM.png

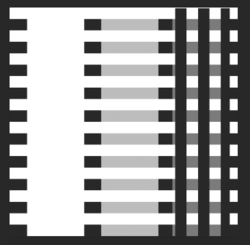
Then I have to black out everything but that section on the second line layer-layers mask!
Screen Shot 2019-08-16 at 9.06.44 PM.png

Here's the problem........I need for the opposing lines to be the same opacity as the underlying lines of the first line layer and layer mask.
So.......I have to change the shade of the selected area of the second layer mask to the same as the first.....
Screen Shot 2019-08-16 at 9.20.00 PM.png

Screen Shot 2019-08-16 at 9.19.41 PM.png

Make any sense? It's all a bit confusing, but the more you play around with it, the more you will get the idea.

You need to black out this area on the opposing line layer-layers mask of your example.
Screen Shot 2019-08-16 at 8.58.21 PM.png
 
Excellent your tutorial has been very informative, easy to follow and a great help to me i could not have done it without you
Thank you very much
 

Back
Top