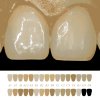
Original:

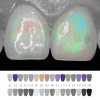
Method 1:
-Convert to Lab mode
-Added a 50% gray level Layer above the original and set blend to Luminosity (this is to isolate the colors)
-Added a curves adjustment Layer and use the Auto function only on the "a" and "b" channels
-Added a posterization adjustment Layer and in this case set the levels to 5-30
-New adjustment Layer to change hue/saturation

Method 2:
-Posterize Layer 11

Method 3:
-I've made a color table made of colors from VITA shader pallette (dental equipment to match colors) (there was a long discussion how to do it)
-i've matched colors of my photo with a vita pallette
-Image-Mode-Indexed Color-Custom (loaded color table)

Method 4:
-I've made a color table made of colors from VITA shader pallette
-my macro selects color range from each color of Vita shader and replaces it with easy to see color (pink, green, etc)

which method you think is the most accurate?
i'm thinking about first matching colors of photo with vita shaders, then limiting colors with color table and then macro replacing each color with some other easy to see color.

Method 1:
-Convert to Lab mode
-Added a 50% gray level Layer above the original and set blend to Luminosity (this is to isolate the colors)
-Added a curves adjustment Layer and use the Auto function only on the "a" and "b" channels
-Added a posterization adjustment Layer and in this case set the levels to 5-30
-New adjustment Layer to change hue/saturation

Method 2:
-Posterize Layer 11

Method 3:
-I've made a color table made of colors from VITA shader pallette (dental equipment to match colors) (there was a long discussion how to do it)
-i've matched colors of my photo with a vita pallette
-Image-Mode-Indexed Color-Custom (loaded color table)

Method 4:
-I've made a color table made of colors from VITA shader pallette
-my macro selects color range from each color of Vita shader and replaces it with easy to see color (pink, green, etc)

which method you think is the most accurate?
i'm thinking about first matching colors of photo with vita shaders, then limiting colors with color table and then macro replacing each color with some other easy to see color.
