What's new
Photoshop Gurus Forum

Welcome to Photoshop Gurus forum. Register a free account today to become a member! It's completely free. Once signed in, you'll enjoy an ad-free experience and be able to participate on this site by adding your own topics and posts, as well as connect with other members through your own private inbox!

Split an image!


ana101

New Member
Messages
3
Likes
0
HOW TO SPLIT AN IMAGE INTO MULTIPLE SHAPES AND KEEPING SEPARATE LAYERS

Hello, I have an image that I need to split into multiple geometrical shapes that then will be on their own layer so I can manipulate each individually. This is for a custom sticker page design i'm working on.
 
Please post the image (or one very similar) so we can explain the best way to accomplish what you want! Techniques may vary with different images.

Example............are the shapes overlapping or separate? Do they have shading or shadows? Etc.
 
Please post the image (or one very similar) so we can explain the best way to accomplish what you want! Techniques may vary with different images.

Example............are the shapes overlapping or separate? Do they have shading or shadows? Etc.

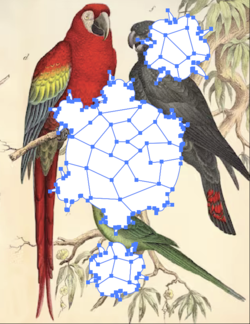
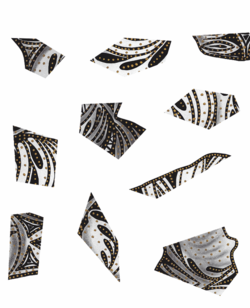
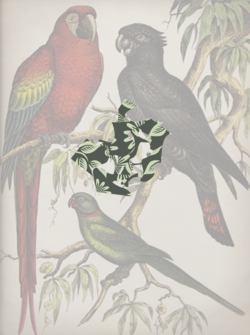
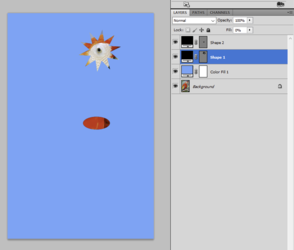
Hi so I have a background picture. I created some some shapes. If i do clipping path on the shapes and then mask it I loose the ability to then move each shape separately. I need to be able to move them individually so I can mix them up on a page. see examples

Screenshot 2023-09-24 at 11.06.33 AM.png

Screenshot 2023-09-24 at 11.11.00 AM.png
 
Hi so I have a background picture.
The birds image, OK.

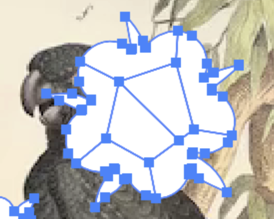
I created some some shapes.
If you created these shapes, shouldn't they already be on their own layers?

If i do clipping path on the shapes and then mask it I loose the ability to then move each shape separately.
What would the clipping path be for? A shape created separately from the background would not require a clipping path. A mask linked to a shape will move with the shape. If you have multiple masked segments within a shape, you can group them so they can be moved.


I could be wrong here, but this is what I suspect you are doing.
If you used "clipping paths" to dissect or select/isolate shapes from an object in an image, you could have copied each selection to it's own layer using Cmd/Cntrl + J.

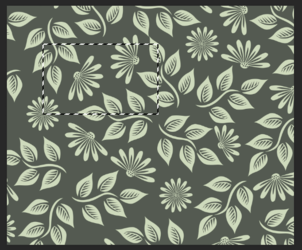
In my example below, the pattern represents the "flower" shape you show here with the paths......
Screen Shot 2023-09-24 at 2.05.47 PM.png

If I have a pattern from which I want a shape (in this case a rectangle), I make a selection....
Screen Shot 2023-09-24 at 1.56.20 PM.png

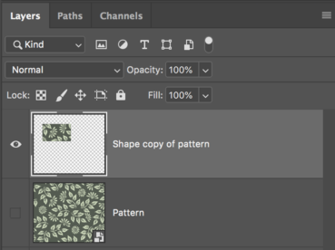
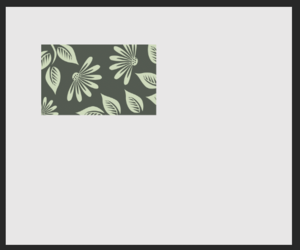
Hit Cmd/Cntrl + J to copy the selection to its own layer.
(Turn off the original pattern layer)
Screen Shot 2023-09-24 at 1.59.32 PM.png

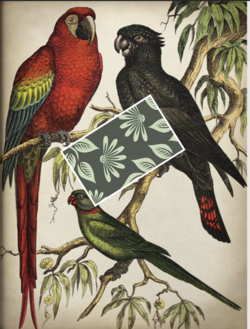
You have the shape on it's own layer. You can do anything with this shape now!
Screen Shot 2023-09-24 at 1.57.00 PM.png

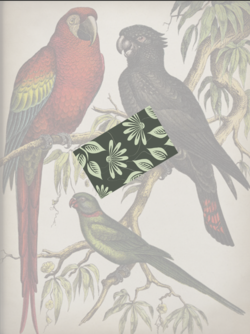
OR...
Screen Shot 2023-09-24 at 2.17.28 PM.png

No need for a "clipping path" or a layer mask.

If I'm way off base here, let me know or maybe post the PSD file.
 
I need the bird image masked on the multiple shapes I have created while maintaining the ability to then move each piece freely.
 
Why would you need the bird image masked? It seems to me that you have your layers out of order. The bird image should be the lower layer while the shapes are on layers above it. This eliminates the need for layer masking while giving you the freedom to move each piece freely.

Shape layer above bird layer.
Screen Shot 2023-09-24 at 5.05.34 PM.png

Shapes within the shape layer moved individually...
Screen Shot 2023-09-24 at 5.05.02 PM.png


Can you please post your PSD file so we can see what you are trying to do?
 
I need the bird image masked on the multiple shapes I have created while maintaining the ability to then move each piece freely.
If your shape layers are below the bird layer requiring you to create a layer mask on the bird layer for them to be visible, then you will have to delete or fill the existing layer mask on the bird layer, move the shapes, and then recreate a new layer mask for the bird layer.
 
I need the bird image masked on the multiple shapes I have created while maintaining the ability to then move each piece freely.

If I'm interpreting your question correctly, I believe I found a solution.
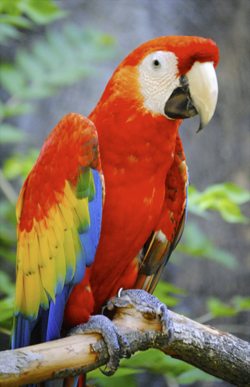
  • Start with an image of a bird.
  • This needs to be the bottom layer of your file and it needs to be a true "background" layer.
  • If your bird layer is not a true background, you can convert it by going to Layer > New > Background From Layer.
1695598636541.png


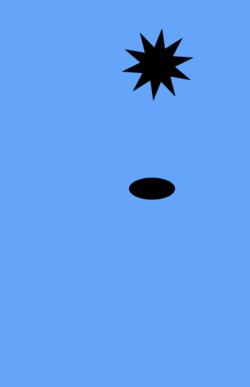
  • Just for illustration purposes, I placed a solid blue layer immediately above the bird layer.
  • Above that blue layer, I have two individual layers each representing the shape of a different sticker. (It doesn't matter what color these are.)
  • In my example, my shape layers are all vector shapes. This enables you to resize them without introducing pixelation, but this method does not require them to be vector shapes.
  • Here's what it looks like now. The parrot is still there, hidden below the blue layer.

1695598977822.png


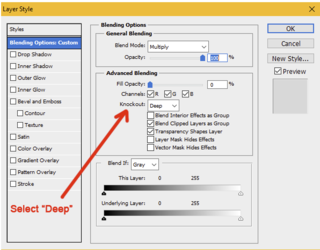
  • Now do two things to your shape layers:
  • First, change the Layer Fill (not the opacity) to zero.
  • Next, go into the Layer Styles panel, find the setting for "Knockout", and change the setting to "Deep".
  • Do this for all of your individual sticker layers.
1695599243491.png


  • "Deep Knockout" essentially takes the shape of your sticker and punches a hole through every layer in your stack, all the way down until it hits the bottom Background layer. You can have a hundred layers in between and Deep Knockout will punch through them all.
  • Once you've got this set up, you can now move your individual sticker shapes anywhere you want, and the corresponding parrot image will show through.
  • If your shapes are normal raster layers, then use the Move tool. If your shapes are vector layers, then activate the vector path and go to Edit>Free Transform Path.
  • The Knockout feature comes with two settings: Shallow and Deep. Tutorial below.


1695599282137.png


Hi @ana101

This seems to be very similar to having puzzle pieces of an image and you want to select and move them to any location and rotation that you want. This can be accomplished by several techniques such as
- Each puzzle piece is cut out of the oriignal image to their own Layer (similar to what @IamSam posted
- Each puzzle piece could be the whole image with the puzzle piece being the Layer Mask
-Each puzzle piece could be the whole image with the puzzle piece being a Vector Mask
- and it can also be each pizzle piece is a clipping Mask (two Layers) with the Lower Layer being the Puzzle Piece Shape and the Upper Layer (clipped to the Lower Layer) is the whole image. For this to work these two Layers of the Clipping Mask also need to be linked to each other

Assuming you are talking about the last version using Clipping Masks (not a Clipping Path which is totally different) then the images below show the Layer Structure to Make that work

This first image shows the whole image with two adjacent shapes (puzzle pieces) and the puzzle pieces selected. Each of these puzzle pieces is its own Shape Layer:
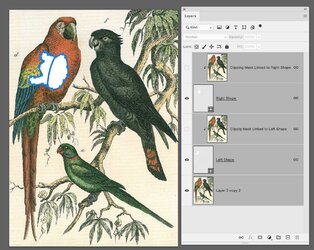
Screen Shot 2023-09-25 at 8.50.27 AM.jpg

The bottom Layer is only there so that you an see the whole image relative to those two puzzle pieces. Now I am showing the enable Layers for the Left Shape which are the first next two Layers that are clipped to each other making the Left Shape Layer the mask for the whole clipped image above it. Not from the Layer those tow Layers are linked to each other (the chain symbol). That linking is done by selecting both Layers of the clipping Mask and using the Layer > Link Layers command.
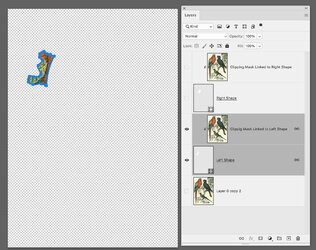
Screen Shot 2023-09-25 at 8.50.53 AM.jpg

I am now showing the Top Two Layers (Clipping Mask) that are also linked to each other.
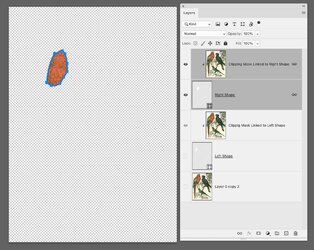
Screen Shot 2023-09-25 at 8.51.14 AM.jpg


With the above Layer setup, I can select a Shape Layer (puzzle piece) and move it or rotate it to anywhere on the image which I believe is your desired objective as shown in the image below. I just move each shape Layer individuatlly to whereever I want that piece to be.
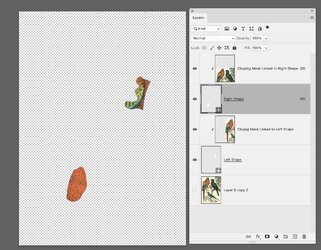
Screen Shot 2023-09-25 at 8.51.54 AM.jpg

I hope this explanation is helpful to you and that of course is if I understand what your are trying to do.
John Wheeler

PS, you can click on the iamges above to get a large size version for better readability.
 

Back
Top