Photoshop Gurus Forum
Welcome to Photoshop Gurus forum. Register a free account today to become a member! It's completely free. Once signed in, you'll enjoy an ad-free experience and be able to participate on this site by adding your own topics and posts, as well as connect with other members through your own private inbox!
You are using an out of date browser. It may not display this or other websites correctly.
You should upgrade or use an alternative browser.
You should upgrade or use an alternative browser.
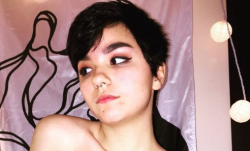
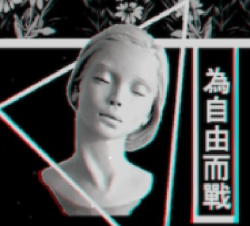
Specific Sculpture with a black blackground.
- Thread starter Marqueira
- Start date
-
- Tags
- girl pretty sculptures
Here's my attempt, but don't ask me how I did it. Mostly trial & error. Lots of contrast adjustments, lots of surface blur, then sharpen, then blur again, then sharpen again, etc. I've tried a couple of these in the past and each time is the same—I get a decent result but I could never replicate it.
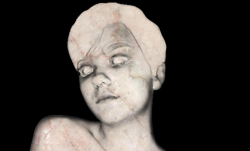

Well done. Perhaps just record it all in an action for next time?Here's my attempt, but don't ask me how I did it. Mostly trial & error. Lots of contrast adjustments, lots of surface blur, then sharpen, then blur again, then sharpen again, etc. I've tried a couple of these in the past and each time is the same—I get a decent result but I could never replicate it.
View attachment 116948
HuckinFell
Well-Known Member
- Messages
- 147
- Likes
- 260
- Isolated subject
- Desaturated
- Inverted blacks
- Tweaked brightness and contrast to equalise
- Masked
- Mapped a stone texture over the image (displacement)
- Gaussian blur
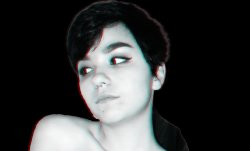
- Created 2 duplicate layers and made one cyan and the other red
- Switched the red layer to "Difference" and then inverted and offset it to create stereoscopy
- Added black BG layer
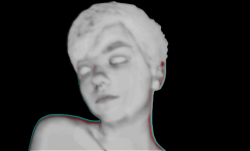
Instead of creating the red and cyan layers, you can get a more realistic effect If you place a stamp layer to the top of the layers panel, select Blending Options and in the Advanced Blending options, uncheck the GREEN and BLUE channels. Then nudge the layer to the left. All done - perfect 3D effect.
JeffK
Guru
- Messages
- 2,602
- Likes
- 2,994
Spent a bit of time with this. Created the sculpture as requested using a b/w conversion, then smudging, deleting areas, painting in, lowering contrast. Hair and eye textures are borrowed.
Then I created second image using a kintsugi finish - the Japanese art of repairing breaks with lacquer and gold powder. I've played with this on ceramic pieces.
Hope this works for you.
- Jeff
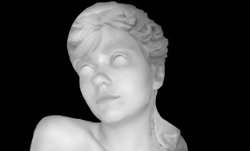
With kintsugi:
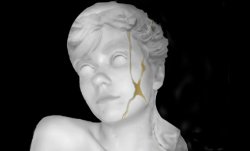
Then I created second image using a kintsugi finish - the Japanese art of repairing breaks with lacquer and gold powder. I've played with this on ceramic pieces.
Hope this works for you.
- Jeff

With kintsugi:

JeffK
Guru
- Messages
- 2,602
- Likes
- 2,994
Jeff, that is excellent. I like yours the best of all the attempts.
Rich
Many thanks for the compliment, Rich. It was actually a mashup of some research. Basically converted the image to b/w, masked out the background, used the smudge tool to reduce the details, brought the contrast all the way down. Smoothed the edges and did a bit of a curve adjustment. I did steal the hair and the eyes from other sculptures and them fit to the image. With the hair I had to since it was nearly solid black without any details. The gold veins I picked up from a kintsugi vase I found.
Lot of fun but did take a lot of time. Fits into my obsessive nature though.

- Jeff
JeffK
Guru
- Messages
- 2,602
- Likes
- 2,994
Thanks Hudson! I've never dug into 3D - doesn't mean I won't give it a try.Great work Jeff! Will you be adding the 3D effect?
- J.
I noticed the OP had it in the sample. Really easy to do by turning off the Blue and Green channels in Blend If (on a new copy layer) and nudging to the left.Thanks Hudson! I've never dug into 3D - doesn't mean I won't give it a try.
- J.

