What's new
Photoshop Gurus Forum

Welcome to Photoshop Gurus forum. Register a free account today to become a member! It's completely free. Once signed in, you'll enjoy an ad-free experience and be able to participate on this site by adding your own topics and posts, as well as connect with other members through your own private inbox!

Resizing


mgriffen

New Member
Messages
2
Likes
1
Hello, I am in charge of populating my companies website with images and I am having serious difficulty dealing with image sizes etc..
I have a Soliloquy slider at the top of the home page but its image resolution restriction is really hard to work with. It wants images at 1440 x 466.
How do I get high-quality images to this size? If I take a picture with my cell phone and then try to crop down to that resolution I basically lose everything I'm trying to take a picture of. Or if I try to resize the photo to the necessary resolution it gets completely distorted and stretched.
Any help is much appreciated.
 
It looks like in the "Config tab", you can alter the image dimensions from 1440 X 466 to something else. Should you choose to use the default dimensions, the pictures you take on your phone should be at least of that dimensions.
What I normally do is to take a large resolution image, scale it down proportionally and then crop to get the desired image.
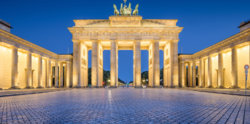
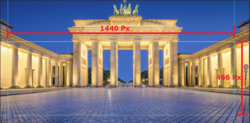
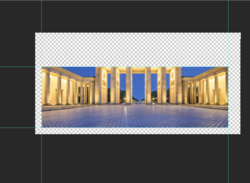
For example, I take this image: 1158-Other-20161027154446-BERLIN_2000px_cropped_1584x780.jpg with dimensions 1584X780, open it in Photoshop, add guides with the required dimensions, viz 1440 width and 466 height, like so:
1.png
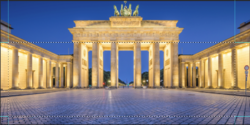
Next select Rectangular marquee tool and select within the area enclosed by the guidelines. Like so:
2.png
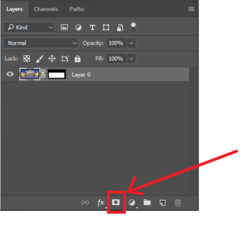
Next, add layer mask by clicking this icon as indicated:
3.png
At this stage, this is what you should see on your screen:
4.png
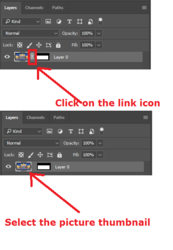
Next, in the layers panel, click on the link icon between picture thumbnail and mask thumbnail as shown below and then select the picture thumbnail:
5.png
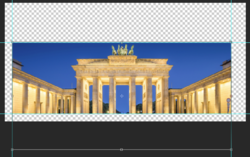
Now, you are free to transform the picture by moving it or by sizing it using the Transform tool (CTRL + T). Make sure you always resize proportionally using Shift key. This image shows the bounding box of transform tool where I try to include as much of the whole arch as possible, but I was unable to get the base.
6.png
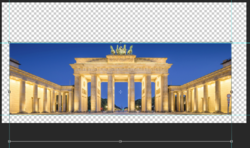
So, I size the image upwards without proportional adjustment - only because the sizing is minor.
7.png
Once satisfied, Commit to transform by hitting Enter key. Now, you can crop the image using Crop tool and use it.

Any questions, just ask,
 

Back
Top