What's new
Photoshop Gurus Forum

Welcome to Photoshop Gurus forum. Register a free account today to become a member! It's completely free. Once signed in, you'll enjoy an ad-free experience and be able to participate on this site by adding your own topics and posts, as well as connect with other members through your own private inbox!

Resizing for photo gift


cdtcpa

Member
Messages
16
Likes
1
Hello: I’m looking for advice on method I should be using to accomplish my task. If I’m in wrong place in the forum , please tell me where I should be.

I have an image I want to submit to a photo lab to make a photo block for a gift. The block is 5x7. I’ve cropped the image to 5x7. But when I load the image to the block. It cuts off a little of the top & bottom.

I thought I could “resize” the image to something like 4.5 x 6 (or whatever the default is), but when I loaded it, it doesn’t look any different.

If what I need can be done, please tell me how. I am still using CS6.

Thank you very much for any help!
 
Last edited:
Hi @cdtcpa

The details of the specific product on which you are printing are missing, so I will give you my best guess.
When printing, most products have an alignment issue of placing the image on the product that would stand out like a sore thumb, as trying to print the entire image might show some anomaly along the edges. So, they compensate by sacrificing the edge of the image to effectively overlap to prevent those types of issues. A parallel is when you want to have a borderless print. Printers do not print the exact 5x7 image to a 5x7 piece of paper because if there is any misalignment, there can be a small white border on 1 or 2 of the edges. So, the image is slightly enlarged to print outside the paper's boundary to ensure complete coverage. The downside, of course, is that a small piece of the image can be cropped.

To get around that you can make sure the very edges of your image are not critical to have in the print. You never know which edge will be cropped slightly. The company doing the product whoudl be able to tell you what you should different as well.

Just my quick thoughts
John Wheeler
Thank you for the reply. My question is how I can reduce my image via photoshop, so that it’s small enough to fit in their block without cropping off my top & bottom of object. Like using a new canvas, resizing, etc. I can’t believe there isn’t a way; because I thought I have did it many years ago; I just can’t remember.
 
Hi @cdtcpa

Let me give you an example of what I believe is your problem and how to solve it. I am using Printique print service as an example.

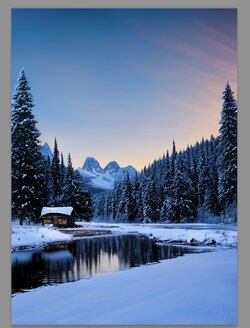
Here is my original image that has some important treetop near the edges:

Screenshot 2023-12-12 at 11.28.53 PM.jpg

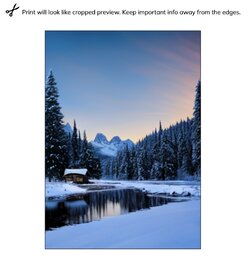
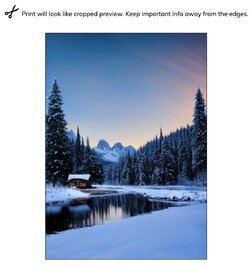
If I put it into the Printique web service it crops it a bit: Note that it warned me not to put important things near the edges (pilot error on my part)

Screenshot 2023-12-12 at 11.16.34 PM.JPG

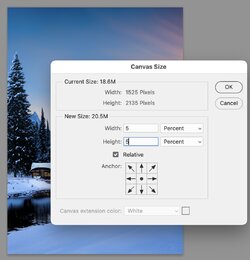
So to recover, I need to add more image on the boundaries of the original image. I first do this with Image > Canvas Size and set it to relative, percent, and 5% on height or width:

Screenshot 2023-12-12 at 11.20.25 PM.jpg

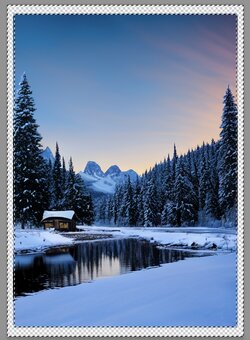
I ended up with transparency surrounding the image where I want to add less critical elements. I selected the transparency and expanded by 5 pixels with Select > Modify > Expand. What you see is this image:

Screenshot 2023-12-12 at 11.50.50 PM.jpg

I do not remember all the Content-Aware Fill options in CS6, yet that is my approach. There are more options in more advanced versions of Photoshop.
So I fill the transparent areas with a tool appropriate for my version. Note you could fill it in with a solid color as well. In Printigue it now looks like the critical parts back in.

Now how you fill the newly created area in the original image may be your toughest choice yet that is the approach that I would take for your project

Screenshot 2023-12-12 at 11.41.55 PM.jpg

Hope this gives you a direction to try.
John Wheeler
 
Thank you! That is exactly what I tried to do, except I didn’t use the percentage (I just make the size real big like 80 x 80 inches, then cropped again, but didn’t work—-I think I cropped it smaller than I needed instead of bigger. I will try it again with percentage, if my version has it. I won’t have a problem filling the border. Thanks again!!!!!
 

Back
Top