What's new
Photoshop Gurus Forum

Welcome to Photoshop Gurus forum. Register a free account today to become a member! It's completely free. Once signed in, you'll enjoy an ad-free experience and be able to participate on this site by adding your own topics and posts, as well as connect with other members through your own private inbox!

Replace specific color range


Andy289

Member
Messages
8
Likes
0
I have a set of coins images that are made on a rugged green background and I would like to get the coin on a transparent background. I tried some things, as a newbie, and I got pretty good results but the edge of coin isn't very good as I replace the old green background. I am looking to learn how to make it better and without many headaches because I have to edit hundreds of images like that.

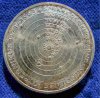
Here is an example of image
IMG_7766.png
and this is what I got after 15 minutes of work on image
Untitled-1.png

I would like to know if I can do it better and with less effort, as I mention, I have to edit hundreds of images like this one. Thank you.
 
Try this...

Grab a hard brush the same size as the coin. On a layer above the coin image, click once and cover the coin image....

Tz43ype_zpsbd222bbc.png

Then Alt and right click on the brush layer to select the circle.

6s6saxk_zpsdad0a1f4.png

Now click on the coin layer, then press Ctrl+J

Now go to refine edges...

53EILFy_zpsa83e25ef.png

Here's what I got with the above.

Coin_zps56c7ee01.png

Hope this helps.
 
Nice way to do it. I have to work a little with refine edge tool to see exactly how it's work because my edges looks ugly compared with yours.
 
There are many, many ways one can achieve a nice smooth edge to a "cut-out" task. Inkz's approach of using the "Refine Edge" tool is an excellent suggestion. I would just add a few comments.

1. You should never, ever attempt to do a cut-out on such a small image. At minimum, you should have at least 2000 pixels in both directions, even if the image will eventually be reproduced at smaller size, say, on a web page.

2. For something like a circular object with a smooth boundary, I suggest you adjust the "smooth edges" slider in "Refine Edges" to several tens of pixels. Any lower and you probably won't see much effect. Any higher and you risk incorrectly deforming the correct but not quite circular shape into an (incorrect) perfect circle.

3. This is purely a personal preference, but I would start the cutout process with a quick select tool of approximately the correct size instead of using the black paintbrush.

Here's an example:
 

Attachments

  • Germany_5_Mark_Silver_Coin_1973_Copernicus_500th_Birthday-tjm01_acr-ps02a_sRGB-8bpc-01_orig_blue.jpg
    Germany_5_Mark_Silver_Coin_1973_Copernicus_500th_Birthday-tjm01_acr-ps02a_sRGB-8bpc-01_orig_blue.jpg
    1.4 MB · Views: 0
  • Germany_5_Mark_Silver_Coin_1973_Copernicus_500th_Birthday-tjm01_acr-ps02a_sRGB-8bpc-02_new_red_b.jpg
    Germany_5_Mark_Silver_Coin_1973_Copernicus_500th_Birthday-tjm01_acr-ps02a_sRGB-8bpc-02_new_red_b.jpg
    1,002.4 KB · Views: 0
Thank you guys for advices. Both ideas works pretty good to get the desired result. For some coins it's pretty quick to do it, others can be more difficult because of strange shapes (they are not just round) or other images have a thin shadow that make my selection difficult and then the refined edge a little bit ugly. But overall I can do what I need, with less or more effort so many thanks. If anyone have any other tips or ideas don't be shy to say your suggestions.
 

Back
Top