What's new
Photoshop Gurus Forum

Welcome to Photoshop Gurus forum. Register a free account today to become a member! It's completely free. Once signed in, you'll enjoy an ad-free experience and be able to participate on this site by adding your own topics and posts, as well as connect with other members through your own private inbox!

Removing the shadow of a photographer


polarwoc

Guru
Messages
1,585
Likes
1,431
Guys, I have been following this THREAD. I found this example on another website and thought it would be helpful so I decided to share.

This is the explanation the creator gave:
"It's difficult for me, because my english is not that good and my photoshop is in german. First cut all same color shadow stuff on diffrent layers (arms 2 layers, Shirt one, shorts one) with really smooth edges toward the same color parts and sharp edges to the "not the same color parts". Than on each layer: Lots of diffrent Image Adjustments (mostly: Hue/Saturation (not all colors at once but yellow colors for example); Brightness/Contrast; Shadow/Highlight and some really low Fotofilters..); than Part Healing Tool and Copy Stamp (from the original layer - not full opacity) and smudge the outlines of each layer. (sorry for my english) edit "

Inspirational!

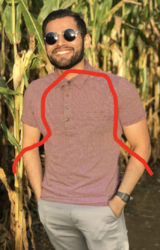
Before photo
1129-Before-w9q7hctpipuz.jpg


After photo
1129-Other-After-CXRTwr8.jpg
 
Last edited by a moderator:
Thanks for sharing!

While I think this is a fair edit, I feel it's not a bad starting point, but the after edit is not really that well done and if anyone with a discerning eye saw it, they could quickly identify the edited areas without seeing a before photo. The pant's would be harder to determine that they had been edited without the before photo. So good job there.

Screen Shot 2019-11-18 at 10.03.26 AM.png

The creators explanation is a bit limited, probably due to the language barrier, but it does provide some insight. It would be hard for anyone without Ps experience to learn how the creator actually managed the edit.

What I really like is that the before image may serve as a challenge for our own members to "give it a try". (This photo seems very familiar, it may have been posted here as well.)
 
I agree with IamSam. This type of edit, where the shirt has a checked pattern, is very difficult. Sometimes you can eliminate a shadow using Curves or Hue/Saturation adjustments, but other times it's easier to simply paint away the shadows. In the edit I did yesterday (the young lady holding flowers), the wedding dress was a solid color with clearly defined planes of different shading, so it wasn't too difficult to select all those areas with the pen tool and simply paint-in the correct shades. At the very end, I added a slight grainy texture on top. But with a checked pattern such as here, life gets much more difficult.

I may give this one a try later today. Just thinking out loud, I wonder if frequency separation would work here? Make the underlying color what it needs to be and then add the checkered pattern afterward.
 
Here's my try.
  • For the shirt, I used frequency separation to paint over the shadow and then add-back the checked texture. I then copied the original image on a new layer above that, changed the blend mode to luminosity, and used a combination of Blend-If, gradient masks and regular masking to bring back all the dark folds in the shirt.
  • For both the pants and arms, I used a Curves adjustment to change the color of the shadowed areas to match the unshadowed areas.

Shirt.jpg
 
Here's my try.
  • For the shirt, I used frequency separation to paint over the shadow and then add-back the checked texture. I then copied the original image on a new layer above that, changed the blend mode to luminosity, and used a combination of Blend-If, gradient masks and regular masking to bring back all the dark folds in the shirt.
  • For both the pants and arms, I used a Curves adjustment to change the color of the shadowed areas to match the unshadowed areas.
Thank you for detailing the steps followed. Excellently done.
 

Back
Top