Photoshop Gurus Forum
Welcome to Photoshop Gurus forum. Register a free account today to become a member! It's completely free. Once signed in, you'll enjoy an ad-free experience and be able to participate on this site by adding your own topics and posts, as well as connect with other members through your own private inbox!
You are using an out of date browser. It may not display this or other websites correctly.
You should upgrade or use an alternative browser.
You should upgrade or use an alternative browser.
Specific Remove Background
- Thread starter AzHulk
- Start date
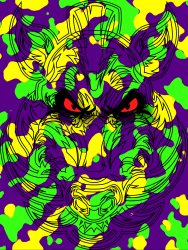
This method relies on the fact that the camo pattern has no black in it:
- Create a copy of your image on a new layer.
- Between these two layers, insert another layer and fill it with white.
- With the top layer active, use the Magic Wand tool to select all areas that are black. Make sure to uncheck the Contiguous setting on the Magic Wand.
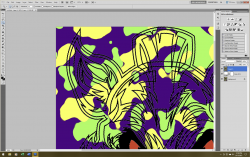
- At this point, you should have a "marching ants" selection of all the black lines, like this:

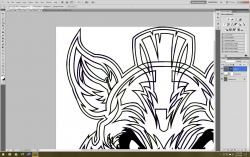
- With this selection active, click on the layer mask icon to add a mask to your layer. You should now have an image of only the black outlines and nothing else, like this:

- Copy this to a new layer using Stamp Visible (Ctrl+Shift+Alt+E) and turn off the visibility of all other layers below this one.
- Go back to the Magic Wand and re-check the Contiguous setting.
- Using the magic wand, select all white areas on the outer perimeter of your hog outline. In this particular image, there are four distinct quadrants of white. As you select each one with the Magic Wand, hit the delete key to delete those white areas on the outer perimater.
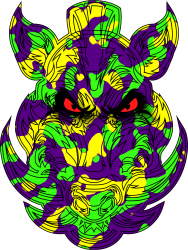
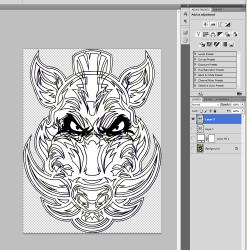
- When you're done, it should look like this:

- From here, you can make a selection of this layer—the hog only—for your final layer mask that will eliminate the camo pattern from the exterior of the background.
- Note: I do not know your level of Photoshop proficiency. If you don't understand this last step, let me know.
Perfect, thank you very much. I'll give it a shot later today on replicating.This method relies on the fact that the camo pattern has no black in it:
- Create a copy of your image on a new layer.
- Between these two layers, insert another layer and fill it with white.
- With the top layer active, use the Magic Wand tool to select all areas that are black. Make sure to uncheck the Contiguous setting on the Magic Wand.
- At this point, you should have a "marching ants" selection of all the black lines, like this:
View attachment 124030
View attachment 124031
- With this selection active, click on the layer mask icon to add a mask to your layer. You should now have an image of only the black outlines and nothing else, like this:
- Copy this to a new layer using Stamp Visible (Ctrl+Shift+Alt+E) and turn off the visibility of all other layers below this one.
- Go back to the Magic Wand and re-check the Contiguous setting.
- Using the magic wand, select all white areas on the outer perimeter of your hog outline. In this particular image, there are four distinct quadrants of white. As you select each one with the Magic Wand, hit the delete key to delete those white areas on the outer perimater.
- When you're done, it should look like this:
View attachment 124032
- From here, you can make a selection of this layer—the hog only—for your final layer mask that will eliminate the camo pattern from the exterior of the background.
- Note: I do not know your level of Photoshop proficiency. If you don't understand this last step, let me know.
ex_teacher
Guru
- Messages
- 569
- Likes
- 1,179
There are many ways to approach somsthing like this, Here is a variation on Rich 54 process
1. Duplicate the base layer (CTRL+J) Click on the eye on the bottom layer and make it invisible.
2. Image/Canvas Size (anything larger will do …say 6x8).
3. Magic Wand w/ contiguous and 3x3 average and tolerance 10.
4. Magnify to 200% or 300%.
5. Select the outermost black line with the Magic Wand and then copy to another layer (CTRL+J) You now have 3 layers.
6. That 3rd layer will be selected. Click the magic wand anywhere outside the black Hog outline.
7. At this point the entire area outside the Hog is selected by crawling ants (That’s why you made the canvas larger so that area would be contiguous.) GO BACK and click on the second layer so that the crawling ants are actually selecting/defining the colored area not blank space.
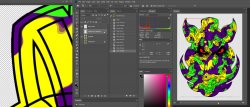
8. CUT (not copy) this colored area (CTRL+Shift+J) Immediately after that hit the delete key or make this cut-out layer transparent.. You have cut out and deleted everything around the Hog head.
9. DONE You will see that the Hog Head is floating in checkerboard transparency. There is some garbage under the head on that second layer that will need to be erased


