What's new
Photoshop Gurus Forum

Welcome to Photoshop Gurus forum. Register a free account today to become a member! It's completely free. Once signed in, you'll enjoy an ad-free experience and be able to participate on this site by adding your own topics and posts, as well as connect with other members through your own private inbox!

Product mockup with multiple smart object layers


Jillkm

Member
Messages
15
Likes
2
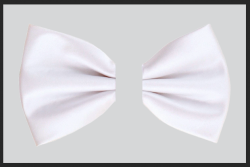
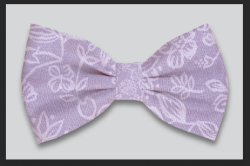
I am trying to do a mockup of a dog bow tie. I have copied the main layer so I have 3 layers of the bow tie and then selected the part of the bow tie I want to change in each layer. I have attached an image.

Now I have my problems. I know I need to do a displacement map for each layer and then save as smart object.

So what I am looking for is a tutorial somewhere online for making a product mockup with multiple smart objects where each object requires a displacement map. Then having the smart object on top with the design to go on the product.

I have hunted and hunted online. I have found thousand to do t-shirts, etc. I have gone through Udemy, Skillshare, Lynda, and YouTube.

Can anyone here point me in the right direction where I can find such a tutorial?

Jill
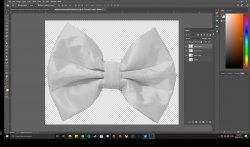
bowtiemockup.jpg
 
I know I need to do a displacement map for each layer
Hello and welcome. What's the displacement map for? Like polka dots or some other patterns to form to the shape of the tie?

What is the ultimate goal for the mock-up?
 
I sell on my own site and on Etsy. I want to be able to change the pattern on the bow tie without having to make 500 bow ties and photograph and edit 500 images. I have mockups for some of my collars, pillows, and mugs. Some I bought and a couple I had designed for me. I can do a mockup of a single image changeover, it's the multiple smart objects that have me perplexed.

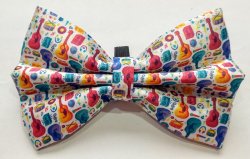
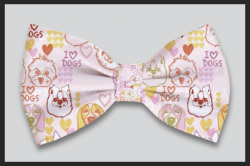
Attached sample of a finished bow tie.

The previous image is of a white bow tie I made specifically for doing a product mockup.

Jill

guitarsbowtie.jpg
 
No, I use them all the time. It's doing the mockup with multiple smart objects, with displacement map on each object. I'm thinking my issue is with my displacement maps. I'll work on those.

But if anyone know of a tutorial somewhere out there on making a mockup with multiple smart objects using displacement maps, I'd love to see it.

Jill
 
It's doing the mockup with multiple smart objects
If you can do one, you can do multiples. You can also nest smart objects.

with displacement map on each object.
Not sure why this would be a problem, just open the smart object and go through the process of adding a displacement map.

I truely apologize if I'm not understanding your issue.
 
I only seem to have the issue with my displacement map when using the multiple smart objects. No problem if only working on a mockup with one smart object. I know I'm obviously doing something wrong, that is why it would be nice if there were a tutorial on doing a mockup with more than one smart object layer. I shall slog along, and sooner or later I'll figure out what I am doing wrong. Thanks for the help.

I had watched that video, along with about 100 others.

Jill
 
This was done with two SO layers and no displacement map.

Screen Shot 2020-09-22 at 5.09.59 PM.png

Screen Shot 2020-09-22 at 5.17.08 PM.png

Screen Shot 2020-09-22 at 5.20.36 PM.png
 
I know I'm obviously doing something wrong,
Not necessarily.

that is why it would be nice if there were a tutorial on doing a mockup with more than one smart object layer.
You have stated this several times without explaining.

What are you trying to do with the (multiple) smart objects specifically?? I'm not asking about changing the fabrics on the bow, this part I understand. Explain exactly.
 
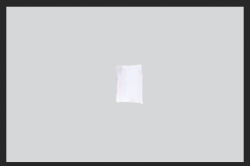
Making product mockup of my bowtie broken into 3 smart objects. One for the left side of the bow tie, one for the right side of the bowtie, and one for the centre of the bowie.

The first uploaded image in my first post shows the bowtie I am working on with the 3 different layers before they have been changed to smart objects.

I want one smart object on top that when clicked on opens in separate window, I add whatever image I want on the bowtie, save the change, and then when I go back to the mockup I have a finished looking bowtie and all the smart objects have changed to the image I have added.

When I do it now, the image does not change any of the smart objects. I tried changing one of the bow tie layers by iteself, and that didn't work either.

Jill
 
Last edited:
One for the left side of the bow tie, one for the right side of the bowtie, and one for the centre of the bowie.
OK, I understand. However, while I get that you may want to separate the center knot of the Bow Tie, why would you need two SO's for the right and left sides of the Bow Tie? Are you planning to place different patterns on the two sides of the Bow Tie? If so, these SO's would have to function independently of one another. You won't be able to update all with one SO.......you would need 2.

I propose one nested SO for everything.

I have one Bow Tie with the center section removed and on a separate layer.
Screen Shot 2020-09-22 at 8.31.55 PM.png
Screen Shot 2020-09-22 at 8.32.12 PM.png

Screen Shot 2020-09-22 at 8.32.35 PM.png

I select these two layers and then convert them to a SO.
Screen Shot 2020-09-22 at 8.35.09 PM.png

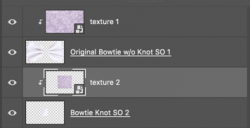
I open the SO which opens a PSB file, and add a texture layer above the Bow Tie w/o knot layer........sized to fit (free transform)
I convert this texture layer to a SO and duplicate.

I set both of the duplicated SO texture layers to "multiply"
I clip one of the duplicated texture SO layers to the Bow Tie w/o knot layer.

I clip the other duplicated texture SO layer to the Bow Tie knot layer.
I then rotate and resize this layer to fit in the knot.

Screen Shot 2020-09-22 at 8.43.16 PM.png

Now I have a SO nested within a SO.

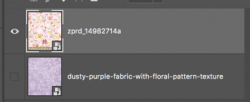
If I want to change the texture, all I need to do is open (double click) the texture 1 SO layer
which opens another PSB file
Drag, drop, and resize a new texture
Turn the other off (note: you can leave them both on, the top layer will be the texture that shows after update)
Close and save
Screen Shot 2020-09-22 at 8.45.30 PM.png

Close and save the first PSB

Everything is updated.
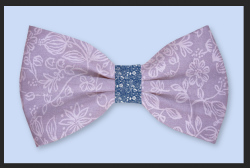
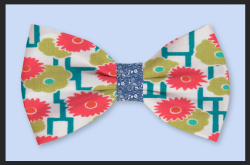
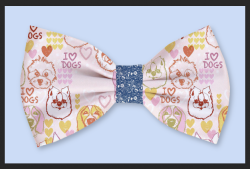
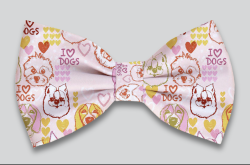
From this....
Screen Shot 2020-09-22 at 8.48.42 PM.png

to this!
Screen Shot 2020-09-22 at 8.49.04 PM.png
 
Thank you so much for this. In all the videos and tutorials I have watched, haven't seen this method. I will try it out tomorrow and see how it goes. You did a lot of work to help me out, I so appreciate it. How does it get that folded look without using either warp or a displacement map?

Jill
 
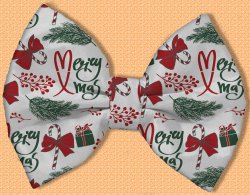
Came out great. Here is my result. The only issue I have is that the multiply filter darkens the image. But I could lighten it after. Haven't done that here.

Jill

merrychristmasbowtie.jpg
 
Great job!

Multiply does darken slightly, but you can add a Curves adjustment layer to even things out.

Screen Shot 2020-09-22 at 11.19.06 PM.png
 
Thanks a lot, will save me a lot on buying premade mockups. I have about 1,000 designs, so sure make life easier than having to make one of each design. I do love Photoshop.

Jill
 
Your very welcome. If you have any other issues or challenging projects, let us know!
 

Back
Top