What's new
Photoshop Gurus Forum

Welcome to Photoshop Gurus forum. Register a free account today to become a member! It's completely free. Once signed in, you'll enjoy an ad-free experience and be able to participate on this site by adding your own topics and posts, as well as connect with other members through your own private inbox!

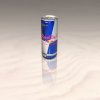
Product image and bending mirror reflection?


Edit-transform-warp-Arch

As a little side effect it can resize the width of the layer, so you may need Edit-transform to resize it back.
 
reflection-correction.jpg

Hi folks...

As with any task like this that requires manual editing in combination with a filter application, the final effect takes a good eye and a bit of patience. One thing i noticed about using the Warp method here is that besides the slight width alteration, there is also not enough bend applied to the bottom of the can (shape). If you'll notice, the outermost edges of the reflection can do not perfectly match that of the original can. If that's really a big deal for you, then you'll have to re-apply the Warp/Arch filter and ONLY adjust the outer bottom edges to align them perfectly. It helps in this case if you have a really decent hi-res photo to work with. If you don't, then you're going to have to settle for a few anomalies.

One simple way i used to help 'hide' some of the less-than-perfect details of the reflection was to add a basic cast shadow under the original can (shape/object).

As another side note here, keep an eye on the text and whatnot of the reflection object, that it doesn't become enlarged/warped to the point where it no longer matches the original object.

Hope this adds to the useful advice already given.

Have a good one.
Mark (aka theKeeper)...
 
Thanks guys. It becomes bulky because I click here and there and can't make it even by hand.

Are there any hotkeys I can use so the warp won't move all over? That it locks into "staight" mode?

For instance with the gradient tool I hold shift while dragging to get a straight line...
 

Attachments

  • Orotine.png
    Orotine.png
    55.2 KB · Views: 40
You shouldn't have to do it manually.

Using Warp, look at the options on the top tool bar. From the dropdown list select Upper Arc. Then hover your mouse over Bend, hold the left button and drag right or left. Dragging to the left will yield minus values which makes a concave. When it looks right release it, this should get you very close.

If you need to do anything manually, drags guides onto the image first so you'll be able to get it straight.
 
Remove the white fringe/edge from the bottom of your bottle Composer. And scale down the cast shadow it's too big. It should be slightly smaller than the width of the bottle.

Hawkeye is right in his advice. Do what he suggested.

Bear in mind also that your product shot is of an odd angle/perspective. It's not a normal perspective. It's 'punched' in the middle as if it was created with a 3D app. i.e. the top and bottom are further from your eye than is the middle section. This might make it a little harder to create a convincing reflection because of unusual shape distortion. See if you can use/find a product with a normal perspective. It'll make this a bit simpler to pull off.

Have a good one.
Mark (aka theKeeper)...
 
It sure is one of the most wanted features in PS and AI - distorting image along some custom curve. From the look of it, it doesn't have to be hard to implement but Adobe somehow ignores it all the way.

However, in my workflow this issue arises more often then not. I, for one, had to use Shear filter, displacement map, Liquify, even Content aware scale for such things. The last resort was some ugly but still working action to make some layer distort along some given curve in an image.

It really baffles me: Whatsa matter guys? Is it really hard to shift the image's pixels accordings to some curve bends? There are lots of uses for this babe....

I agree, also then being able to save that curve or shape for future use. Come on Adobe.
 
Thanks guys. The Arc worked great!

Will make the shadow smaller.

I don't know how to remove the fringe/edge. I usually select->edit->contract by 1px->move tool,moving the image away and leaving behind a jaggedy 1px border edge behind.
But that removes 1px off the image all around.

I've always wondered how some designs look "edge clean" and some are jaggedy.
 
Just add a Layer Mask Composer, and paint off the jaggies with a black brush. Simple, non-destructive editing -- always the way to go. Although in this case you would then want to "apply layer mask" afterword because you don't actually WANT to keep those jaggies. ;)
 

Back
Top