What's new
Photoshop Gurus Forum

Welcome to Photoshop Gurus forum. Register a free account today to become a member! It's completely free. Once signed in, you'll enjoy an ad-free experience and be able to participate on this site by adding your own topics and posts, as well as connect with other members through your own private inbox!

Need help with Inner Glow


maggie2

Well-Known Member
Messages
48
Likes
6
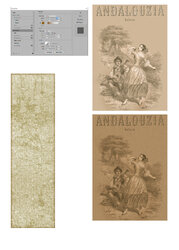
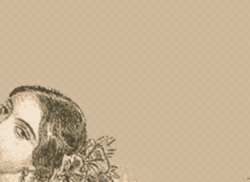
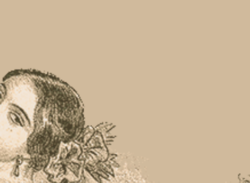
Hi, I am trying to get Photoshop to create an inner glow only around the outer edge of my graphic. I have done it on other graphics with no problem. However, on this particular graphic it won't create a border, it is darkening the whole photo. I have included a snapshot of the settings I used as well as a graphic to show how it worked around the edge on the one graphic. I am also including the original photo and what happened to it when I tried to apply the inner glow. If you could please tell me how to fix this I'd really appreciate it. Thanks in advance,
Marg Ruttan

sample1.jpg
 
Maybe you have the wrong layer selected or you have to change the blendmode to an other and set it back to "multiply" (sometimes PS ignores the standard setting)
 
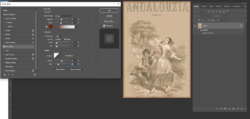
I used your settings, chose a brown color, and had no problem:

1657223061652.png

Would you be able to send us your photoshop file so we can get a better idea of what may be going on?
 
I used your settings, chose a brown color, and had no problem:

View attachment 130982

Would you be able to send us your photoshop file so we can get a better idea of what may be going on?
Sure. I'm not sure what you mean by my photoshop file? The image I sent is the one I used to try to create the inner glow. So can you tell me what the photoshop file is that would be different from that? Thanks and thanks for your help.
Marg
 
Sure. I'm not sure what you mean by my photoshop file? The image I sent is the one I used to try to create the inner glow. So can you tell me what the photoshop file is that would be different from that? Thanks and thanks for your help.
Marg
Hiya -
That would be the psd file so that it would include all the layers. What you sent earlier was a jpg which ends up as a merged file.
You can post it as a zip file, or if it's too large or a problem, you can post to WeTransfer.com and then just give us a link to download.
Really interested to see what's been done and how we can help
- Jeff
 
Okay, here's the zip file. It is only one layer so there shouldn't be much of a problem. Thanks again.
 

Attachments

Hi @maggie2
I found the root cause of your issue and it is because your image has partial transparency over the entire image.
Here come the details.

In the blending options, here are the selected choices for your image. The important one (which is also the default) is that Transparency Shapes Layer. It means the transparency determines where the boundary of your image exists.
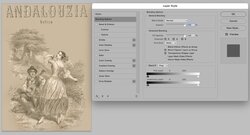
Screen Shot 2022-07-08 at 2.28.46 PM.jpg

Here is how I found out you have parital transparency over the entire image (tircky yet I use this all the time)
With the Layer Selected, I use the Layer > Layer Mask > From Transparency which pulls the transparency out to a Layer Mask and leaves the image fully opaque:
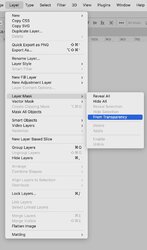
Screen Shot 2022-07-08 at 2.29.35 PM.jpg

To make the Layer Mask visible, just hold down the Option Key and click on the Layer Mask (use Alt key on PCs)
The I just use the command Image > Adjsutments > Levels which brings up a Historgram (don't change any settings). You will see that if the image was fully opaque the histogram would have all the pixels in the futhest right postion of 255. In your case all the pixels are less than 255 meaning all the pixels are partially transparent:
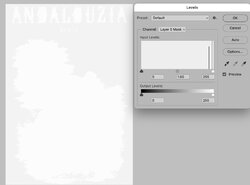
Screen Shot 2022-07-08 at 2.32.50 PM.jpg

This is what throughs the money wrench into the Layer Styles.
If I just turn off the Layer Mask with the inner glow set it shows up:
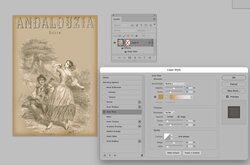
Screen Shot 2022-07-08 at 2.34.16 PM.jpg

If I turn the Layer Mask back on, the problem comes back.
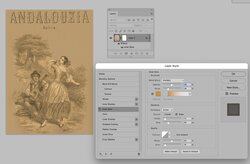
Screen Shot 2022-07-08 at 2.34.39 PM.jpg

I don't know if you need that transparency or not in the image. If you do, here is a way to get around it. Include Layera below that you need that make the composite image fuly opaque, make it into a group, then apply the Layer Style at the gorup Layer
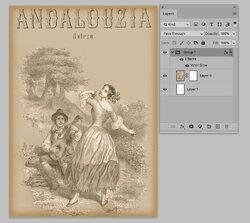
Screen Shot 2022-07-08 at 2.49.18 PM.jpg

Hope this helps
John Wheeler
 
As [ iLLuSioN ] wrote above, the image is transparent which is creating that overall brown tint.
@thebestcpu has given one solution - here's another:

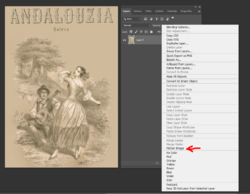
Select and activate your layer - then right click and choose "Flatten Image" -

1657313724263.png

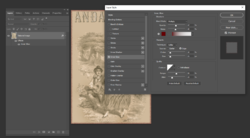
Now go ahead and apply your layer style / inner glow:

1657313997739.png
 
Here is what the transparent image looks like enlarged and then the flattened image for comparison::

1657314298758.png 1657314342264.png

You can see the difference in the appearance of the background....
 

Back
Top