What's new
Photoshop Gurus Forum

Welcome to Photoshop Gurus forum. Register a free account today to become a member! It's completely free. Once signed in, you'll enjoy an ad-free experience and be able to participate on this site by adding your own topics and posts, as well as connect with other members through your own private inbox!

Need help to blend these two layers


maggie2

Well-Known Member
Messages
48
Likes
6
Hi,
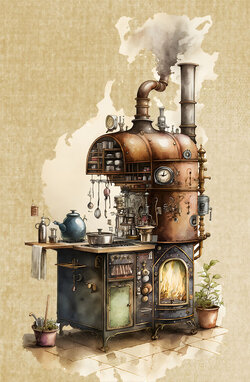
I am trying to blend these two layers together. I want the edges of the stove image to blend softly into the background so the edges don't look so much like the image has just been slapped onto the background. Is there a way to blend the two images together so the stove image looks like it is a natural part of the background and not a separate image? Thanks in advance for any advice you can give me.
ephemera8.jpg
 
Hey!

The fix should be a layer mask and a soft Brush (Brush Tool).

If you want a demo, you may need to post the two images or a PSD file.
 
As @IamSam suggested a soft brush is the way to go.
The more usual route is to blur the edges with the blur tool but if the image you posted shows the stove in question then that may seem a daunting task, but...

I'm going to assume the 'stove' is on it's own layer and with transparency, in which case try this:
  1. Create a marquee, (select all the pixels on the stove layer), and then go to the paths panel.
  2. Create a 'Working Path' from the marquee.
  3. Ensure the working path layer is kept selected after creation, if not, select it. (It will not be visible if it is not selected)
  4. Switch back to your layers panel, you should still see the 'Working Path'.
  5. Select the 'Blur' tool.
  6. Adjust the tool to taste with the settings in the top bar. One setting you will need is to check 'Sample All Layers'....this is crucial to the whole plot!
  7. Create a new layer and with that layer selected hit the 'Enter' key, or 'Return' key, or whatever version of that key you have.
You should now see that your two layers are blurred together but only along the path, and it's on it's own layer too!
You can hit the 'Enter' key as many times as you like, each time the same blur amount will be applied.
With the blur set low, (maybe say 10%), then you can hit the key and build up the blur until you're satisfied.

Using a 'Working Path' will work with many other tools too, just create a 'Working Path', select it, and use it.
You can have as many 'Paths' as you like but only one 'Working Path' so if you need more then duplicate the 'Working Path' to create a 'Path', (essentially performing a 'save' action)....any new path created will overwrite the current 'Working Path' layer, be it selected or not.

Regards.
MrToM.
Thank you. I appreciate the help.
 
@MrToM - I've only had a short opportunity to try your technique, but I may be doing something wrong!!

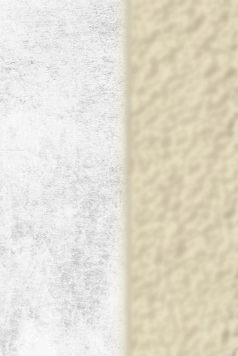
This is the blurred edge using the Blur Tool at full strength at the edge.
Again, I must be doing something wrong! Help me out!
Screen Shot 2023-03-10 at 9.05.33 AM.png

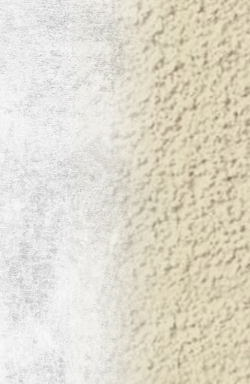
Same edge with a layer mask and Brush Tool...........I'm getting a better blend.
Screen Shot 2023-03-10 at 9.05.45 AM.png
 
Help me out!

We've done this before mate, although it's been a while. LOL

Are you using the same settings for each tool...it looks like your second image is using a much larger brush size.
Try a larger brush size with my method.

The only difference with this technique is that instead of manually moving the tool, in this case the brush, by hand, you 'apply' the brush along a path, a 'Work Path'. Thats the whole idea of 'Work Paths'...you define where the effect is to go before actually applying it...then its applied in one deft tap of the 'Enter' key, or multiples of.

Note that I mistakingly called it a 'Working Path' in my first reply post and not it's proper name of 'Work Path'.

Hopefully it will all come flooding back to you.

Regards.
MrToM.

PS. You did a video HERE a while back and I mentioned this technique as a follow up. (A 'while back' = 8 years!)
 
Last edited:
As @IamSam suggested a soft brush is the way to go.
The more usual route is to blur the edges with the blur tool but if the image you posted shows the stove in question then that may seem a daunting task, but...

I'm going to assume the 'stove' is on it's own layer and with transparency, in which case try this:
  1. Create a marquee, (select all the pixels on the stove layer), and then go to the paths panel.
  2. Create a 'Working Path' from the marquee.
  3. Ensure the working path layer is kept selected after creation, if not, select it. (It will not be visible if it is not selected)
  4. Switch back to your layers panel, you should still see the 'Working Path'.
  5. Select the 'Blur' tool.
  6. Adjust the tool to taste with the settings in the top bar. One setting you will need is to check 'Sample All Layers'....this is crucial to the whole plot!
  7. Create a new layer and with that layer selected hit the 'Enter' key, or 'Return' key, or whatever version of that key you have.
You should now see that your two layers are blurred together but only along the path, and it's on it's own layer too!
You can hit the 'Enter' key as many times as you like, each time the same blur amount will be applied.
With the blur set low, (maybe say 10%), then you can hit the key and build up the blur until you're satisfied.

Using a 'Working Path' will work with many other tools too, just create a 'Working Path', select it, and use it.
You can have as many 'Paths' as you like but only one 'Working Path' so if you need more then duplicate the 'Working Path' to create a 'Path', (essentially performing a 'save' action)....any new path created will overwrite the current 'Working Path' layer, be it selected or not.

Regards.
MrToM.
New here .... tried to follow this ... but obvious did something wrong.
After Blur tool - "Create a new layer and Enter key" - layer still empty
Not understanding what is suppose to happen there.
 

Back
Top