What's new
Photoshop Gurus Forum

Welcome to Photoshop Gurus forum. Register a free account today to become a member! It's completely free. Once signed in, you'll enjoy an ad-free experience and be able to participate on this site by adding your own topics and posts, as well as connect with other members through your own private inbox!

Matching colors from one side to the other from scan


R.Braverman

Member
Messages
13
Likes
1
Not sure this is the correct place to start this, so BY ALL MEANS move it to where it should be if necessary (as if you needed my permission ...)

As you can see, this is, well maybe you can't ...
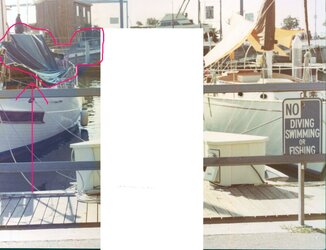
OK, this is a scanned in photo, if you look the boat on the left is/has a bluish cast, while the right one is "greenish" (is my ignorance starting to show ...?). I think it's a reflection in the lens when it was taken, but obviously I'm not sure - at least that's what it appears to be..
This was taken 50 years ago, I know the fellow who took it, and he would NOT have screwed this up.
So as I can pretty much mask that area, how do I try to blend it's colors to match the right side?
A brief explanation; as I think most people do, I learn what I need as I need it, and this is the first time I've run into this.

Thanks.
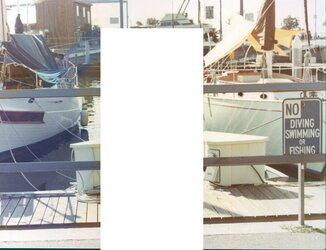
Untitled-2.jpg
 
If you want to adjust the left half of the image to match the green color cast on the right, here's one way.
  • Temporarily open a Black & White adjustment layer.
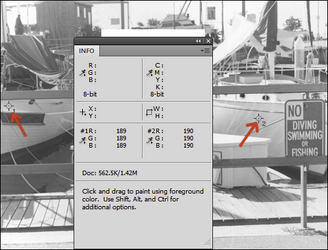
  • Go to Window>Info to open the Info panel, which allows you to hover your mouse over any part of the image and get a precise read-out of the RGB value of that spot.
  • Find an area on the hull of each boat that has the same (or nearly the same) luminosity. Use the color sampler tool to mark those two spots, as I did below where the red arrows are pointing. The spots I selected have an RGB luminosity of 189 on the left and 190 on the right, which is close enough.

1736793568971.png


  • Discard the B&W adjustment layer, and the Info panel will now display the actual color read-outs for points 1 and 2. The goal is to change the RGB value of point #1 to match the individual red, green and blue values of point #2, using a Curves adjustment layer.
  • If you don't know how to do this, I've attached a tutorial here. Once done, you can use the mask in the curves adjustment so that the change affects only the left half of the image. (Personally, I would use the gradient tool to smoothly mask the entire image from left to right.)


Another Way
That said, I believe a better way to deal with color casts is to set the black, white and gray points and then make further adjustments based on clues from the image. Here's one approach:
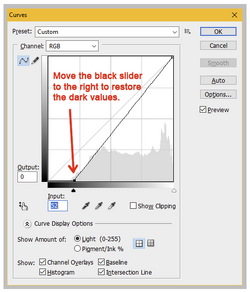
  • Open a Curves adjustment layer. The histogram shows that the image is washed-out with no dark pixels present. Move the black slider to the right, as shown here, to bring back the dark values of the image.

1736795735402.png


  • Now set the Gray point, which is often a good way to deal with color casts.
  • If you don't know how to identify the Gray point, here's a tutorial. (Note, for setting the Gray point, a Curves or Levels adjustment layer are equally interchangable.)
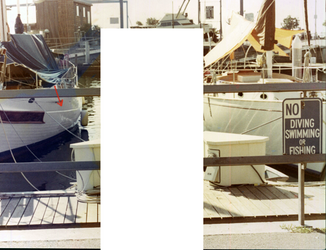
  • My gray point is on the hull on the left where the red arrow is pointing. Use the Gray eyedropper in the Curves adjustment to set the gray point, which gives you this.
  • To me, the left half of the image now looks natural, but the right half possibly still needs work.

1736796549094.png


  • On the right side of the image, it seems likely that the "No Diving" sign should have white text. But if you hover over the white areas of that sign using the Info panel, the RGB values are not identical and are particularly deficient in the blue channel.
  • Similar to what you did above, select a spot of that text using the color sampler tool, open a Curves adjustment, and set the text to a neutral color with RGB values of roughly 200, 200, 200.
  • Apply a right-to-left gradient in the layer mask so that this new curves adjustment affects only the right half of the image and smoothly fades away as we move to the left.
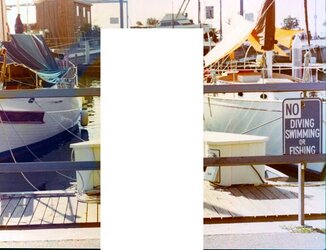
  • Lastly, I boosted the overall saturation of the image to arrive at this final result.

Boats.jpg
 
Hi @R.Braverman
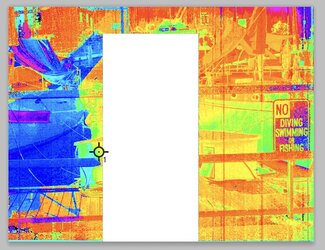
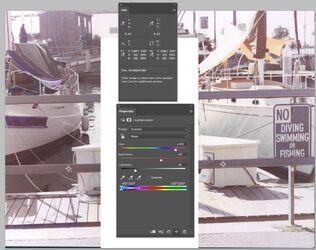
I will explain my approach, yet the first thing I wanted to point out is that the blue areas on the left are not a simple gradient, and not sure why it is that shape that directed me in the approach I took. The image below is a Hue map of the entire image and you can see that there are specific areas that are way off in Hue compared to the others:

Screenshot 2025-01-13 at 10.03.29 PM.jpg

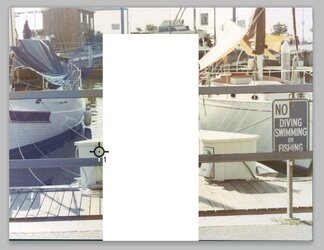
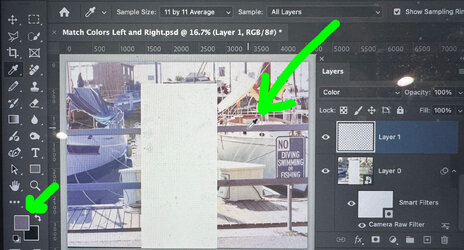
So, I first decided how I would want to fix the image's white point, so I only had to work by hand on the smaller blue area. So I made the image a Smart Ojbect, and then applied the Camera Raw filter using the white balance eye dropper on the ship's hull on the right. So here is your starting image:

Screenshot 2025-01-13 at 10.03.51 PM.jpg

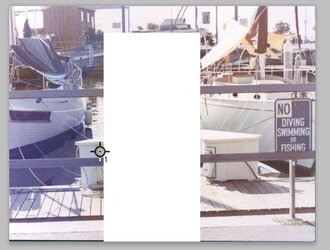
After applying the white balance eyedropper on the right ship, here is the result:
Screenshot 2025-01-13 at 10.04.30 PM.jpg

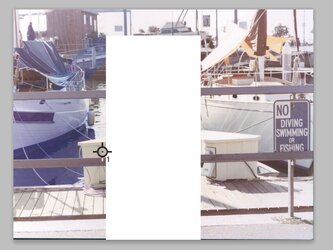
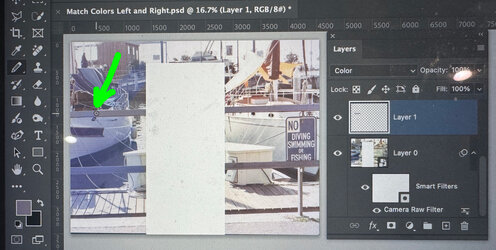
Now, I added a blank Layer and set the blend mode to color to match up the left blue areas to the right. I sampled areas on the right to paint on the left blue regions. For this example, since you are just asking for directions, I applied a mask and only worked on the boards of the fence of the walkway, the walkway, and the box that I marked with a sample point. I sampled the color to paint on the right and then painted on the left side.
I saved the selection of where I was painting and used that as the mask on a curves adjustment Layer to change the luminosity to better match from left to right (this is optional). The resulting image is below for those selected areas where I was matching the color:

Screenshot 2025-01-13 at 10.17.27 PM.jpg

So, given the odd shape area with the blue tint, that is the general approach I would take.
I hope this gives you a direction to consider.
John Wheeler
 

Back
Top