thebestcpu
Guru
- Messages
- 3,204
- Likes
- 2,957
A post of the Free Photoshop Request Forum by @JayE had several submissions by myself @JeffK, @Babine, and @chrisdesign
This is a request to see how others approached or would approach improving this image. I will share my approach to spur on responses.
I am assuming this is the correct forum for this topic yet if not, please move it to the correct forum.
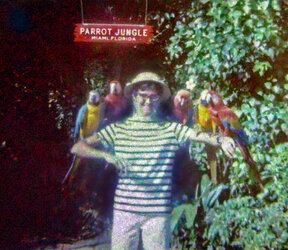
Here was the starting image provided by the OP:

I was quite a challenging image to try and improve and am providing some details on the approach I took as was requested. It would be great if the other members providing submission shared how they tackled the problem as well.
The image had a tremendous amount of "noise" and lack of tone around the subject. Without seeing the original photo, it is hard to know all the contributing factors for the "noise." Yet I do know that JPEG compression was a very large factor and I suspect the scanner introduced both regular and color noise on top of that. There was plenty of resolution/pixels so that was not the issue.
Using a higher quality scan (or use of a copy stand and high resolution camera) and saving in a non-lossy compression format such as PNG or TIFF would really help with a much better starting image and better results in post processing.
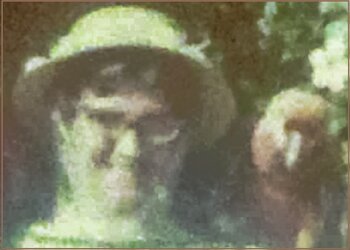
I zoomed and cropped around the subject's face to show the JPEG compression issue.
First image is the original scan as provided. You can see 8 bit and 16 bit blocking reducing effective resolution as well as a high amount of color noise in the image.
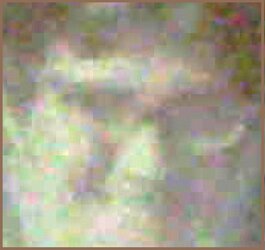
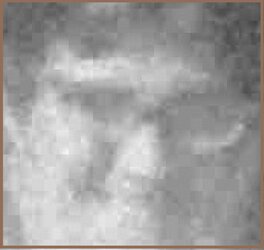
Second image is just showing the luminosity channel. Note the JPEG compression overwhelming the resolution:
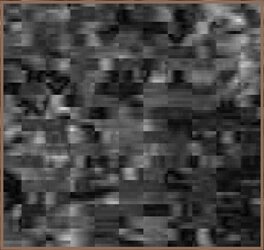
Third image is the Saturation Channel (note the lack of any detail):
Fourth image is the Hue Channel. Note the lack of any detail and color noise:
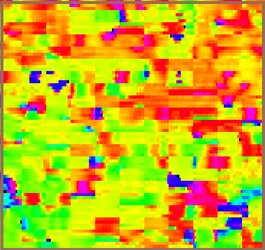
Even though there are plenty of pixels the JPEG compression creates quite the challenge.
In lieu of a better starting image, here are the steps I took (I did not record every step as I went down a lot of dead ends as well).
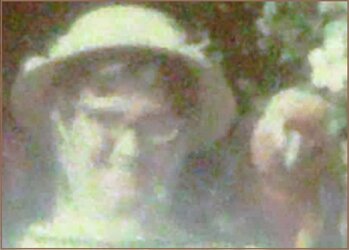
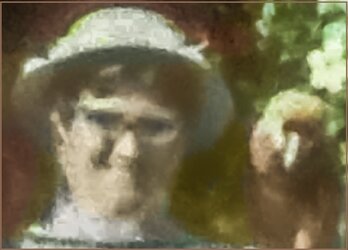
First I used the neural filter that removes JPEG artifacts. It is actually helpful with highly compressed JPEGs:
I then did a first round of the Camera Raw Filter as both a first pass noise reduction and improving tone (particularly contrast).
- I maxed out the Color Noise Slider
- Using a masked adjustment increased the contrast, reduced highlights, added just a bit of clarity for the subject and right hand side of the image:
At this point I noted that the white blooming around the subject lacked detail and decided to use Content Aware Fill functions to fill in the areas around the subject to reduce the harder work area to just the subject and birds.
I then applied a second Camera Raw Filter with following steps
- Detail section used noise reduction
- Tone areas, slight increase in contrast, a great reduction in shadows, added vibrance.
- My focus was on hiding all the distractions around the subject
Then I focused on the subject. I first de-saturated the whole subject and with a color blend Layer added in skin color.
I also brushed in more color on the birds in the darker areas.
I did some healing in areas that I thought were distractions.
I also took the eye on the left and duplicated it to the right. It was a subtle change to the image yet the eye-brain combination notices eye detail quite well and I thought it made a difference.
Pretty much depending on viewing the image a lower magnification and let the eye-brain do its own automatic filtering.
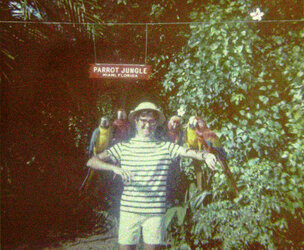
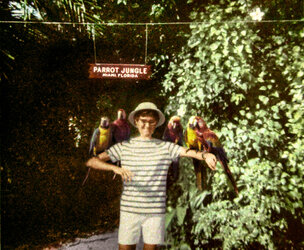
Here is the full image with those changes:
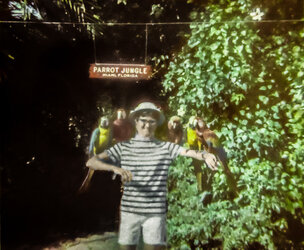
Far from ideal yet my focus was to help invoke good memories as opposed to technically the best possible recovery (which would have taken a tremendous amount of time given my skill level).
Best next steps is to get a better original as the starting point. That might allow AI tools to be used as well.
All in my opinion of course. Would be great how others would approach this image.
John Wheeler
This is a request to see how others approached or would approach improving this image. I will share my approach to spur on responses.
I am assuming this is the correct forum for this topic yet if not, please move it to the correct forum.
Here was the starting image provided by the OP:

I was quite a challenging image to try and improve and am providing some details on the approach I took as was requested. It would be great if the other members providing submission shared how they tackled the problem as well.
The image had a tremendous amount of "noise" and lack of tone around the subject. Without seeing the original photo, it is hard to know all the contributing factors for the "noise." Yet I do know that JPEG compression was a very large factor and I suspect the scanner introduced both regular and color noise on top of that. There was plenty of resolution/pixels so that was not the issue.
Using a higher quality scan (or use of a copy stand and high resolution camera) and saving in a non-lossy compression format such as PNG or TIFF would really help with a much better starting image and better results in post processing.
I zoomed and cropped around the subject's face to show the JPEG compression issue.
First image is the original scan as provided. You can see 8 bit and 16 bit blocking reducing effective resolution as well as a high amount of color noise in the image.

Second image is just showing the luminosity channel. Note the JPEG compression overwhelming the resolution:

Third image is the Saturation Channel (note the lack of any detail):

Fourth image is the Hue Channel. Note the lack of any detail and color noise:

Even though there are plenty of pixels the JPEG compression creates quite the challenge.
In lieu of a better starting image, here are the steps I took (I did not record every step as I went down a lot of dead ends as well).
First I used the neural filter that removes JPEG artifacts. It is actually helpful with highly compressed JPEGs:

I then did a first round of the Camera Raw Filter as both a first pass noise reduction and improving tone (particularly contrast).
- I maxed out the Color Noise Slider
- Using a masked adjustment increased the contrast, reduced highlights, added just a bit of clarity for the subject and right hand side of the image:

At this point I noted that the white blooming around the subject lacked detail and decided to use Content Aware Fill functions to fill in the areas around the subject to reduce the harder work area to just the subject and birds.
I then applied a second Camera Raw Filter with following steps
- Detail section used noise reduction
- Tone areas, slight increase in contrast, a great reduction in shadows, added vibrance.
- My focus was on hiding all the distractions around the subject
Then I focused on the subject. I first de-saturated the whole subject and with a color blend Layer added in skin color.
I also brushed in more color on the birds in the darker areas.
I did some healing in areas that I thought were distractions.
I also took the eye on the left and duplicated it to the right. It was a subtle change to the image yet the eye-brain combination notices eye detail quite well and I thought it made a difference.
Pretty much depending on viewing the image a lower magnification and let the eye-brain do its own automatic filtering.

Here is the full image with those changes:

Far from ideal yet my focus was to help invoke good memories as opposed to technically the best possible recovery (which would have taken a tremendous amount of time given my skill level).
Best next steps is to get a better original as the starting point. That might allow AI tools to be used as well.
All in my opinion of course. Would be great how others would approach this image.
John Wheeler

