What's new
Photoshop Gurus Forum

Welcome to Photoshop Gurus forum. Register a free account today to become a member! It's completely free. Once signed in, you'll enjoy an ad-free experience and be able to participate on this site by adding your own topics and posts, as well as connect with other members through your own private inbox!

Actions How to Remove graphics from objects?


Skyrice_7

New Member
Messages
2
Likes
1
Hi, I need to remove the graphics from this van and make it all yellow. I am going crazy because I don't know how to accomplish this in photoshop. I don't know if there is something that can help me with this in an easy way. I am hoping someone can give me advice on what techniques are available and which ones can be used to get the best result. I want to learn how to do this for myself! Thanks!

Image.jpg
 
It all depends on your Photoshop abilities. Here are the major topics and tools that you'd need to understand:
  • Creating precise paths/selections using the Pen Tool.
  • How to draw a gradient.
  • Layer masks.
  • Layer styles, such as Bevel and Emboss.

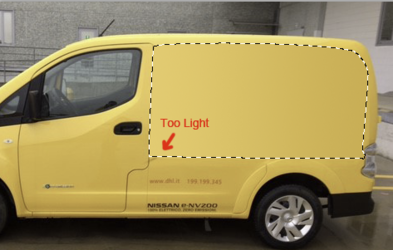
  • First, create a path that surrounds the logo, using the Pen tool. Be careful about the border with the front door and also the rear tail light.
  • Fill that path with a left-to-right gradient where the foreground color is the lighter shade of yellow (from the front part of the car) and the background color is the darker yellow (from the rear of the car).
  • Your selection and gradient should look like this. But you'll notice that it's too light in the lower-left corner. The car is a bit darker at the bottom.

1686878625648.png


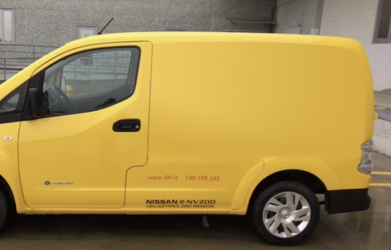
  • With the selection still active, sample the darker yellow at the bottom of the car.
  • Using a fairly large, soft brush, brush-in the darker color for a better blend. Something like this.
1686878884739.png


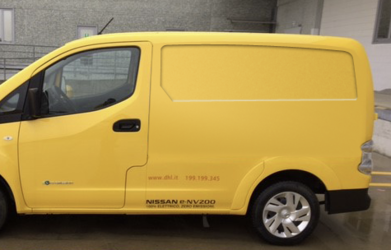
  • Use the Pen tool again to make a new path around the beveled portion of the van (where the letters DHL are).
  • With that selection active, go to Edit>Copy All and paste your new yellow color onto a new layer.
  • Apply a Bevel & Emboss to this layer. You can also apply an inner shadow, as well.

Here's the final image. This can always be improved upon, but just these few steps does most of the hard work.

1686879384343.png
 
Excellent job Rich!

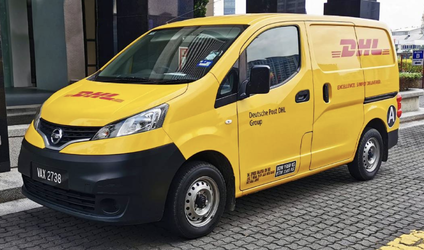
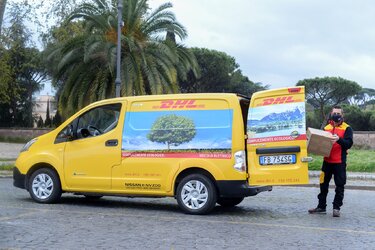
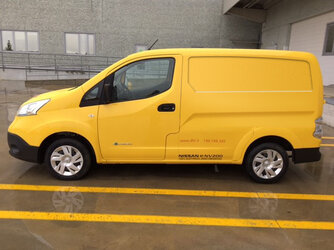
Just in case anyone needs an original ref for the side of the vehicle.......

Screen Shot 2023-06-15 at 9.20.39 PM copy.png
 
well, I don't know what to say. I'm really grateful for this explanation. I think I can't ask for more, also because as you said well, it all depends on my ability. I will just have to figure out how to do the van bevel. thank you very much
 
I guess the Van model in the Opening Post is different, where it does not have the side rear access door. So, you did not miss anything.

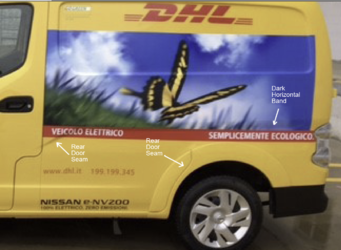
I sure didn't see it at first. But now I'm not completely sure if the rear door is actually there. Look at the three white arrows I drew here. Those seem to agree pretty closely with the rear door in the image that IamSam posted. It may just be a trick of the lighting in the original post. I'm slightly leaning toward thinking the door is really there, but I could probably be talked out of it.


1686936214398.png
 
Could you screenshot the settings for the lower embossed Drop shadow layer settings please? Specifically, how did you manage the curve in that settings?

I already deleted the PSD file. But... I didn't use any layer styles. I just drew it freehand using the Pen tool.

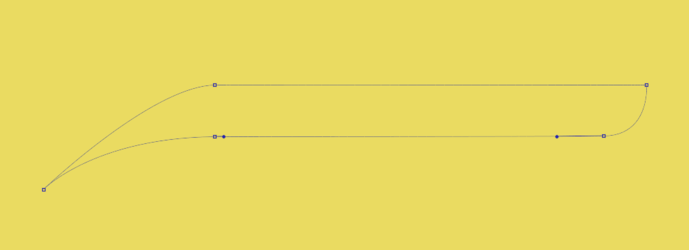
First, I created a Pen path:

1687106844984.png


Then, with that selection active, I used a large soft brush and drew my own shadow. I kept the center of the brush aligned with the top edge, so that the top of the shadow would be the sharpest and darkest. Then I let the natural feathering of the brush fade-out toward the bottom. Something like this:

1687107072258.png
 

Back
Top