What's new
Photoshop Gurus Forum

Welcome to Photoshop Gurus forum. Register a free account today to become a member! It's completely free. Once signed in, you'll enjoy an ad-free experience and be able to participate on this site by adding your own topics and posts, as well as connect with other members through your own private inbox!

How to make lines in picture


rizalito

New Member
Messages
3
Likes
0
Hallo there
i am a new member on this forum !
I would like to know how can i make lines like the picture below...been struggling a lot theses days to find a pattern but no way
31947362_1714402708647829_6588919550815764480_n.jpg
 
Hello and welcome to PSG.

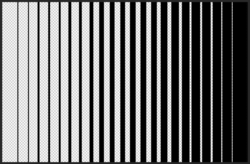
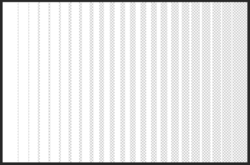
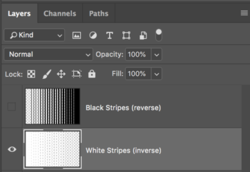
The effect is called a Halftone Striped Gradient. It's basically vertical or horizontal lines that are exponentially spaced so that the reverse is proportionately the same pattern as the inverse.

Reverse
Screen Shot 2018-05-06 at 11.21.27 AM.png

Inverse
Screen Shot 2018-05-06 at 11.21.42 AM.png
Screen Shot 2018-05-06 at 11.23.33 AM.png

These are very hard to make and would be even harder for me to explain!

I would just download one that's already made and use that.

More to come.
 
i would say i am still a beginner despite working with Photoshop for 2,5 years ..there are still thing i need to learn :P
 
OK. here's the basic concept.

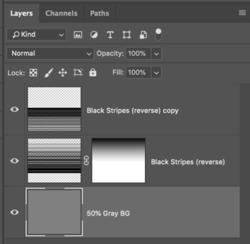
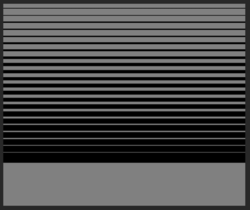
Open an image that you want to apply the effect to. In this case it's just a 50% Gray BG.
Open or drag the Halftone Stripe Gradient image into the document.

Use Free Transform, the Move Tool, or whatever you need to position the Halftone Stripe Gradient layer where you want it.
Screen Shot 2018-05-06 at 1.16.46 PM.png

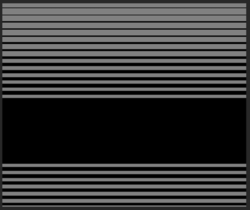
Make a copy of the Halftone Stripe Gradient layer, hit Cmd/Cntrl + T to enter free transform.
Right click inside the transform box and choose "Flip Vertical"

Use the Move Tool to move the duplicated Halftone Stripe Gradient layer down until it looks like this......
Screen Shot 2018-05-06 at 1.17.11 PM.png


This is how you fade the stripes.
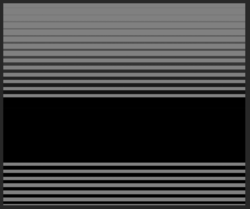
Add a reveal all layer mask to the first Halftone Stripe Gradient layer (not the copy).
Hit D on the keyboard to reset your foreground and background colors to black and white.
Select the Gradient Tool.
Open the Gradient Tool editor and set the gradient preset to "foreground to transparent".
Select the layer mask and pull a gradient from the top to the bottom

Should now look like this....
Screen Shot 2018-05-06 at 1.17.49 PM.png
Screen Shot 2018-05-06 at 1.18.34 PM.png

On an image and rotated to 45 degrees.
Screen Shot 2018-05-06 at 1.35.38 PM.png
 
Your welcome. If you have any questions please don't hesitate to ask.
 

Back
Top