What's new
Photoshop Gurus Forum

Welcome to Photoshop Gurus forum. Register a free account today to become a member! It's completely free. Once signed in, you'll enjoy an ad-free experience and be able to participate on this site by adding your own topics and posts, as well as connect with other members through your own private inbox!

How to make a cut at exactly 45 degrees


Rich54

Guru
Messages
1,834
Likes
3,599
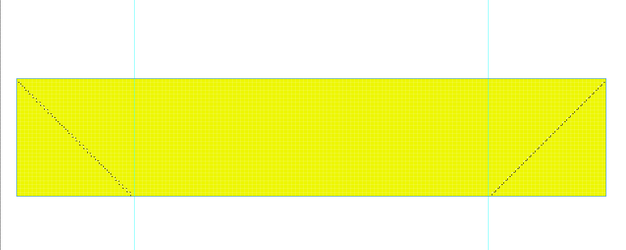
This feels like a beginner question that I’m embarrassed to ask. I have a rectangle on its own layer. I want to cut off the ends in a 45-degree bevel, as if the rectangle were one side of a beveled picture frame. How would I do that?

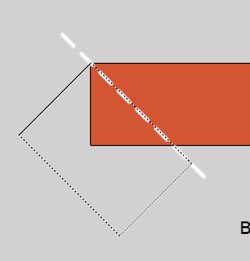
I got it done in a complicated way by constructing a custom 45-degree triangle, making a selection of that shape, and then moving that selection around to make my cuts. There is probably a much simpler way that I’m missing.


1677630285305.png
 
Just going by pure mathematics, if the requirement is a 45 degree cut on a rectangle:
Leave a guide on each side of the length that is exactly equal to the width. Then, cut using your preferred method.
 
Hi @Rich54
Use the polygonal selection tool. Start at the corner of the rectangle with a click to start, Start dragging to the lower right and then hold the Shift Key and it will lock at intervals of 45 degrees.
Finish the selection by going back around to the beginning and you have a selection edge that is 45 degrees from the desired starting point.
Similar steps for the cut on the right.
There are other ways yet that is the most straightforward that comes to mind.
Hope that helps
John Wheeler
 
Hi @Rich54
Here is another way. Make a rectangular selection starting in the upper left corner of the item to be cut.
Use Select > Transform Selection
In Options Bar set the pivot point to the upper left corner
Set angle to rotate at 45 degrees and accept.

Here is an image of a sample selection with the desired edge at 45 degrees
Just another approach to consider
John Wheeler


Screen Shot 2023-02-28 at 6.55.29 PM.jpg
 
Use the polygonal selection tool. Start at the corner of the rectangle with a click to start, Start dragging to the lower right and then hold the Shift Key and it will lock at intervals of 45 degrees.

Worked perfectly. I forgot about that tool. I knew I was missing something fairly obvious.
 
Here's another option.

Be sure and use centering guides when creating your rectangle.
Make sure "snap/snap to" is active.

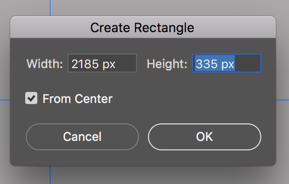
You have known parameters when you create your rectangles.
In this case, the known height is 335 pixels.
Screen Shot 2023-02-28 at 9.41.28 PM.png

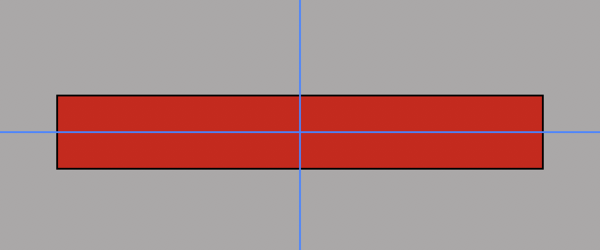
Here is the rectangle with a black stroked inner border.
Screen Shot 2023-02-28 at 9.42.24 PM.png

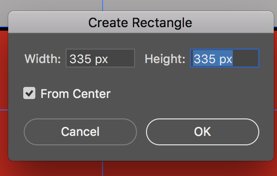
On a new layer, create a new rectangle/square using the known height of the rectangle you're working on.
Corner to corner of a square is a 45 degree angle.
In this case, it's 335px x 335 px.
Screen Shot 2023-02-28 at 9.43.31 PM.png

Note that I have also added guides to outside of the rectangle.
Move the square to the left end using the Move Tool and shift.........it should snap in place if you have that setting active.
Screen Shot 2023-02-28 at 9.44.11 PM.png

Add a guide to the inner edge of the square.
Screen Shot 2023-02-28 at 9.45.15 PM.png

Repeat for the right side.
Screen Shot 2023-02-28 at 9.45.39 PM.png

Turn the square layer off.
Now use the Pen Tool to add a point to lower intersections of the newly added guides and the bottom guide of the rectangle.
Delete the two lower corner points.
This will leave you with curved ends.
Screen Shot 2023-02-28 at 10.09.37 PM.png

Now hold the alt/opt key and click on the two new lower nodes!
You have now quickly added 45 degree angles to your rectangle.
Screen Shot 2023-02-28 at 9.53.39 PM.png

You can create four individually mitered rectangles forming a frame with their own layer style for each.

You can also use this quick method to create a layer mask.
 
Here's another option.

Be sure and use centering guides when creating your rectangle.
Make sure "snap/snap to" is active.

You have known parameters when you create your rectangles.
In this case, the known height is 335 pixels.

Here is the rectangle with a black stroked inner border.

On a new layer, create a new rectangle/square using the known height of the rectangle you're working on.
Corner to corner of a square is a 45 degree angle.
In this case, it's 335px x 335 px.

Note that I have also added guides to outside of the rectangle.
Move the square to the left end using the Move Tool and shift.........it should snap in place if you have that setting active.

Add a guide to the inner edge of the square.

Repeat for the right side.

Turn the square layer off.
Now use the Pen Tool to add a point to lower intersections of the newly added guides and the bottom guide of the rectangle.
Delete the two lower corner points.
This will leave you with curved ends.

Now hold the alt/opt key and click on the two new lower nodes!
You have now quickly added 45 degree angles to your rectangle.

You can create four individually mitered rectangles forming a frame with their own layer style for each.

You can also use this quick method to create a layer mask.

At first, I did something very similar to this method: I created a perfect square with the shape tool. Then I used the Pen tool on that square to create a perfect 45-degree triangle shape. Once I had the triangle path, I could move it around the screen and create selections from it for cutting or masking.

To me, John Wheeler's suggestion of the polygonal lasso is much faster and simpler. As John pointed out, by pressing the Shift key, the polygonal lasso snaps to a perfect 45 degree angle. It's very quick and flexible.

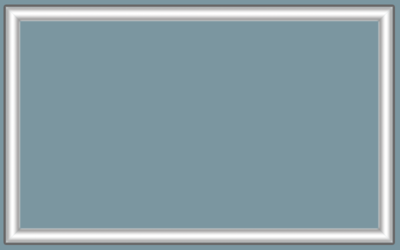
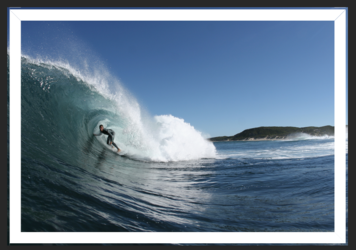
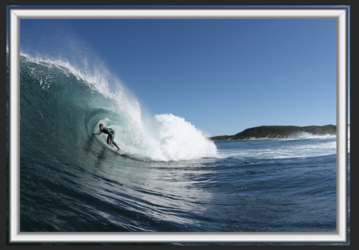
This all started when I looked at the recent post from Rollo Pollo about how to make the frame image he posted. I wanted to see if I could do it myself, which is when I got hung-up on the 45-degree miter/bevel issue. Here's what I came up with for the frame, which is four separate sides that I merged, and then applied some layer styles.

1677692797391.png
 
To me, John Wheeler's suggestion of the polygonal lasso is much faster and simpler. As John pointed out, by pressing the Shift key, the polygonal lasso snaps to a perfect 45 degree angle. It's very quick and flexible.
I totally agree, I was just offering another possibility when working with a path associated with the rectangle.

I have always used the Shift key option with the Pen Tool to create 45 degree angles.
 
On the miter, did you mask or crop the rectangle?

I masked each of the four sides to achieve the 45-degree cut.

At first, I thought I could get away with creating only one side of the frame, and then simply copy, rotate and resize that rectangle to create the shorter sides. But I discovered that if you first cut (erase) the 45 degree ends, if you then lengthen or shorten that object, it distorts the 45 degree cut and the pieces won't join properly.

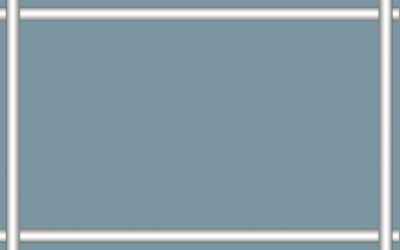
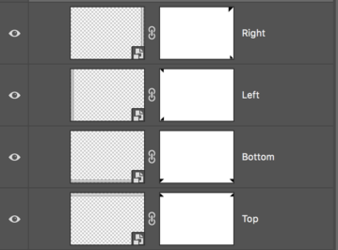
What I did instead was: I deliberately made all my sides too long, so that they overlapped (like below). Then I masked each of the four individual layers to trim the ends at 45 degrees, creating the miter.


1677694362613.png
 
I masked each of the four sides to achieve the 45-degree cut.
Excellent! For my own works, I always mask the miters. I also convert the rectangle into a smart object, then duplicate........this way I only have to adjust one layer style.

Like you, I was looking for a quick and simple way to create the frame for @Rolo Polo's post.................I wasn't sure how to approach it. I need to reconsider my earlier post.
 
The layer styles were tricky. I created the rounded emboss effect by applying a black-to-white-to-black gradient to my first rectangle. Then I duplicated that layer three more times to create the four separate sides, masking them to create the miter.

Once I had all four layers masked and mitered, I combined them into one merged shape to apply additional layer styles (inner glow).
 
I also convert the rectangle into a smart object, then duplicate........this way I only have to adjust one layer style.
Let me explain this for those future readers. This is also just another method.

I created one rectangle for for the border.
Screen Shot 2023-03-01 at 12.47.30 PM.png

I then converted this one rectangle to a smart object.
I then copied the newly minted SO 3 more times and moved into position.
Screen Shot 2023-03-01 at 12.47.50 PM.png

I then added layer masks to each rectangle.
Using the Pen Tool and the shift key trick mentioned above (Polygonal Lasso tool works as well) I mitered the rectangles for each.
Screen Shot 2023-03-01 at 12.48.05 PM.png
Screen Shot 2023-03-01 at 12.53.45 PM.png

Since all of these rectangles are SO's created from one, all I have to do is to double click on one of the SO layers, which opens a PSB document.
I then added the layer style and saved the change.
This updates all of the rectangles making up the frame.
Note: You will have to flip some of the rectangles!
Screen Shot 2023-03-01 at 12.45.52 PM.png
 

Back
Top