Hi Pocahontas
Providing images of your Layer Stack and results would be much easier to understand your issue and provide suggestions.
Here is my best shot without that information.
You want to a half tone pattern (bit map style) made from a gray tone image where the shape is of varying sizes to represent the gray tones (when viewed form a distance)
The path you were taking does have issues and there is another way that gives you more adjustment capability. This also helps easily solve some potential issues such as small tonal range of either the original image or the pattern.
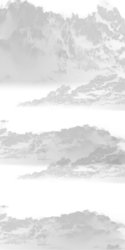
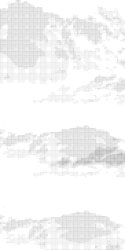
I have created an example made from you original could picture and using a 10 x 10 pixel diamond pattern with shades from black to white.
The end result does show varying diamond sizes depending on gray tone of the original image. Hope this gives you a good starting point.
You need to create a desired pattern of sufficiently small size compared to your original image and create it with Edit > Define Pattern
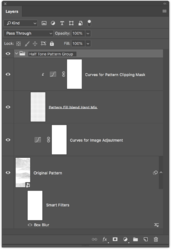
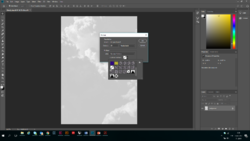
First here is the Layer Stack that I used:

The lowest Layer is the original image made into a Smart Object with an optional box blur filter applied. Turns out that if you make the box blur ~ the same size as the pattern size the shape will more closely represent the pattern you use. If you don't use the box blur you will have a little more precision in the image a far as gray tone
The second Layer is a cures adjustment layer (could use Levels Adjustment Layer) to create an image with a high level of tone range (your starting clouds do not)
The third Layer was just a blank Layer filled with the pattern you created (Edit > Fill..... use the pattern option and selection your pattern. This Layer is set to blend of Hard Mix (this is important)
The fourth is another curves adjustment Layer (again you could use a Levels Adjustment Layer) to adjust the tone range of the pattern you defined.
I used a grouping to group Layers 2 thru 4 to easily turn all adjustments on and off for comparison to the original.
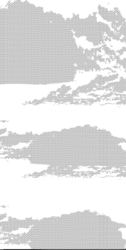
The first image below is the results of playing around with the curves adjustment Layers with the Smart Object blur blend turned off
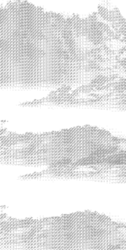
The second image below is the the same except for turning on the fox blur.


Finally, since the above was all done in grayscale you an always change modes to bit map using the 50% gray threshod which will keep the image the same other than the mode/format is changed.
Hope this helps
John Wheeler
