What's new
Photoshop Gurus Forum

Welcome to Photoshop Gurus forum. Register a free account today to become a member! It's completely free. Once signed in, you'll enjoy an ad-free experience and be able to participate on this site by adding your own topics and posts, as well as connect with other members through your own private inbox!

How to fix the colour on this image?


slavicgirl

Member
Messages
5
Likes
1
Hello everybody,

I am new to this forum and relatively new to Photoshop.
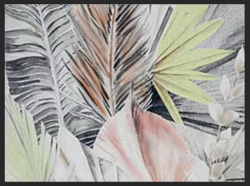
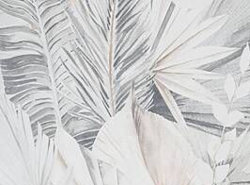
I am wondering if anyone is able to help me how I can make the "leaves" of this wall mural more vibrant and saturated like the ones in the other image?
I want the blacks to be dark etc.

Usually, this is part of a whole image and I don't want the whole image to change *such as the carpet, other bare part of wall etc) but if i try to isolate just the mural bit with quick selection or polygonal lasoo tool and then apply vibrancy and contrast changes it looks funny as it doesn't just "pick up" the leaves but the part behind/between it too.

How would you go about making the photo 1 like the second photo in "colour depth" please but without affecting the area between the leaves?
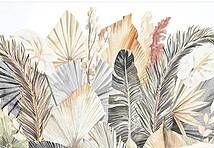
checke1.jpgcheck2.jpg
 
These images are way too small for details. I would guess that this is just a colorization process involving making a selection and then using a color fill layer set to "multiply" with a layer mask.

Like this...
Screen Shot 2020-03-17 at 9.43.00 AM.png
 
I agree with IamSam that your images are very small, which makes it almost impossible to do detailed work on them. You asked several questions, one of which is how to make the blacks darker. You seem to be a Photoshop beginner, so I wonder if you're familiar with Histograms. If not, you may want to read-up about those and the various ways to adjust them.

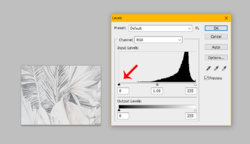
My first attachment below is your original image where I opened a Levels adjustment. If you look at the histogram graph shown in the Levels adjustment, the entire left side of the graph is empty, meaning that there are no dark pixels in your image. The darkest pixels start to show up roughly in the center of the histogram axis, which equates to a medium-gray amount of darkness. The red arrow points to the spot that would be pure black, but there are no pixels there.

Before.jpg


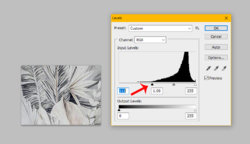
In the next attachment, below, I grabbed the little triangular slider on the left (for pure black) and slid it toward the right to the point where I start to see actual pixels in your histogram graph (where the red arrow is pointing). By moving that left-hand slider, I have re-set the pixels in your image to make the darkest ones pure black. All other pixels in the rest of the image are automatically re-set by the Levels adjustment. In this second attachment, you now have areas of dark black.

After.jpg

Other hypothetical images (not yours) have a similar issue where there are no whites. In that case, you would grab the little triangle on the far right and slide it toward the left to re-set the lightest pixels as pure white. A general rule-of-thumb for most photos is that something should be pure black and something should be pure white, so that the overall photo contains the full range of possible tones. The histogram helps you see what's going on to achieve that.

The images you have chosen in your original post are very complicated leaf patterns. The coloring effects that you want to achieve will likely involve detailed masking and the use of layer blend modes, all of which may possibly be beyond your abilities at the moment. You might want to try achieving similar color effects on simpler images to start. Just a thought.

Rich
 

Back
Top