What's new
Photoshop Gurus Forum

Welcome to Photoshop Gurus forum. Register a free account today to become a member! It's completely free. Once signed in, you'll enjoy an ad-free experience and be able to participate on this site by adding your own topics and posts, as well as connect with other members through your own private inbox!

How to draw tire tracks in sand ?


Portal

Member
Messages
13
Likes
4
Hi,
I'm a very casual PS user, usually only for minor editing. Over the years, I've used some tools, but it's still a big machine for me.
I'm a tabletop gamer and I'm creating battlemaps for playing with my miniatures. I've found some usefull informations on dedicated forums and improve a bit my skills with it.
But I now face a problem that should probably be answered more by PS-addicts than by miniatures-addicts.

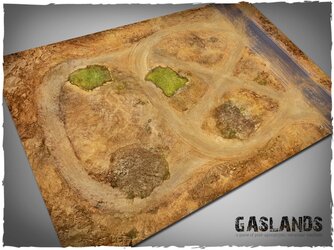
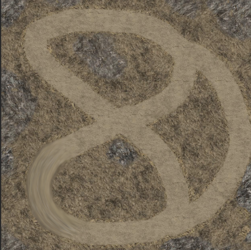
I try to build a desert circuit for buggy race. I feel that I really need wheel tracks all over the main "road" and probably a bit outside of it.
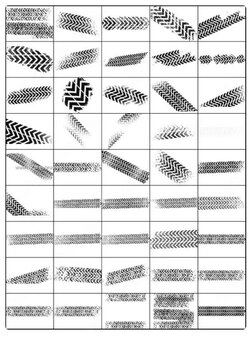
I tried to play with brushes, but I can only use them as "stamps", so I only got short lines of tires and usually only in straight line.
So, how could I add tire tracks following the road, crossing each other, etc... ?

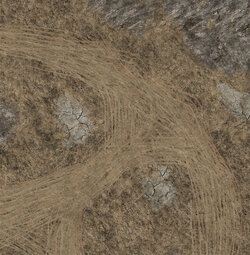
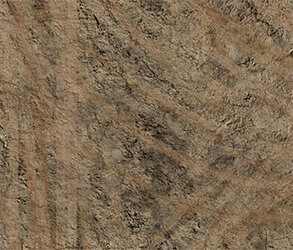
I attach a pic of a professional map that is a bit similar to what I try to achieve.
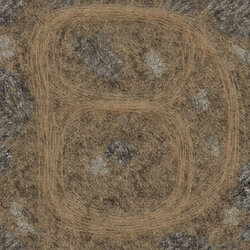
And also a pic of my map to show where I am.

Hope to find some help, my google fu is not enough for that. :)
desert2.jpg

gaslands-game-mat-playmat-track-6x4-title.jpg
 
Can you attach an image of what your tire-track brush looks like? There are ways to do what you want, but it would help me explain if I could see the brush.
 
Hi
I would create a path and just use the size % for the tire track
Play with the size of the brush, the tint, the transparency
You can repeat this as many times as you want
 
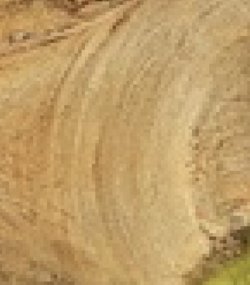
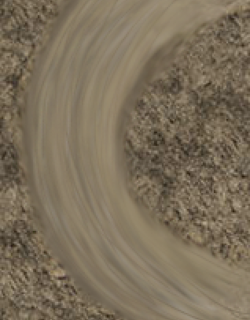
The lines or tracks as you refer to them, are textures in your sample image that are simple contrasting lines. In order to simulate these, you will need to draw them in with the Brush Tool and a medium hard round brush on a separate layer and then blend them in with the smudge tool. It will take several contrasting colors to give the appearance of tracks or ruts.

Orig
Screen Shot 2023-04-21 at 9.06.16 PM.png

Brushed simulation (Quick Demo)
Screen Shot 2023-04-21 at 9.30.18 PM.png

The whole track is not complete, but you get the idea in scale.
Screen Shot 2023-04-21 at 10.16.16 PM.png
 
I'd say I'm probably trying to do something like that ?

But my "stamps" of tracks didn't repeat themselves gently along the path... ??
 
The lines or tracks as you refer to them, are textures in your sample image that are simple contrasting lines. In order to simulate these, you will need to draw them in with the Brush Tool and a medium hard round brush on a separate layer and then blend them in with the smudge tool. It will take several contrasting colors to give the appearance of tracks or ruts.

Orig
View attachment 136875

Brushed simulation (Quick Demo)
View attachment 136876

The whole track is not complete, but you get the idea in scale.
View attachment 136877
Amazing. So you create a new layer for each color ?
Here is an update. I feel I can't go to much in the "blurry" way, because when printing at 1:1 scale, it will be strange.
But man, I shoud have a tablet and pencil, because it's so bad with the mouse...

2.jpg
 
I'd say I'm probably trying to do something like that ?

But my "stamps" of tracks didn't repeat themselves gently along the path... ??

I found this same video and was going to post it yesterday, but I felt it might be too difficult for you because you have little Photoshop experience. In order to do what you want—to have your patterned tire tracks automatically rotate themselves along the twists and turns of your racetrack—you need to familiarize yourself with the various settings found in the Brush Panel. I'll try to simplify it down to only what you need, but the brush panel can do much, much more.

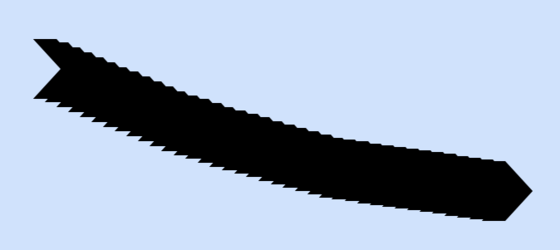
Let's say I start with a brush that looks like this:

1682183184460.png


If I hold down my mouse (and, yes... you really do need to get a tablet and stylus) and drag this brush across the page, I get an ugly smudge, which is not what you want:

1682183408536.png


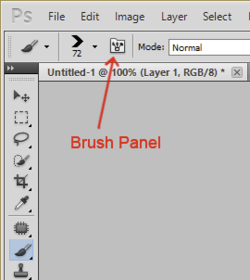
The first thing to do is to open the Brush Panel by clicking on this icon here. (You first need to have the brush tool activated.)

1682183670026.png


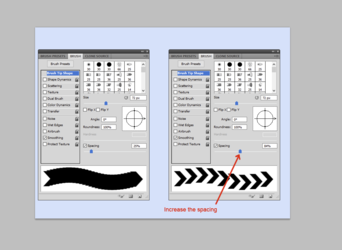
Click on the box that says "Brush Tip Shape". Near the bottom of this panel is a slider called Spacing. This controls the spacing of your brush strokes as you drag it across your image. As you can see on the right, when I increase the spacing to 84%, the ugly smudge becomes evenly spaced tire treads.

1682184203353.png


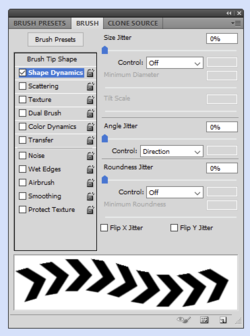
The next thing you need is for the tire tracks to automatically tilt and rotate themselves as you drag across the random curves of your racetrack. You can control that by clicking on the words "Shape Dynamics" in the brush panel.

Change the settings to exactly match this view here:
  • Set size jitter to 0%
  • Set the size jitter control to "Off"
  • Set angle jitter to 0%
  • Set angle jitter control to "Direction". (This is crucial. This makes it do what you want.)
  • Set roundness jitter to zero.
  • Unclick everything else in the brush panel (such as Scattering, Texture, Dual Brush, etc.)

1682184747073.png


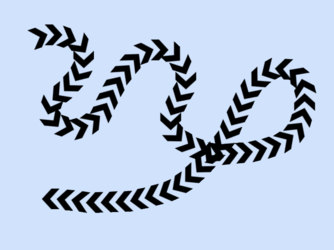
With these settings, you can now draw your tire tracks. If you drag your tire-track brush in a curved path, you will get something like this. You can always go back and adjust the setting for "Spacing" to fine-tune the appearance. Also try varying the brush size and opacity, and experiment with layer blend modes to make the tracks look like they are embedded in the dirt.

Good luck.


1682185200535.png
 
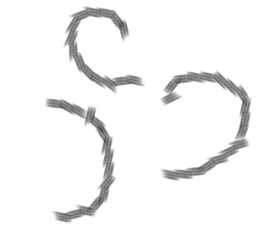
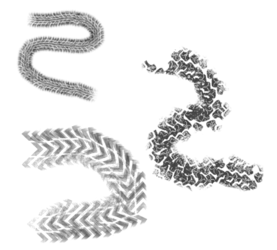
@Rich54 - great instructional! I had been playing with this since I just picked up on a brush video from a recent conference and I appreciated your additional insights. I think, though, that the problem is also in the brushes that the OP picked - they just can't seem to follow a curved path and make a clean turn no matter how much I played with the settings:

1682193898022.png

But I did find a set of brushes here:


These seemed to be able to make a smoother transition - again with your settings:

1682194122594.png

If the OP insisted on the original brushes he picked, there would need to be some additional work - the alternate ones I found can work right out of the box....

**EDIT - just noticed that the alternate brushes I menioned above a preset to work on the curved direction that includes the settings Rich mentioned
 
Last edited:
@Rich54 - I think, though, that the problem is also in the brushes that the OP picked - they just can't seem to follow a curved path and make a clean turn no matter how much I played with the settings:
I completely agree and thought the same thing. The OP's brushes are too wide—they're essentially rectangular—and each individual brush image won't bend enough to form a smooth curve. Something more like the chevron shape that I used works better.

I discovered all the brush panel settings only in the last year or two. I always knew they existed but never really took the time to study them in any depth. But they can really do a lot.
 
@Rich54 : best tuto ever ! Why isn't it in every PS course ? :)
@JeffK : thanks for finding best brushes, I'm really not stuck to the first ones.

I'll try all of this tomorrow, thanks for your precious help !!

Quick question : is there a way to fade in and fade out the brush path ? I've find a way to fade out, but it looks like it's only for a defined length of lines...
 
Last edited:
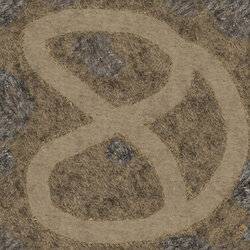
Here is my progress, showing the full map, and a detail. Full map will be printed at 120x120 cm and we will put toys car on it, so that's also necessary to look at a detail-scale.
I find good that the "shape" of the tires is noticeable only when you really look at it.

Any thought about improvment ? (other than buying a tablet+pen to have a smoother trajectory of the roads :(

2 details.jpg

2 large.jpg
 

Back
Top