What's new
Photoshop Gurus Forum

Welcome to Photoshop Gurus forum. Register a free account today to become a member! It's completely free. Once signed in, you'll enjoy an ad-free experience and be able to participate on this site by adding your own topics and posts, as well as connect with other members through your own private inbox!

How to create a thin border around a selection?


Coffee_Girl

Active Member
Messages
39
Likes
8
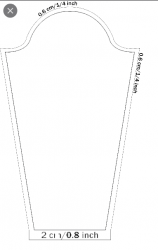
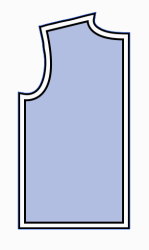
I am a seamstress and i am trying to create an outline about 1/4 inch from the original object, it is relatively simple but i am such a noob that i cannot figure it out. The image above is an example of what i want to do, I select the object with magic wand...then just expand the border of the selection out to 1/4" etc. Thanks!


Screenshot 2022-01-29 at 14-53-07 sewing pattern seam allowance - Google Search.png
 
I think you already know the answer because you have explained it correctly when you stated your question. If you are able to select your main object, then go to Select>Modify>Expand to increase the size of that selection. The "expand" command is stated in pixels, so it may be trial & error to estimate how many pixels equals 1/4 inch. (If that calculation needs to be precise, there are ways to do it.) But once you have expanded your selection by the proper amount, create a new layer and go to Edit>Stroke. Apply a black (or whatever color) stroke to your expanded selection and then you're done.

1643519623445.png
 
This is actually a task for Illustrator...

You shouldn't work with selections and expand in Photoshop because you won't get sharp corners.

Instead, you should work with shapes and different stroke widths/colors.

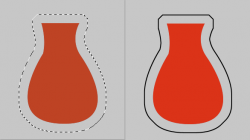
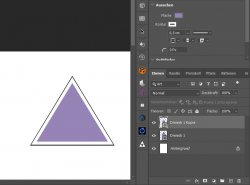
The first shape should have a black outline stroke with a width of 0,6cm/1/4in
Duplicate this shape an change the color from black to white an the stroke width from 0,6cm to 0,5cm.

outline.jpg
 
This can be done in Ps, but it takes a few steps that may be tedious to describe.

Screen Shot 2022-01-30 at 2.23.28 AM.png Screen Shot 2022-01-30 at 2.27.13 AM.png
Screen Shot 2022-01-30 at 2.28.03 AM.png
 
OK, going to give this a shot!

This is the first and most difficult part.
All of this needs to be on transparent BG. I have added the white BG layer for visibility.

First you must create your pattern.
I used guides and the Pen Tool set to "Shape".
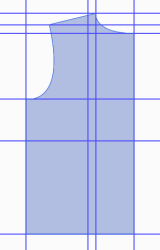
Screen Shot 2022-01-30 at 9.08.36 PM.png

Using the tools option bar of the Pen Tool, I then added a 24 pixel outside stroke which is 0.25 inches. CONVERTER
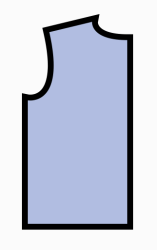
Screen Shot 2022-01-30 at 9.11.17 PM.png

I then made a duplicate of this layer and rasterized it.
I used the Magic Wand Tool to make a selection of the outside of this shape.
Make sure the marching ant selection is only around the shape! If not hit Cmd/Cntrl + I.
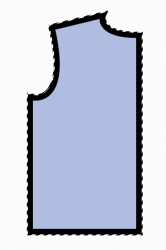
Screen Shot 2022-01-30 at 9.27.24 PM.png

Create a new layer.
Turn all other layers off.
Select your Rectangular Marquis Tool.
Select/highlight the new layer with the active selection...
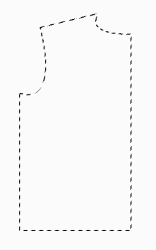
Screen Shot 2022-01-30 at 9.33.52 PM.png

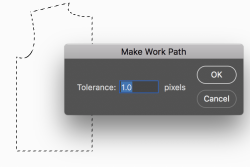
Then right click within the selection and choose "Make Work Path".
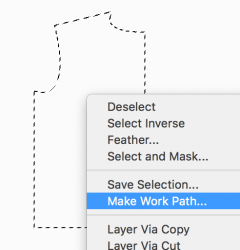
Screen Shot 2022-01-30 at 9.16.48 PM.png
Screen Shot 2022-01-30 at 9.17.06 PM.png
You will now have a work path that looks like this.
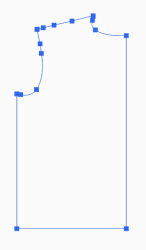
Screen Shot 2022-01-30 at 9.35.58 PM.png

Now we need to convert the work path to a shape layer.
Go to LAYER > NEW FILL LAYER > SOLID COLOR Hit OK and choose a color.
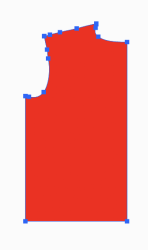
Screen Shot 2022-01-30 at 9.21.19 PM.png
You should now have three (3) layers.....
The Original Pattern Shape layer.
The Original Pattern Shape copy layer.....which is no longer a shape layer because we rastorized it!
And the Color Fill (shape) layer which is 24 pixels larger than the Original Pattern Shape.
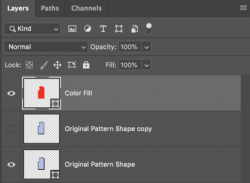
Screen Shot 2022-01-30 at 9.39.25 PM.png
 
Now for the second part.

Turn off the Color Fill layer.
Select/Highlight the Original Pattern Shape layer.
Select your Pen Tool.

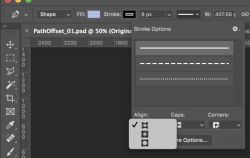
We left this layer wit a 24px outside stroke. We need to change this to a 8px inside stroke.
Use the tools option bar at the top to do this.
Screen Shot 2022-01-30 at 9.55.12 PM.png
Screen Shot 2022-01-30 at 9.55.39 PM.png

Now turn on and select/highlight the Color Fill layer.
From the tools option bar, turn off the fill.
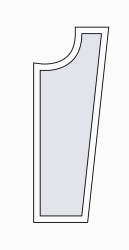
Set the stroke to a 8px inside stoke just as we did before.
Screen Shot 2022-01-30 at 10.00.52 PM.png

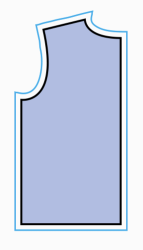
You can of course make the stroke smaller and change it's color.
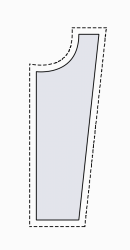
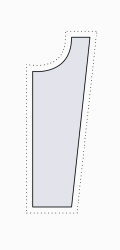
Screen Shot 2022-01-30 at 10.02.16 PM.png

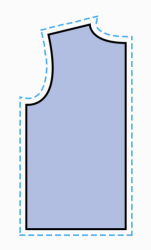
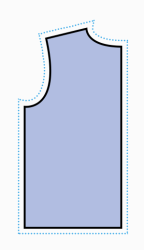
You can also change it to a dashed or dotted line.
Screen Shot 2022-01-30 at 10.03.07 PM.png
Screen Shot 2022-01-30 at 10.03.19 PM.png

All of the strokes and colors are editable! The only drawback is that the offset distance is not .........err..........readily editable! LOL!!
Adobe Illustrator is leaps and bounds a better program for this kind of stuff!!!
 

Back
Top