What's new
Photoshop Gurus Forum

Welcome to Photoshop Gurus forum. Register a free account today to become a member! It's completely free. Once signed in, you'll enjoy an ad-free experience and be able to participate on this site by adding your own topics and posts, as well as connect with other members through your own private inbox!

How to achieve this effect?


Bluie

Well-Known Member
Messages
90
Likes
13
Hello

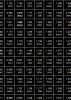
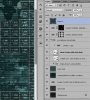
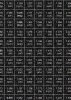
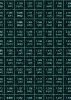
What is the best way, please, to get the effects achieved in the two attachments?

Are they transparent gifs laid over one another with one image on one layer, another image on another, etc, or blended with one another?

If anyone can point to a useful tutorial that would be great.

Thanks.
 

Attachments

  • Image1.jpg
    Image1.jpg
    44.1 KB · Views: 43
  • Image2.jpg
    Image2.jpg
    45.1 KB · Views: 45
Google: {composite photoshop tutorial}

Short summary: Each component image is on a separate layer in Photoshop (or equivalent). A combination of:

layer opacities,
layer blending mode,
layer blendIF conditions, and
layer masks

are used to adjust the relative contributions of the different component images.

The particular image that you cited also uses some other ancillary effects such as scan lines (http://www.pluginsworld.com/plugins_178/adobe/photoshop/richard_rosenman/scanlines.html or an actual photograph), plus an overall color cast. There are way too many things going on in that image to try to walk you through the steps one at a time. However, I can say without a doubt that the file formats (eg, JPGs, transparent GIFs, etc.) for the individual component images have almost nothing to do with the way it actually was executed.

HTH,

Tom M
 
PS - FWIW, if my memory serves me, either that exact image, or a very similar one was brought up in similar discussion about a year ago in a different forum, and there was a lot of detailed reverse engineering of the effects involved. Unfortunately, I just spent about 10 minutes trying to find that discussion, but was unsuccessful.
 
Hello Tom

Many thanks for all your information.

It sounds quite an involved task, so I will have a fair bit of experimentation.

I will also google it as you suggest.

The graphic itself is associated with a US TV programme called 'Person of Interest' and is on www.channel5.com under Demand5 - you can see part of the image there.

Thanks again.

Bluie
 
@OP - I put together a little tutorial for you that, for simplicity, doesn't use any blend modes other than "normal", and does not use any blendIF effects. However, it does use layers, layer masks, and layer opacities. It's not exactly the same as the image you cited, but gets fairly close & hopefully points you in the right direction.

HTH,

Tom

--------------

First - the base image is just a spreadsheet I grabbed off the web and then inverted it. It doesn't use the font that is used in the image you cited, but it was a quick place to start.
 

Attachments

  • park_factor-tjm01_ps02a_cropped-01_base_image_inverted_spreadsheet.jpg
    park_factor-tjm01_ps02a_cropped-01_base_image_inverted_spreadsheet.jpg
    257.7 KB · Views: 35
To give you an overview of the process, here is a screen grab showing the layer stack that I'm going to walk you through, as well as a bit of the final image.
 

Attachments

  • layer_stack.jpg
    layer_stack.jpg
    311.7 KB · Views: 32
So, the first thing to do is to make the numbers more grungy. The first step was simply to add some noise.
 

Attachments

  • park_factor-tjm01_ps02a_cropped-02_is_01_plus_noise.jpg
    park_factor-tjm01_ps02a_cropped-02_is_01_plus_noise.jpg
    247.3 KB · Views: 33
Then, use a "Levels" adjustment layer to add cyan to both the shadows and hightlights in the previous image.
 

Attachments

  • park_factor-tjm01_ps02a_cropped-03_is_02_plus_cyan_color.jpg
    park_factor-tjm01_ps02a_cropped-03_is_02_plus_cyan_color.jpg
    262.6 KB · Views: 35
The numbers are still too crisp, so I duplicate the layer, take the median, and then set the opacity of the new layer to 50%.
 

Attachments

  • park_factor-tjm01_ps02a_cropped-04_is_03_plus_soften_using_median_at_50pct.jpg
    park_factor-tjm01_ps02a_cropped-04_is_03_plus_soften_using_median_at_50pct.jpg
    240.2 KB · Views: 35
OK... that's looking much more realistic. So, now I add scan lines using the plugin I mentioned in my earlier post & it's really starting to look like an old Hercules graphics monitor from the late 1980's.
 

Attachments

  • park_factor-tjm01_ps02a_cropped-05_is_04_plus_scan_lines.jpg
    park_factor-tjm01_ps02a_cropped-05_is_04_plus_scan_lines.jpg
    245.8 KB · Views: 23
Next, I grabbed a few surveillance photos from the web and brought them into the main PSD file at small sizes. I turned them into B&W and adjusted their brightness and contrast to fit in nicely with the spreadsheet.

Next, I treated them exactly the same way I treated the spreadsheet, ie, gave them a cyan color and added scan lines.
 

Attachments

  • park_factor-tjm01_ps02a_cropped-06_is_05_plus_surv_cam_photos_treated_same_way.jpg
    park_factor-tjm01_ps02a_cropped-06_is_05_plus_surv_cam_photos_treated_same_way.jpg
    221.1 KB · Views: 23
As the final step, if you look carefully on the image you cited, there are some dark bands and extra bright cells. This was presumably done to suggest taking a photo of a monitor where the exposure time used for the photo is catches some of the refresh banding of the monitor.

I added this effect to this photo by simply making some rectangular selections and then darkening those bands using a "levels" adjustment layer. I then did the analogous thing to brighten a few cells.
 

Attachments

  • park_factor-tjm01_ps02a_cropped-07_is_06_plus_bright_cells_dark_bands.jpg
    park_factor-tjm01_ps02a_cropped-07_is_06_plus_bright_cells_dark_bands.jpg
    214.4 KB · Views: 23
If I was doing this "for real" and had more time to give to this project, I would go back and tweak several of the effects, find better source images, fonts, etc. But hopefully, this give you an idea of how it could be approached.

HTH.

Cheers,

Tom M

PS - I looked once again for the old thread that reverse engineered a similar image, but, once again was unable to find it. The participants in that thread discussed some of the more advanced techniques used to really dial in the exact look they were seeking. If I ever find it, I'll send you the URL. It's bugging me that I can't find it and had to put together something myself.
 
Wow Tom!

That's just brilliant. Thank you for all your time and trouble and effort. I am very grateful. I have bookmarked these pages and will press on with it closely following your suggestions. It's not too important that it's tweaked or not; it's a question of grasping the basic technique employed.

Once again very many thanks - you've overstretched yourself!

Cheers!

Bluie
 

Back
Top