Photoshop Gurus Forum
Welcome to Photoshop Gurus forum. Register a free account today to become a member! It's completely free. Once signed in, you'll enjoy an ad-free experience and be able to participate on this site by adding your own topics and posts, as well as connect with other members through your own private inbox!
You are using an out of date browser. It may not display this or other websites correctly.
You should upgrade or use an alternative browser.
You should upgrade or use an alternative browser.
How do I remove an unwanted head?
- Thread starter Laurel_B
- Start date
There isn't just one tool. It would be a combination of many tools plus a bit of freehand drawing skills. Once you've removed the blob, the hard part is to replace it with a realistic view of the missing parts of the man.
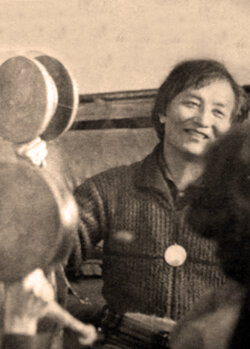
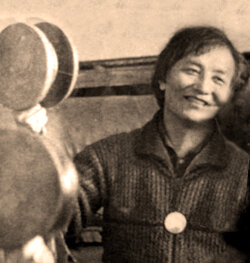
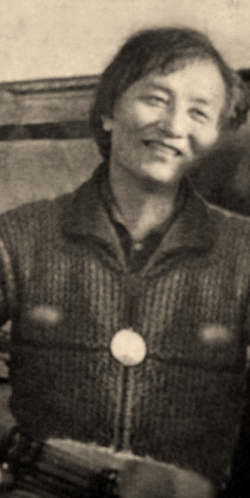
For this particular image, you are lucky that his torso is pretty much facing us full on. You could get away with copying the left half of his torso, flipping it horizontally, and placing it on the other side. I did this very quickly and sloppily in five seconds and got this:
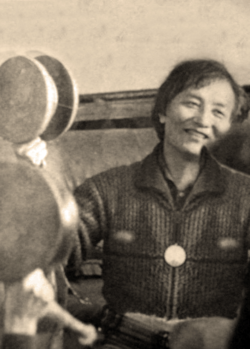
Some further tweaks with the Warp tool can fix the collar and waist area, something like this:
Other things to consider:
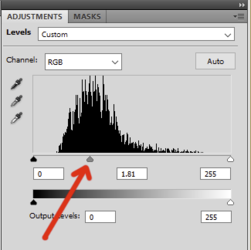
The hardest part is to reconstruct the missing portion of his jaw and face. His head is turned at an angle, so you can't really copy from the left half of his face. To start, open a Levels adjustment layer and move the midtone slider to the left, to lighten the image, something like this. Then fill the mask entirely with black.
Using a soft brush with the Flow set very low (around 5%), gradually paint with white in the mask to lighten the shadows around the missing parts of the jaw and face. Like this:
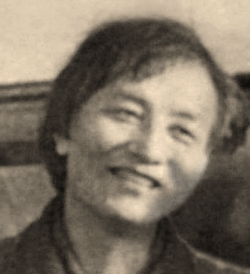
From here, use the same soft brush with low flow, sample a color of the highlighted portion of his cheek or chin, and gradually paint that color to further lighten his face. You can add a small amount of gaussian noise to try to match the graininess of the rest of the image.
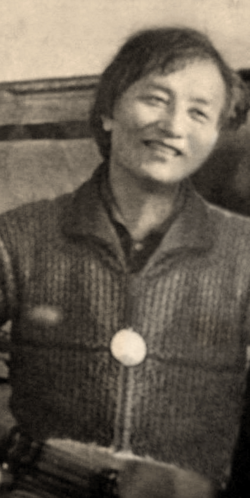
For this particular image, you are lucky that his torso is pretty much facing us full on. You could get away with copying the left half of his torso, flipping it horizontally, and placing it on the other side. I did this very quickly and sloppily in five seconds and got this:

Some further tweaks with the Warp tool can fix the collar and waist area, something like this:

Other things to consider:
- As you can see on his face and neck, the left side of the image is in shadow and the light is coming from the right. On the copied & flipped portion of the torso, you'd need a Levels adjustment to lighten the shadows, simulating the light direction.
- I'm not sure what the white highlights on his chest are (not the medallion), but there probably shouldn't be two of them. On the flipped portion, use the clone stamp to get rid of that.
- You could probably use the same copy & flip technique on the belt and waistline of his pants.
The hardest part is to reconstruct the missing portion of his jaw and face. His head is turned at an angle, so you can't really copy from the left half of his face. To start, open a Levels adjustment layer and move the midtone slider to the left, to lighten the image, something like this. Then fill the mask entirely with black.

Using a soft brush with the Flow set very low (around 5%), gradually paint with white in the mask to lighten the shadows around the missing parts of the jaw and face. Like this:

From here, use the same soft brush with low flow, sample a color of the highlighted portion of his cheek or chin, and gradually paint that color to further lighten his face. You can add a small amount of gaussian noise to try to match the graininess of the rest of the image.

Looks good!!! At first glance, nobody would ever know this wasn't the actual photo.
But... if you zoom-in a lot, you'll see that the entire photo is filled with noisy, mosaic-looking squares. That comes from jpeg compression, where the file was compressed and re-saved too many times. That jpeg noise is almost everywhere, except on the new part of the face that you just drew. In order to better disguise your repaired area, here's a little trick to introduce that jpeg noise.
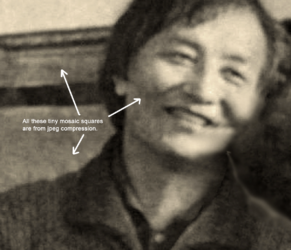
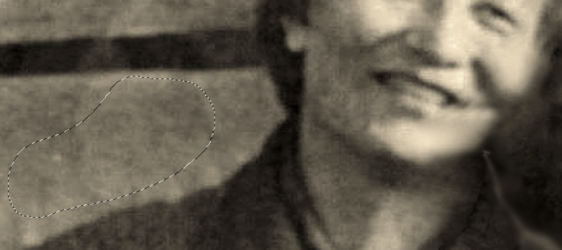
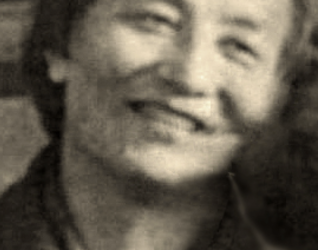
But... if you zoom-in a lot, you'll see that the entire photo is filled with noisy, mosaic-looking squares. That comes from jpeg compression, where the file was compressed and re-saved too many times. That jpeg noise is almost everywhere, except on the new part of the face that you just drew. In order to better disguise your repaired area, here's a little trick to introduce that jpeg noise.

- Using the lasso tool, make a rough selection of that noisy texture from elsewhere on the image. Try to make it about the same size as your repaired area.
- Copy it to a new layer and move it so that it covers your repaired area.
- Change the layer blend mode to Hard Light.

- At first, it will look ugly, miscolored and all wrong.
- Now go to Filter>Other>High Pass. Move the setting on the High Pass filter until the texture starts to match the rest of the image. About 2.5 pixels seems to work.
- Use a layer mask to get rid of any excess texture that you don't need.

thebestcpu
Guru
- Messages
- 3,211
- Likes
- 2,960
Hi @Laurel_B
I did not have the time (and probably not the skills) to do a great job recreating what is under the black area on the right.
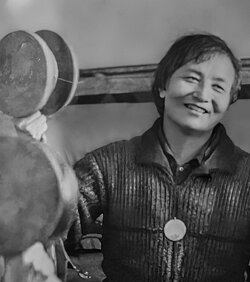
What I did do is create what I think is a better starting point from which to do such work. Among other things I started with the original online image (not facebook) and worked real hard on minimized the JPEG artifacts, then tone and then hand restoration, a bit of grain, and upsizing the image 200%
Anybody is welcome to take this starting point and do with it what they want.
Hope this is possibly helpful.
John Wheeler
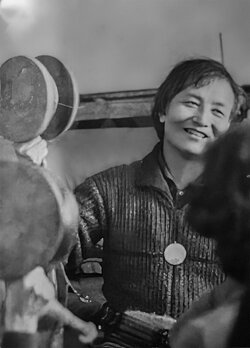
And just for reference that online starting point was not that great and here is that attached image:
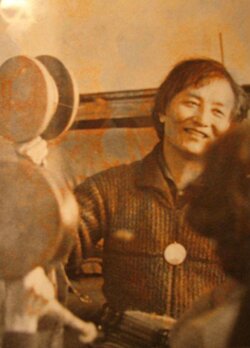
I did not have the time (and probably not the skills) to do a great job recreating what is under the black area on the right.
What I did do is create what I think is a better starting point from which to do such work. Among other things I started with the original online image (not facebook) and worked real hard on minimized the JPEG artifacts, then tone and then hand restoration, a bit of grain, and upsizing the image 200%
Anybody is welcome to take this starting point and do with it what they want.
Hope this is possibly helpful.
John Wheeler

And just for reference that online starting point was not that great and here is that attached image:

thebestcpu
Guru
- Messages
- 3,211
- Likes
- 2,960
thebestcpu
Guru
- Messages
- 3,211
- Likes
- 2,960

