What's new
Photoshop Gurus Forum

Welcome to Photoshop Gurus forum. Register a free account today to become a member! It's completely free. Once signed in, you'll enjoy an ad-free experience and be able to participate on this site by adding your own topics and posts, as well as connect with other members through your own private inbox!

How do I get this sort of brush?


RavGonnaGivItToYa

New Member
Messages
2
Likes
0
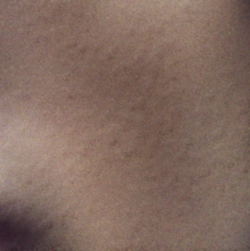
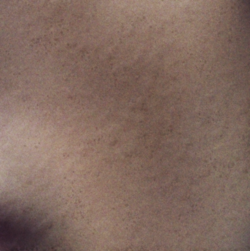
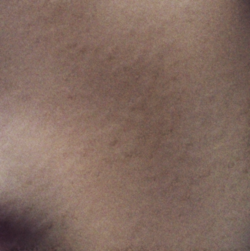
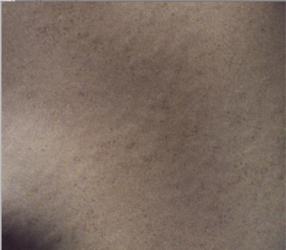
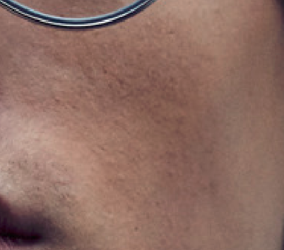
Hi guys! I'm Rav and new here, I'm trying to draw some photorealistic stuff and its working quite good so far. but with faces, the skin texture has been a pain for me to figure out. And it is ruining the entire effect of it looking realistic. I've tried some skin textures brushes and all but none help. These are the kind of textures I'm trying to generate:
1690315823651.png
1690315839971.png
1690315856456.png
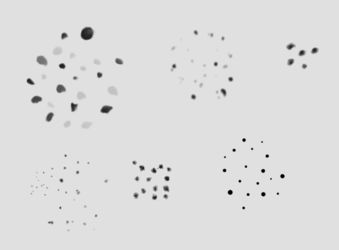
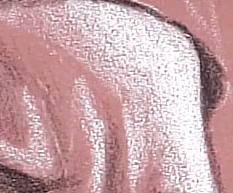
And in case thats not possible, atleast something like this that'd one could get while drawing on a paper and I could improvise on it:
1690315901377.png

the background colour would be the base skin colour of the subject, and the texture is either applied on a multiply/screen layer.
ideally I'd want the solution to be some sort of a brush that could replicate all this, but even if its a combination of things, I'd just want to get the result right.

TIA,
Rav

Version: PS2022
 
The samples you provided all have quite a bit of noise in them due to excessive jpeg compression. This is your second attachment zoomed-in at 300%. All those rectangular shapes are due to jpeg compression, not the actual skin texture. Sometimes, if you're trying to match an edited area of skin to an existing image, you may deliberately want to introduce this jpeg noise. If that's what you're looking for, there are ways to do that.

1690331191272.png


Assuming you do not want to do that, here are a few techniques to simulate skin texture. You can use any of these individually, or together in combination. The samples you provided all look like aged, worn skin, not the young, perfect skin in fashion magazines.
  • I took your first image and used the clone stamp to get rid of the metallic piece of jewelry (or whatever that is).
  • Then I gave it a healthy blur to remove all existing texture but to keep the underlying colors and gradations.
1690331682712.png


  • Above this layer, create a new layer and fill it with 50% Gray (Edit>Fill>50% Gray).
  • Change the blend mode to Overlay.
  • Go to Filter>Noise>Add Noise. Click the boxes for "Monochromatic" and "Gaussian".
  • The amount of noise to add depends on the size and resolution of your image, but try 5% for now.
  • Give this layer a Gaussian blur of something like 0.5 pixels to 1 pixel.
  • You now have this:
1690331990408.png


  • Often, when you look closely at skin, you'll see reds, blues and other colors. You can simulate that effect.
  • Create another new layer above your "Noise" layer. Fill it with 50% Gray and change the blend mode to Overlay.
  • Go to Filter>Texturizer>Grain. Choose clumped grain.
  • Give this layer a Gaussian Blur of about 1%.
  • Reduce the layer opacity until the effect becomes very subtle. You don't want it to be too obvious.
  • Something like this:

1690332440368.png


  • The skin in your sample seems to have a lot of blemishes and small bumps. Here's a way to make that.
  • Create a new blank layer. Change the layer fill (not the opacity) to 0%.
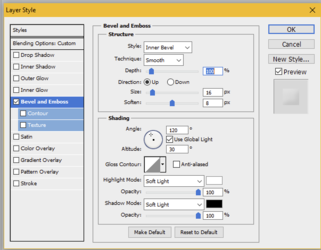
  • Go into the Layer Styles and select Bevel & Emboss. Use these settings, but adjust the light direction to match the lighting of your image.
1690333128719.png


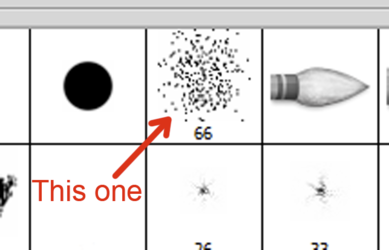
  • Go into the brush tool and choose a brush that looks like this. Make the brush fairly large so that it draws shapes rather than tiny dots.
  • Go into the brush dynamics and activate scattering.
  • Draw across your skin image with this brush to introduce random bumps. (It doesn't matter what color you use because the Fill is set to zero.)
  • Reduce the layer opacity to about 50%.

1690333545825.png


  • It now looks like this:
1690333949129.png


  • Lastly, you can add moles and other blemishes. I made a custom brush for this, but you can do it manually.
  • On a new layer, select an average skin color and change the layer blend mode to Multiply.
  • Draw random blemishes of different sizes and shapes.
  • Reduce the layer opacity until you can see them, but not obviously. Make it subtle.
  • Something like this.

1690334246830.png


  • You can also use the technique explained in the video that @IamSam attached, where he uses the Bloat and Pucker feature of the Liquify filter to simulate the texture conforming to the curve of the skin. I had not seen that idea before, but it's a good one and I will start using that, myself.

Good luck.

1690333961739.png

1690335323687.png
 
I personally use a stipple type skin texture brushes when I am painting in Ps. I use them in light and dark skin tones. However, i feel as though I would not be able to create a tutorial showing how I do use these brushes.

Screen Shot 2023-07-25 at 10.29.17 PM.png

I have never thought of adding a Bevel & Emboss layer style to my stipple layer...........................I really like this idea!!!
 
I personally use a stipple type skin texture brushes when I am painting in Ps. I use them in light and dark skin tones.

I have a couple of custom brushes I made that look a little like your stipple brushes. There are a million options for skin textures. One thing I like to do with a stipple-type brush is to set the brush dynamics to Scatter and the Color Dynamics Foreground/Background jitter to 100%. Set your foreground/background colors to black and white and a layer blend mode of Soft Light. Reduce the layer opacity very low—maybe 20%—for a subtle but varied texture effect.
 
Yes, that's one of the reasons that I did not try do describe my techniques, far too many brush settings and blending options to name! It's just one of those subjects that there's not really a specific answer to write about...........:cry:
 
The samples you provided all have quite a bit of noise in them due to excessive jpeg compression. This is your second attachment zoomed-in at 300%. All those rectangular shapes are due to jpeg compression, not the actual skin texture. Sometimes, if you're trying to match an edited area of skin to an existing image, you may deliberately want to introduce this jpeg noise. If that's what you're looking for, there are ways to do that.
Oh my word, you're a life saver man! this is exactly what I needed. Thanks a ton!!
 
I know I will be looking forward to seeing your results so please post them when you are done.
 
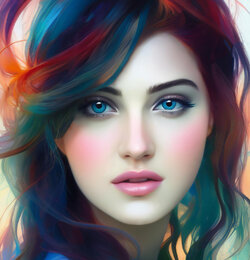
@Rich54 - Would love to see your technique applied to this image! If you have some spare time! If not, that's OK!
(Just excited to see how this works!!)

Click to enlarge.
WomanSkinTest_01.jpg
 
Ok, here's what I've got. This kind of image requires much more subtlety than aged or damaged skin. I used several of the techniques I descrbed above, plus one or two more.

WomanSkinTest (Rich54).jpg
 

Back
Top