Photoshop Gurus Forum
Welcome to Photoshop Gurus forum. Register a free account today to become a member! It's completely free. Once signed in, you'll enjoy an ad-free experience and be able to participate on this site by adding your own topics and posts, as well as connect with other members through your own private inbox!
You are using an out of date browser. It may not display this or other websites correctly.
You should upgrade or use an alternative browser.
You should upgrade or use an alternative browser.
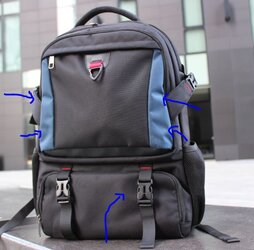
How do I delete creases?
- Thread starter Tonio_88
- Start date
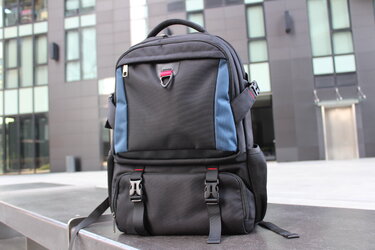
What is your level of Photoshop skill? There is a somewhat advanced technique called Frequency Separation, which allows you to separate the texture on one layer and the underlying colors and shading on another layer. Your backpack has a very distinct dimpled texture that can be cleanly extracted using frequency separation. But... if you're very new to Photoshop, the technique may be too confusing and overwhelming. Tutorial attached, below.
Here's what I did on this blue portion of the image, using frequency separation. (I deliberately left a little hint of the wrinkles to keep it natural-looking).
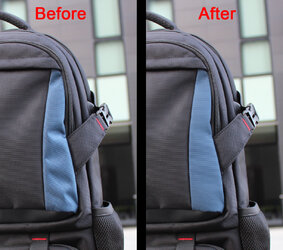
Here's what I did on this blue portion of the image, using frequency separation. (I deliberately left a little hint of the wrinkles to keep it natural-looking).

Here's what I did:
Next Steps:

Re-apply the Texture:

- Following the tutorial, I copied the image onto two new layers and temporarily turned off the visibility of the top layer.
- On the middle layer, I did a Gaussian blur of about 3 pixels, which is just enough to make the texture disappear.
- Back to the top layer, I turned on it's visibility and went to Image>Apply Image, using the settings shown in the tutorial. Change the blend mode Linear Light. This top layer is now the texture, which we'll use later.
- You now have three layers: the original image; the blurred layer that the video calls the Base Layer; and the top layer that contains the texture.
- For now, turn off the visibility of all layers except the original bottom layer.
Next Steps:
- On your original, bottom layer, make a selection of one of the blue panels of your backpack.
- Copy the blue area to its own layer, immediately above the original layer.
- Reactivate the selection of the blue area and give it a very strong Gaussian Blur. I used about 25 pixels for your image. The goal is to blur it enough so that most of the dents and creases that you don't like are filled-in.
- I copied this blurred layer two more times to better fill-in the blurriness out to the edges. I merged these three blurred layers to get something like this:

Re-apply the Texture:
- Make a new copy of your texture layer and turn on its visibility.
- Normally in Frequency Separation, you would use the Patch Tool on the texture layer to replace small areas of "bad" texture with other areas of "good" texture.
- In this case, because the blue panel with bad texture is relatively large, I used a different approach. (In my revised approach, the "Base Layer" will no longer be required.)
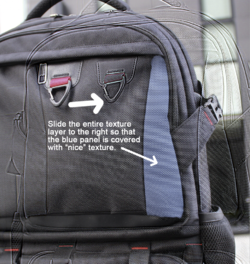
- Using the Move tool, I moved the entire texture layer to the right to cover the blue area as much as possible with "good" texture" (see image).
- Then I applied a layer mask to the texture layer to mask away everything except the blue portion.
- By making multiple copies of the texture layer, I can repeat this process later on for other parts of the image where you want to smooth-out the creases.
- Because your image is so large, you may want to delete the unneeded portions of the texture layer rather than masking them, in order to keep the file size to a reasonable level.
- I've attached my PSD file so that you can see the individual layers.
