Photoshop Gurus Forum
Welcome to Photoshop Gurus forum. Register a free account today to become a member! It's completely free. Once signed in, you'll enjoy an ad-free experience and be able to participate on this site by adding your own topics and posts, as well as connect with other members through your own private inbox!
You are using an out of date browser. It may not display this or other websites correctly.
You should upgrade or use an alternative browser.
You should upgrade or use an alternative browser.
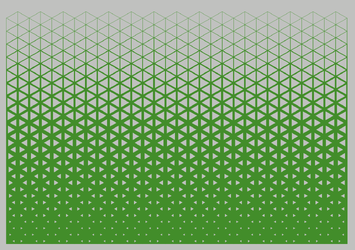
How do I achieve this pattern?
- Thread starter lovedove
- Start date
- Messages
- 23,906
- Likes
- 13,636
Hello and welcome to PSG.
Photoshop is great at creating halftone pattern "effects" with plain round dots, and not so good at creating halftone "patterns".
Ai (Adobe Illustrator)is much better at this!
Here is an example tutorial of creating a geometric triangle halftone pattern in Ai.
You could however locate a suitable geometric triangle halftone pattern as a .PAT file and upload it in your patterns presets. Then add it to a gradient. I'm still looking for a free .PAT file to show as an example.
I figured out a manual way to do it in Photoshop.
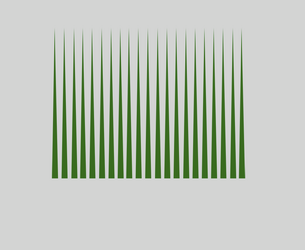
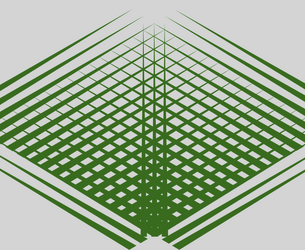

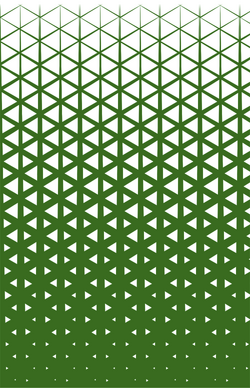
- Use the Pen tool to create a shape of a narrow, tapered triangle. Save this path.
- Create a selection from the path, fill it with the desired color, and replicate it about 20 times, equally spaced.
- Merge them all into one layer. Like this:

- Duplicate this layer so that you have two of them.
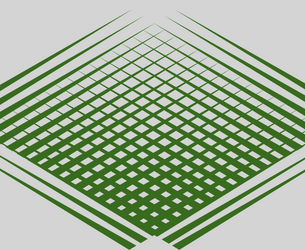
- Use Edit>Transform>Rotate and rotate one of the layers 45 degrees.
- Rotate the other layer by negative 45 degrees.
- Merge the two layers.
- Use Edit>Transform>Scale to widen the pattern a bit.
- Like this:

- Go back to your original triangular pen path.
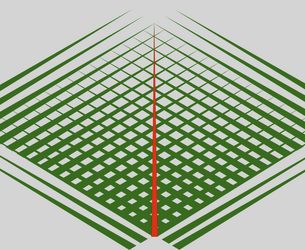
- Make a selection from it and create one verticle triangle on a new layer. (I colored it red just for illustration. You should use the same green color.)
- Use Edit>Transform>Scale to lengthen the triangle to exactly fit in the center of your grid pattern, like this:

- Make two more copies of this new triangle.
- Position them equally spaced on either side of the center one.
- Merge everything down to one layer.

- The next step is to define a pattern so that you can draw your grid using the pattern stamp.
- Use the crop tool to crop exactly as shown below.
- Turn off any background layers, leaving a transparent background.
- Go to Edit>Define Pattern.

- You can now use the pattern stamp to draw your grid across a wide area,
- Use a layer mask, as needed, to replicate the shape of your sample image.

- Messages
- 23,906
- Likes
- 13,636
Excellent work Rich! Very creative solution to a common problem! 
I was working in another direction similar to the Ai tut....................
A path created with the pen tool......
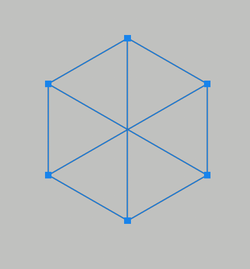
...then stroked with the Brush Tool.
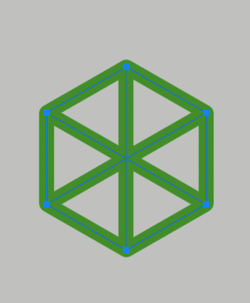
I was going to stack them and gradually decrease the Brush Tool stroke until I had created the gradation effect, then covert to a pattern!
My problem was going to be how I was going to explain it!!!! Even though it's fairly straight forward manual step and repeat.
Here they are stacked, trimmed and ready for a pattern preset!


I was working in another direction similar to the Ai tut....................
A path created with the pen tool......

...then stroked with the Brush Tool.

I was going to stack them and gradually decrease the Brush Tool stroke until I had created the gradation effect, then covert to a pattern!
My problem was going to be how I was going to explain it!!!! Even though it's fairly straight forward manual step and repeat.
Here they are stacked, trimmed and ready for a pattern preset!


- Messages
- 23,906
- Likes
- 13,636
I was decreasing the Brush size by increments of 3 until I got closer to the top, then I was only going down by 1.................it was totally a guess and I can see where I might make changes if I tried this pattern again. There are actually 17 stacked polygons.Did you stroke them 12, 11, 10, ... 1 in equal steps?
- Messages
- 23,906
- Likes
- 13,636
I was going back to the Brush Tool after each stacked layer and decreasing the brush size.My one question is: when you gradually decrease the stroke, exactly how are you doing that?
I'm not great at all the settings in the brush panel, such as shape dynamics. Just thinking out loud, but I wonder if it's possible to create one path of all 17 of your stacked polygons, and then somehow stroke them with a tapered stroke. If that is possible, I wouldn't know how to do it.
- Messages
- 23,906
- Likes
- 13,636
Interesting idea..............I will have to look into that!I'm not great at all the settings in the brush panel, such as shape dynamics. Just thinking out loud, but I wonder if it's possible to create one path of all 17 of your stacked polygons, and then somehow stroke them with a tapered stroke. If that is possible, I wouldn't know how to do it.
The actual hardest part was creating the base path of the polygon that I used for the stroking process.
I used guides and the Pen Tool to create all the paths needed for the final path.
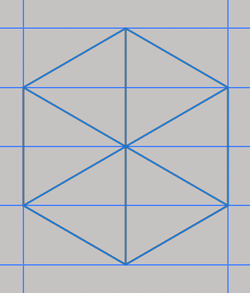

In the Paths Panel, I copied and pasted each path into one (one at a time). I could not find an easier way.............I thought you could merge them, but I couldn't find a way......not that there isn't a better way!!
This was my base for all the stroked layers.
