What's new
Photoshop Gurus Forum

Welcome to Photoshop Gurus forum. Register a free account today to become a member! It's completely free. Once signed in, you'll enjoy an ad-free experience and be able to participate on this site by adding your own topics and posts, as well as connect with other members through your own private inbox!

How can I reveal almost invisible pixels?


TheDutch

Member
Messages
12
Likes
2
Well, don't know if my topic-title is that good, but what I'm looking for is this:

I have a photo of a product and I want to remove the background so that, as a final result, I only have the product and everything else is transparant.

No problem with doing that.

But sometimes when brushing away the background some pixels seem to have been removed but they are not 100% gone, but only 99%. So they are 99% transparant. As I can't see them due this, I think they are gone but they still are in the image. So when I try to center the image this isn't done properly because there's 1 pixel somewhere which is calculated as well when trying to center the item.

So due to the fact of 1 pixel I get this result (left image) whilst it should have looked like the right image.

Is there a way to show ALL pixels which are not 100% gone?

heineken.jpg
 
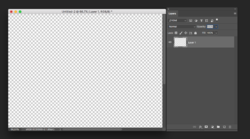
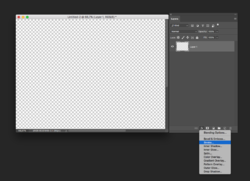
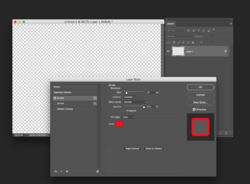
try adding Outside-Stroke in layers blending options it should make it :)

EDIT: added images

Zrzut ekranu 2019-10-11 o 11.36.47.png
add stroke in blending options:
Zrzut ekranu 2019-10-11 o 11.37.00.pngZrzut ekranu 2019-10-11 o 11.37.17.png
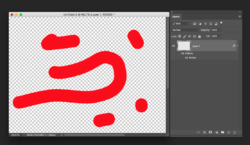
result:
Zrzut ekranu 2019-10-11 o 11.37.32.png
 
Last edited:
Correct me if I'm wrong but I assume you used a layer mask and manually removed the background with a brush?
To check what is left of the background press ctrl+thumbnail to reveal the selection. You'll see the 'marching ants' around the selection, even for one pixel.

But this is not the right way to make a selection.
In this case the pen tool is the best way to select the bottle and only the bottle. That way there will be no remnant stray pixels of the background.
Have a look here: https://www.youtube.com/results?search_query=photoshop+pen+tool+tutorial
 
Thanks for your quick replys.

@revnart , thanks for this solution.

@Eggy, yes, there has been used a layer mask (don't know if a brush has been used as I didn't do the masking myself). But if I CTRL-click on the thumbnail I see the marching ants, but not around ALL the pixels.
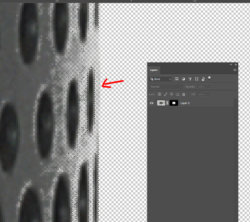
I have made a screenshot where you can see the marching ants, but you can see as well that not all pixels have been selected (see red arrow where pixels are visible but not selected).

clipping2.jpg
 
Beside the fact that in this case the pen tool should have been used and if the original background was dark you could add a white background beneath the masked layer to reveal remnants of the original background or, as @revnart said, use the alt + thumbnail click on the layer mask the reveal the mask in black and white. But that layer mask in the panel is small and it would be difficult to see the remnants.
 
@Eggy, I know it would be better to use the pen tool, but as I mentioned, I did not do this, someone did this for me.

About the white background, I don't think this will work at the moment the pixels are about 5% coloured. Even with a white background it's impossible to see 1 pixel with 5% black. So this is not an option.


About the CTRL (you mention ALT?) click option from @revnart, I tried to show in the post above with the image, that this doesn't work as not all the pixels are selected.
 
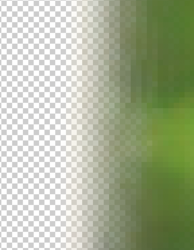
This problem is a result of a poor/lazy selection and the use of "select and mask".

Poor
Screen Shot 2019-10-11 at 8.21.39 AM.png

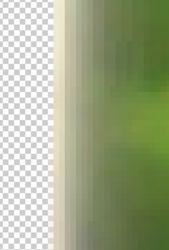
Proper
Screen Shot 2019-10-11 at 8.24.27 AM.png


You will have to restore the "transparent" pixels. You can't make a selection of something that isn't there or that is too transparent to be included in the selection.

Based on the sample image you show in post #5, you will have to make corrections to the existing mask or delete it altogether and create a new mask with the proper tool. If you don't have a layer mask to repair....................then it's back to the ole starting point!
 
@IamSam, it's clear to me that the way the item is ' masked' isn't the right way.

But that wasn't my question.

I was looking for a way to show ALL the pixels that are in an image. Not only the ones that have 100% coverage, but also the pixels that have a few % coverage.

I thought there was an option in Photoshop that automaticly shows all pixels by putting marching ants around them. Even if it was just 1 pixel.
 
@IamSam, it's clear to me that the way the item is ' masked' isn't the right way.

But that wasn't my question.

I was looking for a way to show ALL the pixels that are in an image. Not only the ones that have 100% coverage, but also the pixels that have a few % coverage.
Try using Magic Wand Tool with the tolerance set way down.
 
Based on the sample image you show in post #5, you will have to make corrections to the existing mask or delete it altogether and create a new mask with the proper tool. If you don't have a layer mask to repair....................then it's back to the ole starting point!
This was based on the idea that you wanted to correct the problem and not just skirt around it. Sorry.
 
I was looking for a way to show ALL the pixels that are in an image. Not only the ones that have 100% coverage, but also the pixels that have a few % coverage.
Try this:
1) Alt-click the layer mask thumbnail to show black and white layer mask.
2) With the layer mask still selected from step 1, go to 'Image -> Adjustments -> Threshold' and enter '1', click OK.

This will modify your mask to reveal all pixels at 100% opacity that were transparent in your original layer mask. It will probably reveal more of your image than you wanted and you will need to refine the mask to hide these.

I thought there was an option in Photoshop that automaticly shows all pixels by putting marching ants around them. Even if it was just 1 pixel.

Add a step to the above:

1) Select the layer that is masked and duplicate it (Layers -> Duplicate Layer).
2) On the new duplicate layer, Alt-click the layer mask thumbnail to show black and white layer mask.
3) With the layer mask still selected, go to 'Image -> Adjustments -> Threshold' and enter '1', click OK.
4) Ctrl-Click the layer mask icon to load the mask as a selection.
5) Remove or hide the duplicated layer you were just working on.

You now have the original untouched masked layer, with a selection showing all pixels that are not 100% masked.
 
Try this:

1) Select the layer that is masked and duplicate it (Layers -> Duplicate Layer).
2) On the new duplicate layer, Alt-click the layer mask thumbnail to show black and white layer mask.
3) With the layer mask still selected, go to 'Image -> Adjustments -> Threshold' and enter '1', click OK.
4) Ctrl-Click the layer mask icon to load the mask as a selection.
5) Remove or hide the duplicated layer you were just working on.

You now have the original untouched masked layer, with a selection showing all pixels that are not 100% masked.


Wow,....thank you so much. this is what I was looking for.

@revnart and @admin, thank you very very much.
 
Hi The Dutch

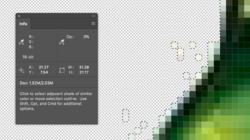
Here is yet another way to find those pixels that partially transparent and it is pretty easy.
1) Set the magic wand to zero tolerance and uncheck if it is set to contiguous and also you are doing a "point sample"
2) Hover over the transparent area of image with the info panel turned on. Make sure you display the opacity in one of the optional areas. When the info panel shows the RGB values as bland (i.e. no value) and the opacity is 0%, click the magic wand (that is an area that is fully transparent and PS recognizes that point as a lack of any pixel and fully transparent)

You now have a selection of only the fully transparent areas for the whole image

3) If you prefer to have the selection for the pixels instead of the fully transparent areas just just the keyboard shortcut Shift+CMD+I (BkSpace+CTRL+I for PCs)

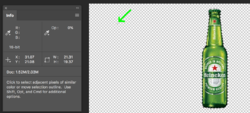
View at 100% or larger and you will be able to see the marking ants even around a single pixel winking at you. The image below shows an example show a single pixel off to the upper left that had 1% opacity and it does stand out.


Screen Shot 2019-10-12 at 9.20.25 AM.png


The second image shows it will also catch the bad selection pixels next to the bottle. so doing its job.

Screen Shot 2019-10-12 at 9.15.04 AM.png

Done
 
Last edited:

Back
Top