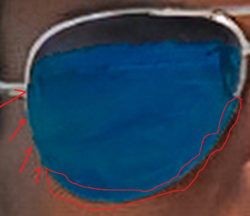
The method I used to change colour is this:
1) Make a careful selection of the glasses (preferably using Pen tool) on the inside of the metal frame. A lot depends on how careful you are with this initial selection.
2) Using Eyedropper tool set to PointSample, get a sample colour from a darker area in the ocean. Then, double click on the foreground colour and move the selecting circle downwards, darkening the selected colour. Do not move it all the way down - just move it a little downwards.
3) Make a copy of the selection made in step 1 using Ctrl+J. Fill this with the above selected foreground colour and set blending mode to hue. This will remove the skin showing int he right frame.
4) Repeat the above process, creating another copy of selection and filling with the FG colour. This time, change blending mode to Hard light. This will darken the tint.
5) Repeat the step once more and set blending mode to Overlay to increase contrast - this still shows a slight degree of eyes, adding a realistic touch. This process also retains the reflection on the glasses.
6) Adjust opacity of the three newly created layers to suit your liking.
Tip 1: Since you are using Pen tool and selecting from a dark area, it is best to add a Brightness/Contrast adjustment layer on the top and change values of the sliders so the darker areas are clearly visible. After you are done with selection, do not forget to delete this adjustment layer.
Tip 2: While you are transforming Pen tool path into selection select a feather value for smooth edges. I selected 3 in this case.
Easiest way I see is this:
1) Flatten the image from above.
2) Make a careful selection around the Left glass (preferably using Pen tool) - this time on the outside of the metal frames.
3) Do a horizontal flip, transform it into place over the right glass.
Then, you may get a better result than this one:
View attachment 86174
I would love to see you create. When you do, please post your image.


