What's new
Photoshop Gurus Forum

Welcome to Photoshop Gurus forum. Register a free account today to become a member! It's completely free. Once signed in, you'll enjoy an ad-free experience and be able to participate on this site by adding your own topics and posts, as well as connect with other members through your own private inbox!

Help to recreate this image!


Soendergaard

New Member
Messages
3
Likes
1
Hi folks,

I want to recreate what is being done in this picture with the txt "The Problematics". But i can't really figure out how to do so, especially the shadows from the upper part of "PROBLEMATICS" is tricky in my mind :)


Ratatat-X-SomeKindaWonderful-The-Problematics-e1432927351358.jpg


Hope you got some tips for a young Photoshopper :)
 
This is fairly simple.

Here's one way to do this.

First create a black BG layer.

Then on a new layer create your text.
Screen Shot 2016-12-13 at 12.13.50 PM.png

Duplicate your text layer.

Change the color of the lower layer to the color you would like to use, pink in this case.
Screen Shot 2016-12-13 at 12.14.07 PM.png

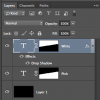
Add a layer mask to both text layers

Select/highlight the uppermost text layer.

Use the Pen Tool set to path to create the selection.
I like the Pen Tool for this process because you can adjust/move the points if needed.
Here is the path.....
Screen Shot 2016-12-13 at 12.19.00 PM.png

Here is the path made into a selection (right click and chose "make a selection").
Screen Shot 2016-12-13 at 12.19.12 PM.png

Click on the layer mask of the selected text layer (uppermost)
Fill the selection with black.
Will look like this....
Screen Shot 2016-12-13 at 12.19.32 PM.png

Repeat the process for the second (pink) text layer.
Will now look like this, but don't worry!
Screen Shot 2016-12-13 at 12.21.22 PM.png

Hit Cmd/Cntrl + D to deselect.

Then click on the the pink text layer mask and hit Cmd/Cntrl + I to invert the mask.
Should now look like this............
Screen Shot 2016-12-13 at 12.21.51 PM.png
Screen Shot 2016-12-13 at 12.45.54 PM.png

Now select the top text layer.
Select your Move Tool.
Use the directional arrows to move the text 4 clicks to the left.
Move the pink layer text 4 clicks to the right.
Screen Shot 2016-12-13 at 12.22.48 PM.png

For the shadow, just add a layer style to the top (white) text layer.
Click the drop shadow and adjust to your liking.
Screen Shot 2016-12-13 at 12.23.21 PM.png

Screen Shot 2016-12-13 at 12.46.08 PM.png
 
All of the drop shadows properties are controlled by the layer style.

Screen Shot 2016-12-13 at 2.13.09 PM.png

Not sure what you mean by fade.
 
There are also other ways of adding shadowing to the effect, just depends on what you desire.

Screen Shot 2016-12-13 at 2.47.53 PM.png

In your original example, I'm not seeing any shadowing at all.

There may be a slight gradient in the original sample, but that's easy as well.
Just use the gradient overlay on the layer style on the pink text layer.
Screen Shot 2016-12-13 at 2.51.23 PM.png

Screen Shot 2016-12-13 at 2.51.38 PM.png
 
Inkz said:
This would have been so much easier to recreate in Illustrator lol
Possibly, but I don't know if the OP has Illustrator or how familiar they are with it.

I just assumed that since it was posted here in the Photoshop Newbies section, that the OP wanted to know how to do this in Photoshop.
 

Back
Top