Just place the apple logo on a layer above the picture. Transform the apple to fit inside, then add a hue/sat adjustment layer. Click the colorize checkbox and play with the sliders till the colors are what you want. Now if by Windows colors, you mean colored, not brown, then select the pieces of the apple you want to change, with the selection active, make a layer above and fill it with the color you want for that selection. And so on. That is one of several ways to do it.
You may want to go to select>refine edge and smooth the edge before you fill it. Then you can always use either a layer mask, a paintbrush, or an eraser to clean it up.
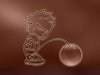
If you want to restore the gradient because the apple doesn't quite fit, then make a circle with the marquee tool or the shape tool and with the selection of the circle active, use the gradient tool. There are a number of ways to get the kind of gradient in the picture, including one gradient layer above the first with a different blending mode set, a use of inner glow, painting highlights on another layer above and so forth. You just need to play around and see what result you like.