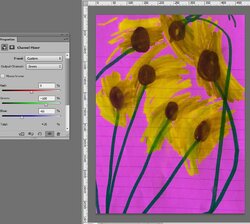
Photoshop Gurus Forum
Welcome to Photoshop Gurus forum. Register a free account today to become a member! It's completely free. Once signed in, you'll enjoy an ad-free experience and be able to participate on this site by adding your own topics and posts, as well as connect with other members through your own private inbox!
You are using an out of date browser. It may not display this or other websites correctly.
You should upgrade or use an alternative browser.
You should upgrade or use an alternative browser.
Help in removeing notebook lines
- Thread starter Maris
- Start date
[ iLLuSioN ]
Power User
- Messages
- 413
- Likes
- 419
You can use the "spot healing brush" (to get better results, you should work from color to color e.g. "white" background - then the yellow parts of the flower - then the green areas - then the brown parts...
You can also try to use "content-aware fill" by selecting the lines and then > edit > content-aware fill
In most cases you have to play with the settings
For better results you should work with the original image and not with this small version
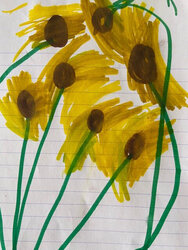
You can also try to use "content-aware fill" by selecting the lines and then > edit > content-aware fill
In most cases you have to play with the settings
For better results you should work with the original image and not with this small version

If you're willing to live with a tiny amount of image distortion, here's a quick shortcut that gets you 80% there.
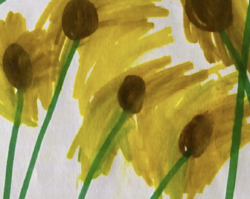
Here's what I get after doing this, at 300% magnification. You can still see the ghosts of where the lines were, but not nearly so bad as what you started with. From here, you can use the clone stamp or spot healing tool to clean up the image further.
Edit: you can now eliminate even more of the ghost lines using Surface Blur.
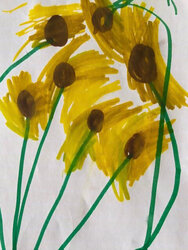
- Copy your drawing to a new layer, so that you have two identical layers.
- On the top layer, change the layer blend mode to Lighter Color.
- Now activate the Move tool and move the top layer two clicks up using the up-arrow key. (Alternatively, you can move it two clicks down—either will work and it's your choice.) The blend mode of Lighter Color compares the brightness of each layer and keeps whichever pixels are the lighter ones. In your case the lines on the paper are generally darker than what's around them, so the blend mode will replace the dark lines with the lighter colors.
Here's what I get after doing this, at 300% magnification. You can still see the ghosts of where the lines were, but not nearly so bad as what you started with. From here, you can use the clone stamp or spot healing tool to clean up the image further.
Edit: you can now eliminate even more of the ghost lines using Surface Blur.
- Copy the combined image (after following the steps above) to a new layer using Stamp Visible (Shft+Ctrl+Alt+E).
- Go to Filter>Blur>Surface Blur. You can experiment with the settings, but try using Radius=1 and Threshold=10.
- If you want, you can apply a layer mask to this blurred layer and brush it in selectively to the spots that need it most.
- See final image down below.


Last edited:
- Messages
- 23,889
- Likes
- 13,633
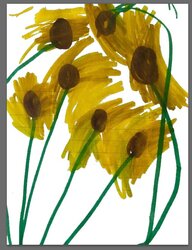
I tried a variety of quick fix's that were mostly unsuccessful due to the images small size and lack of color in the ruled lines.
I finally figured that the best approach to this particular image is to isolate/select the artwork using a layer mask and then remove the remainder of lines with the Spot Healing Brush Tool and the Brush Tool.
Original
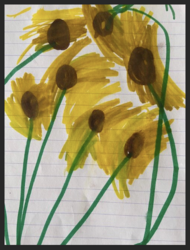
Layer masked artwork. White BG with lines still in the artwork.
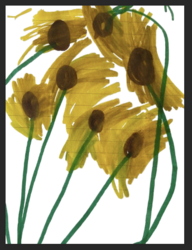
Lines removed from the artwork using the Spot Healing Brush and the Brush Tool.....as previously suggested by illusion.
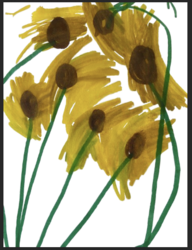
I finally figured that the best approach to this particular image is to isolate/select the artwork using a layer mask and then remove the remainder of lines with the Spot Healing Brush Tool and the Brush Tool.
Original

Layer masked artwork. White BG with lines still in the artwork.

Lines removed from the artwork using the Spot Healing Brush and the Brush Tool.....as previously suggested by illusion.

thebestcpu
Guru
- Messages
- 3,211
- Likes
- 2,960
Hi @Maris
I agree with @[ iLLuSioN ] that the a much better scanner version of the image should be used and preferable not in JPEG as that introduces artifacts along all edges that makes it harder.
I partially simulated a better image by putting the JPEG through Topaz Gigapixel at 1X and output as TIFF
Here is an approach using Content Aware Fill that I found worked pretty well with few artifacts (at least in the first three lines I tried). Here are the steps
Above the starting image add a blank Layer. On the blank Layer I used a pencil drawing over the line with about a 4 pixel width. I did this on the first three lines.
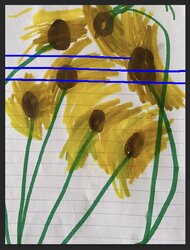
Here is the image with the blue lines drawn and the image Layer turned off
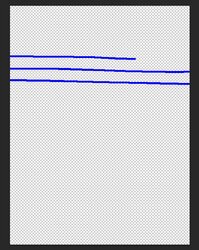
You can Cmd Click on the Layer Thumbnail of the drawn blue Line Layer to create a selection around the drawn lines. I turned off visibility of the blue line Layer and turned on (and selected) the original image Layer
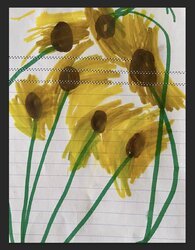
I used Edit > Content Aware Fill with the settings shown in the following image:
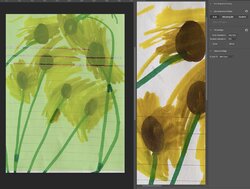
I accepted the results and below is the saved image as a high quality JPEG. By my eye there is not much retouching required.
Just one of many ways to consider for the approach.
John Wheeler

I agree with @[ iLLuSioN ] that the a much better scanner version of the image should be used and preferable not in JPEG as that introduces artifacts along all edges that makes it harder.
I partially simulated a better image by putting the JPEG through Topaz Gigapixel at 1X and output as TIFF
Here is an approach using Content Aware Fill that I found worked pretty well with few artifacts (at least in the first three lines I tried). Here are the steps
Above the starting image add a blank Layer. On the blank Layer I used a pencil drawing over the line with about a 4 pixel width. I did this on the first three lines.

Here is the image with the blue lines drawn and the image Layer turned off

You can Cmd Click on the Layer Thumbnail of the drawn blue Line Layer to create a selection around the drawn lines. I turned off visibility of the blue line Layer and turned on (and selected) the original image Layer

I used Edit > Content Aware Fill with the settings shown in the following image:

I accepted the results and below is the saved image as a high quality JPEG. By my eye there is not much retouching required.
Just one of many ways to consider for the approach.
John Wheeler

Thank you very much, I am going to give it a try, and let you know, if I come right. I do have a higher resolution Jpeg. Really appreciate your time. Marisa.Hi @Maris
I agree with @[ iLLuSioN ] that the a much better scanner version of the image should be used and preferable not in JPEG as that introduces artifacts along all edges that makes it harder.
I partially simulated a better image by putting the JPEG through Topaz Gigapixel at 1X and output as TIFF
Here is an approach using Content Aware Fill that I found worked pretty well with few artifacts (at least in the first three lines I tried). Here are the steps
Above the starting image add a blank Layer. On the blank Layer I used a pencil drawing over the line with about a 4 pixel width. I did this on the first three lines.
View attachment 131108
Here is the image with the blue lines drawn and the image Layer turned off
View attachment 131109
You can Cmd Click on the Layer Thumbnail of the drawn blue Line Layer to create a selection around the drawn lines. I turned off visibility of the blue line Layer and turned on (and selected) the original image Layer
View attachment 131110
I used Edit > Content Aware Fill with the settings shown in the following image:
View attachment 131111
I accepted the results and below is the saved image as a high quality JPEG. By my eye there is not much retouching required.
Just one of many ways to consider for the approach.
John Wheeler
View attachment 131112
thebestcpu
Guru
- Messages
- 3,211
- Likes
- 2,960
You’re welcome @Maris.Thank you very much, I am going to give it a try, and let you know, if I come right. I do have a higher resolution Jpeg. Really appreciate your time. Marisa.
min review if my instructions I caught a Mac only command and sid not provide the PC equivalent.
I.E. you Cmd click on the Layer thumbnail on a Mac and Cntl click on the Layer Thumbnail for a PC. I usually provide that detail yet missed it this time
Best of skill on your project and with one or a combination of the various techniques Forum members mentioned above I am sure you will be successful
John Wheeler


