What's new
Photoshop Gurus Forum

Welcome to Photoshop Gurus forum. Register a free account today to become a member! It's completely free. Once signed in, you'll enjoy an ad-free experience and be able to participate on this site by adding your own topics and posts, as well as connect with other members through your own private inbox!

HELP! How to remove a shadow from a photo!


polarwoc

Guru
Messages
1,585
Likes
1,431
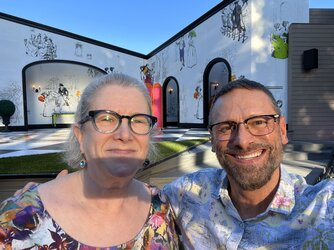
I have been attempting this, but I was not able to get satisfactory result. Anyone attempting this image could please provide a brief workflow of how they did it, that would be fantastic.

IMG_7818.jpg
 
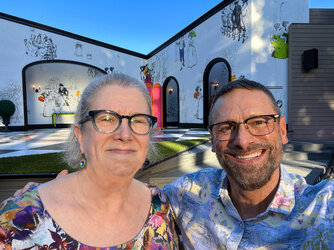
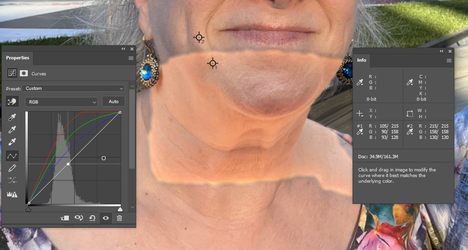
Started with a feathered selection of the shadowed area, saved the selection to an alpha channel then placed colour samplers as shown. Used curves adjustments to match the RGB values of #1 and #2. from there, I masked the curves effect to the layer below (using the original as a model..) and used the clone tool and/or healing brush to blend the separations. To get closer to the original, painted on a new layer in soft light mode to add showing and lighting.

Shadows-relief.jpg
 
Sorry, guys. I was away from my computer for a few days. As I am back, I see this new thread and a blowout.

Started with a feathered selection of the shadowed area, saved the selection to an alpha channel then placed colour samplers as shown. Used curves adjustments to match the RGB values of #1 and #2. from there, I masked the curves effect to the layer below (using the original as a model..) and used the clone tool and/or healing brush to blend the separations. To get closer to the original, painted on a new layer in soft light mode to add showing and lighting.
Thank you so much for the explanation, @Babine Much appreciated. Also, just wondering about what you referred to as #1 and #2 Colour Samplers. Was there an additional image showing reference points that was not posted or removed as a part of new thread migration?
 
sed curves adjustments to match the RGB values of #1 and #2. from there, I masked the curves effect to the layer below (using the original as a model..)
I followed your method but feel I am doing something wrong, as the RGB values of the two sampled areas match but the colours do not match - even forgetting the border areas for now. Any guesses how I can make amends please?
1.png
 
I followed your method but feel I am doing something wrong, as the RGB values of the two sampled areas match but the colours do not match - even forgetting the border areas for now. Any guesses how I can make amends please?
View attachment 138763
Your selection and adjustment has matched the colour values but, due to the luminosity variances within the targeted area, it appears as it does now. From here, apply a hide-all mask and apply the adjustment with a low opacity brush to more of a realistic appearance. Further curves adjustments will bring the contrast values more into line and I would also experiment with the curves layer by making a duplicate(s?) of it and using various blend modes, i.e. Colour, Soft Light, etc to fit. .... definitely not a 'one button' fix.
Rimerez explains much better HERE.
I hope this helps.
 

Back
Top