What's new
Photoshop Gurus Forum

Welcome to Photoshop Gurus forum. Register a free account today to become a member! It's completely free. Once signed in, you'll enjoy an ad-free experience and be able to participate on this site by adding your own topics and posts, as well as connect with other members through your own private inbox!

Grainy to solid colour


DEL 707

New Member
Messages
2
Likes
0
I've scanned a picture, I did it at 600dpi, it came out pretty o.k but there was 2 glaring flaws.

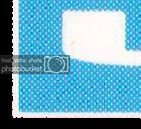
Pixel1.jpg

Pixel2.jpg

The colour is very "grainy", the 2nd picture, when placed back on the original picture is semi transparent for some reason.
I would like to turn the red and blue into a solid colour, but I'm not sure how.

I followed a guide on how to use the colour replacement tool, but it still left the picture grainy.

Are they any toold or tricks I can use to get solid colour on these images?
 
...Are they any toold or tricks I can use to get solid colour on these images?...
Sure.

TOOLS:
Paint Brush.
Pencil.
Clone Stamp.
History Brush.
Paint Bucket.
Gradient Fill.

All those will give you a 'solid' colour.

Alternately...
METHODS:
Paste. (Internally or externally from clipboard)
Vector (Via Pen Tool or Shape Tools)

Regards.
MrTom.
 
Mr.T's suggestions are right on the mark, but, to start, why don't you try this one very simple, specific method:

1. Use the "Quick Selection" tool to select the pink area. Make sure that the size of the selection circle just fits inside the pink area.

2. You should now see "marching ants" walking around the periphery of the pink area. This shows that the area has been properly selected.

select_the_grainy_area.jpg

3. Click on "average" in the Filter / Blur drop down menu.

pink_area_averaged.jpg

4. Done.

HTH,

Tom M
 

Back
Top